Getting Started in Adobe Premiere Pro
This is a quick start guide to editing in Premiere, which will cover:
- Organizational structure + file management
- Navigating Premiere Pro’s interface
- Core editing tools + techniques
- Useful hot keys to speed up workflow
- Basic color correction
- Adjusting + balancing audio levels
- Exporting across platforms
Organizational Structure + File Management
As projects grow in size + complexity, it’s best to start building professional habits early. As an industry expectation, strong file structure + organization turns editing from damage control into creative focus. Being organized from the beginning prevents missing media and broken projects. Keep in mind that Premiere doesn’t store your footage—it only references it. This means that if files are moved or renamed, links break creating a mess. A clean, consistent folder structure ensures your project opens correctly every time. You will know where assets live, projects can be transferred cleanly between editors, and no files are mistakenly overwritten or deleted. 
Navigating Premiere Pro’s Interface
First, open the Premiere Pro desktop application. From Adobe Creative Cloud (account.adobe.com)
And at the top left of the screen, select ‘New Project.’
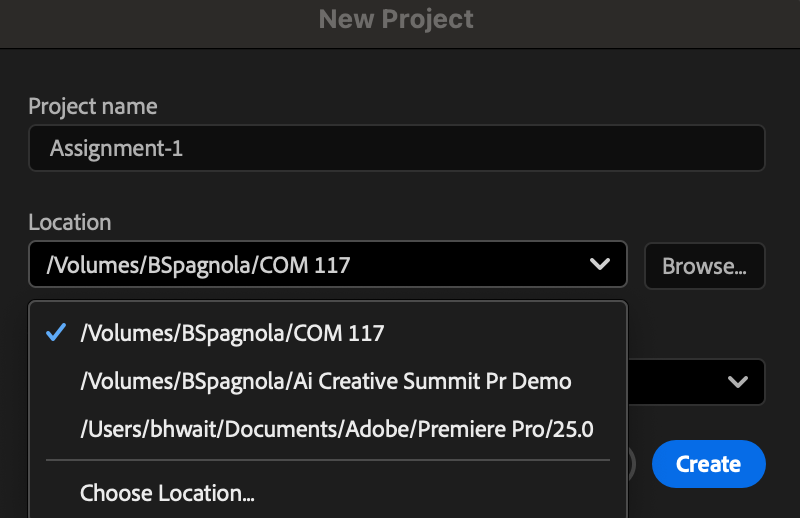
Fill in your Project Name, Location (project folder of ext. hard drive) and then hit ‘Create.’
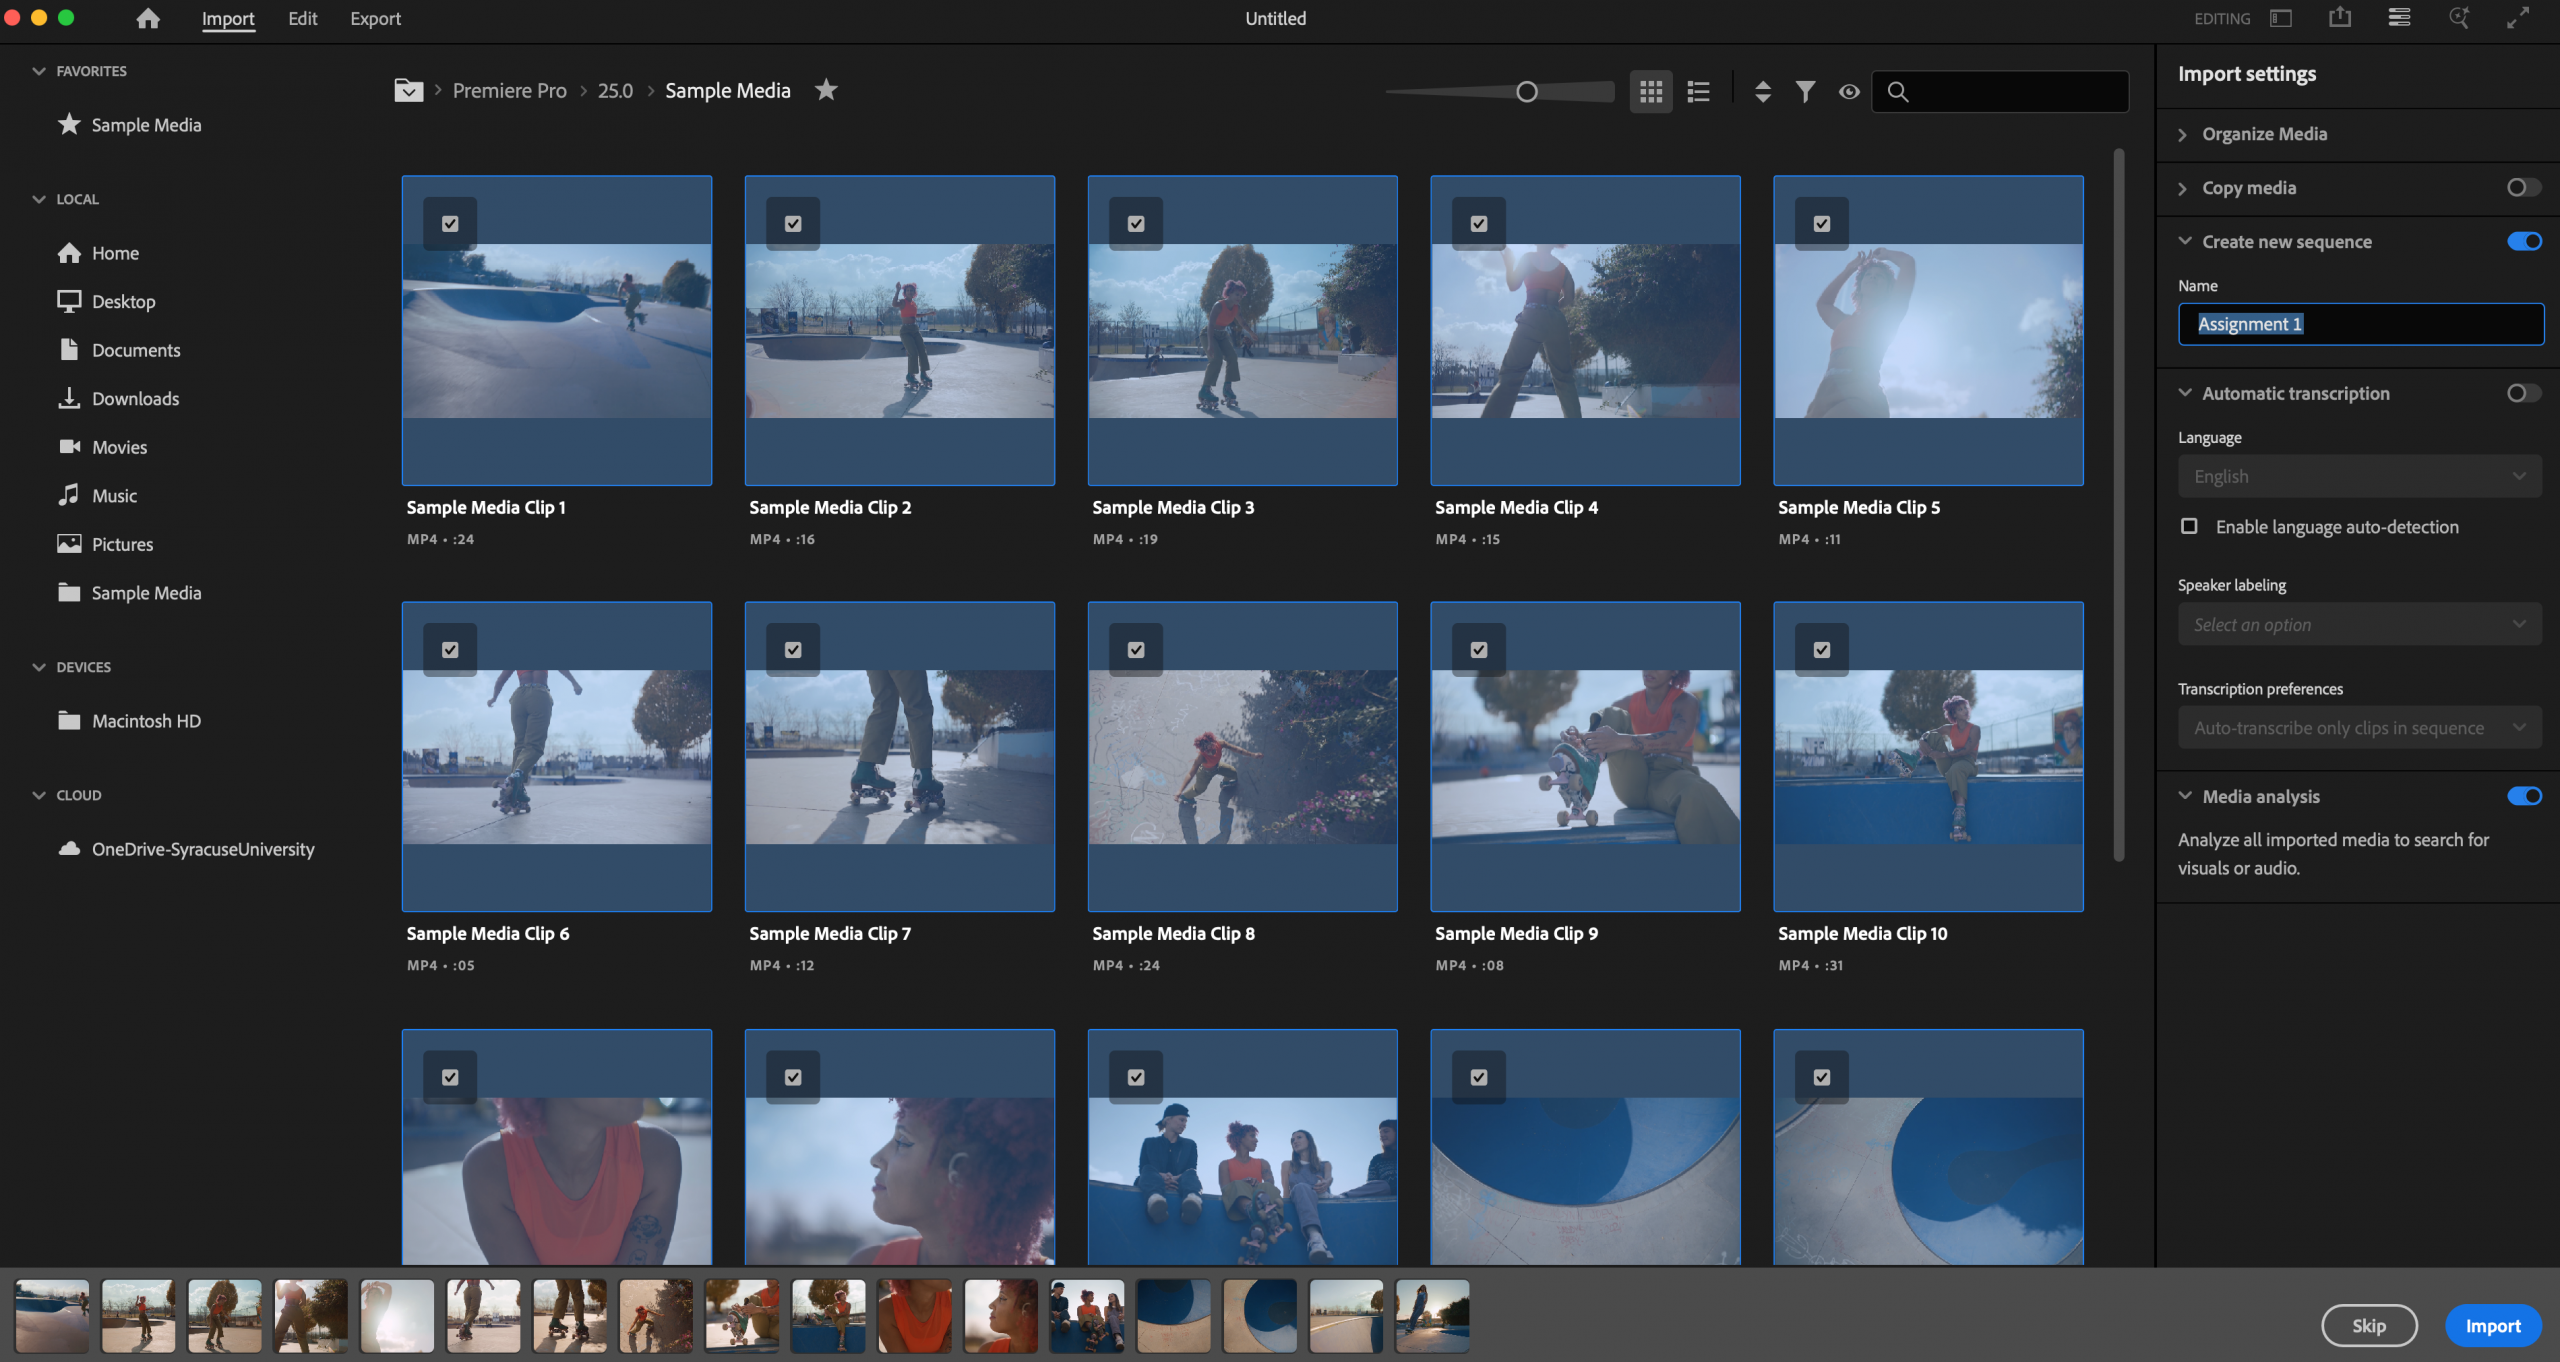
Now, in the opening Import tab, this is where you pull footage from anywhere on your laptop or external hard drive into the software, or you can import sample footage provided by Adobe by selecting one video clip and hitting the command + A key to select all the media in the sample list.
Now, to the right side of the screen, type in your project name to the sequence/timeline this footage will land on at the start of editing. You can always skip this step by hitting the ‘Skip’ button in the lower right corner and import footage later. Otherwise, hit the ‘Import’ button and the next window will take you to the Edit tab of Premiere.
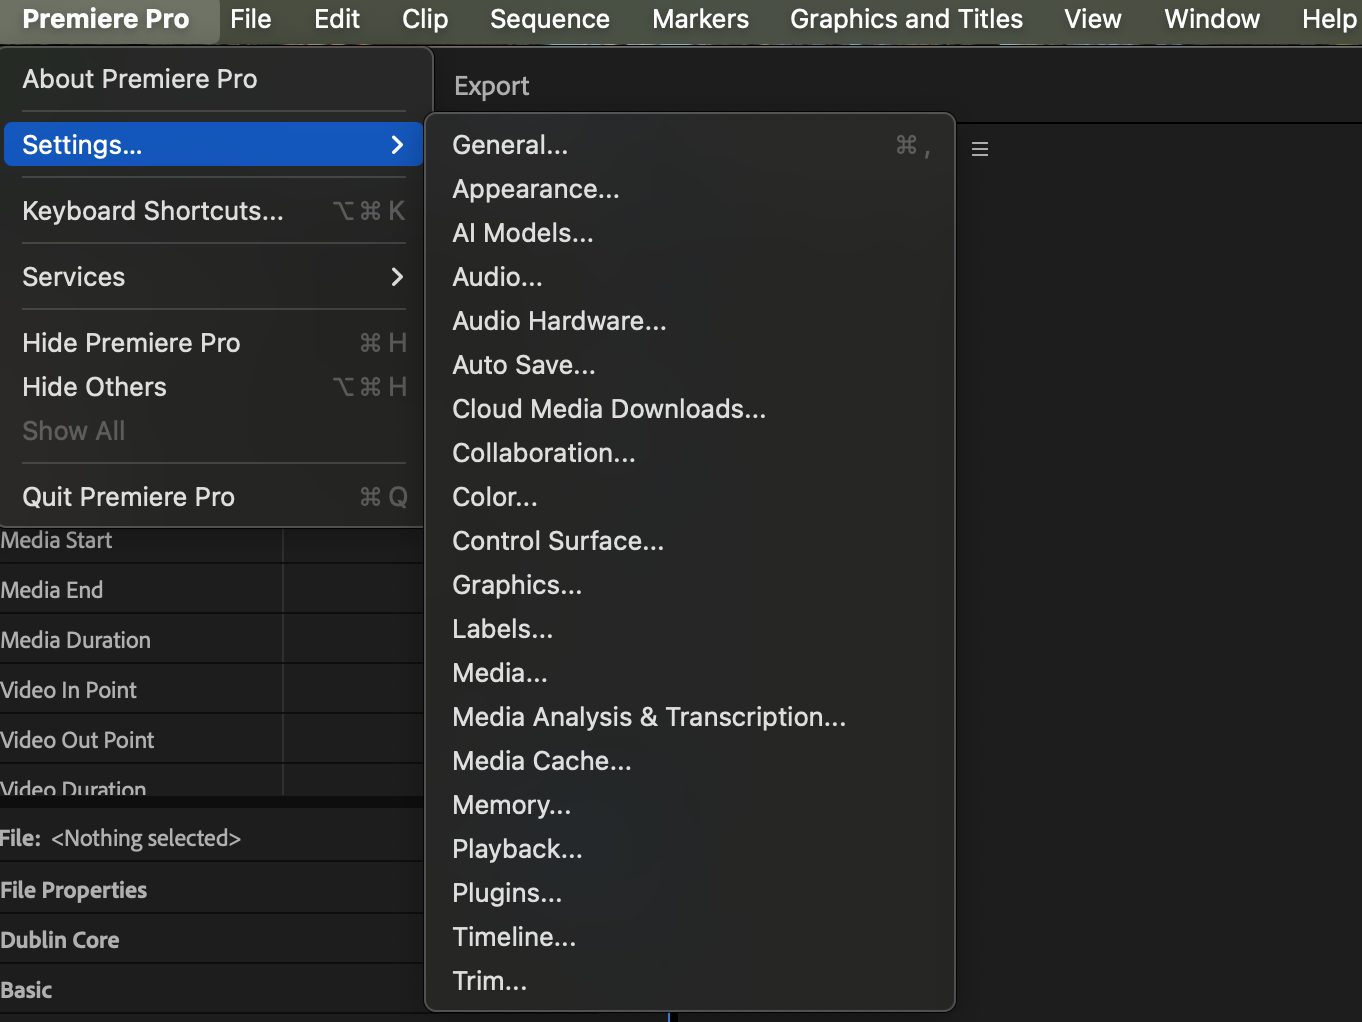
Before we look at the interface, let’s organize Cache files by going to the top menu and selecting Premiere Pro > Settings > Media Cache.
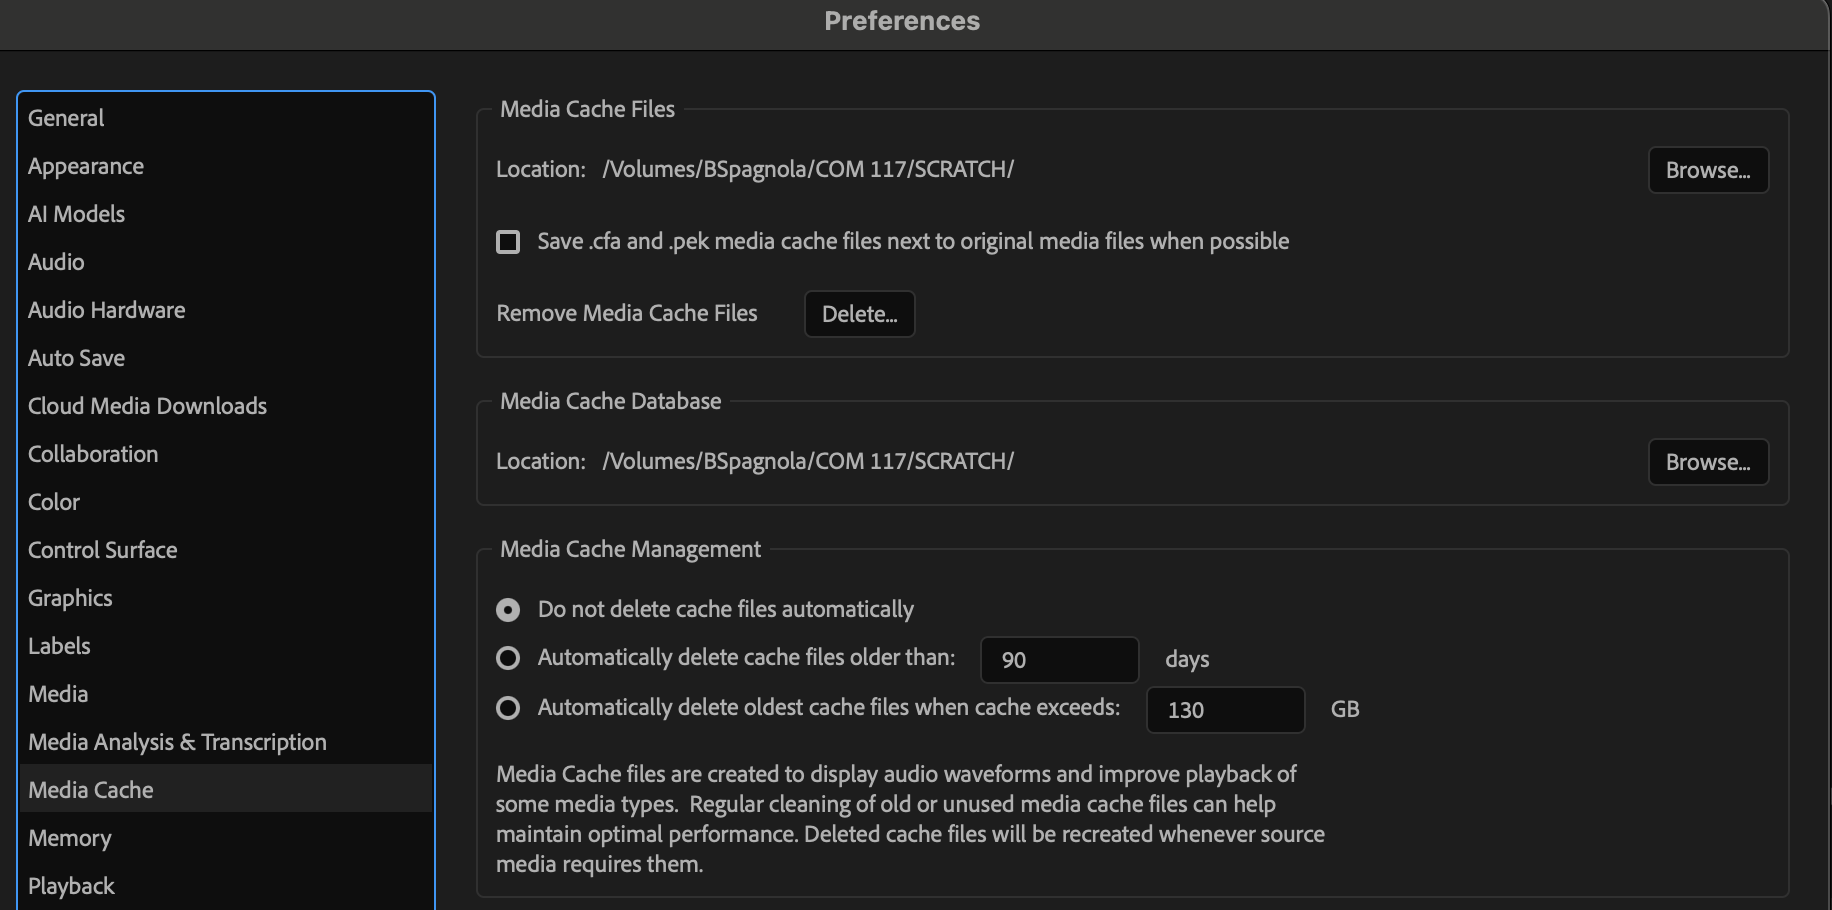
In the ‘Media Cache’ tab of the Preferences window, hit ‘Browse’ to change both Media Cache Files and Media Cache Database locations to your ‘Scratch’ folder. This will help declutter your project folder. Note: Media Cache files are created to display audio waveforms and improve media playback.
In the top left of the program, there are three sections that separate the Editing process. You can toggle back and forth between these at any time.
- IMPORT(The place to pull in footage to later edit)
- EDIT (Editing window with Project, Source, Timeline, Program panels)
- EXPORT (Here, you will export your final video)
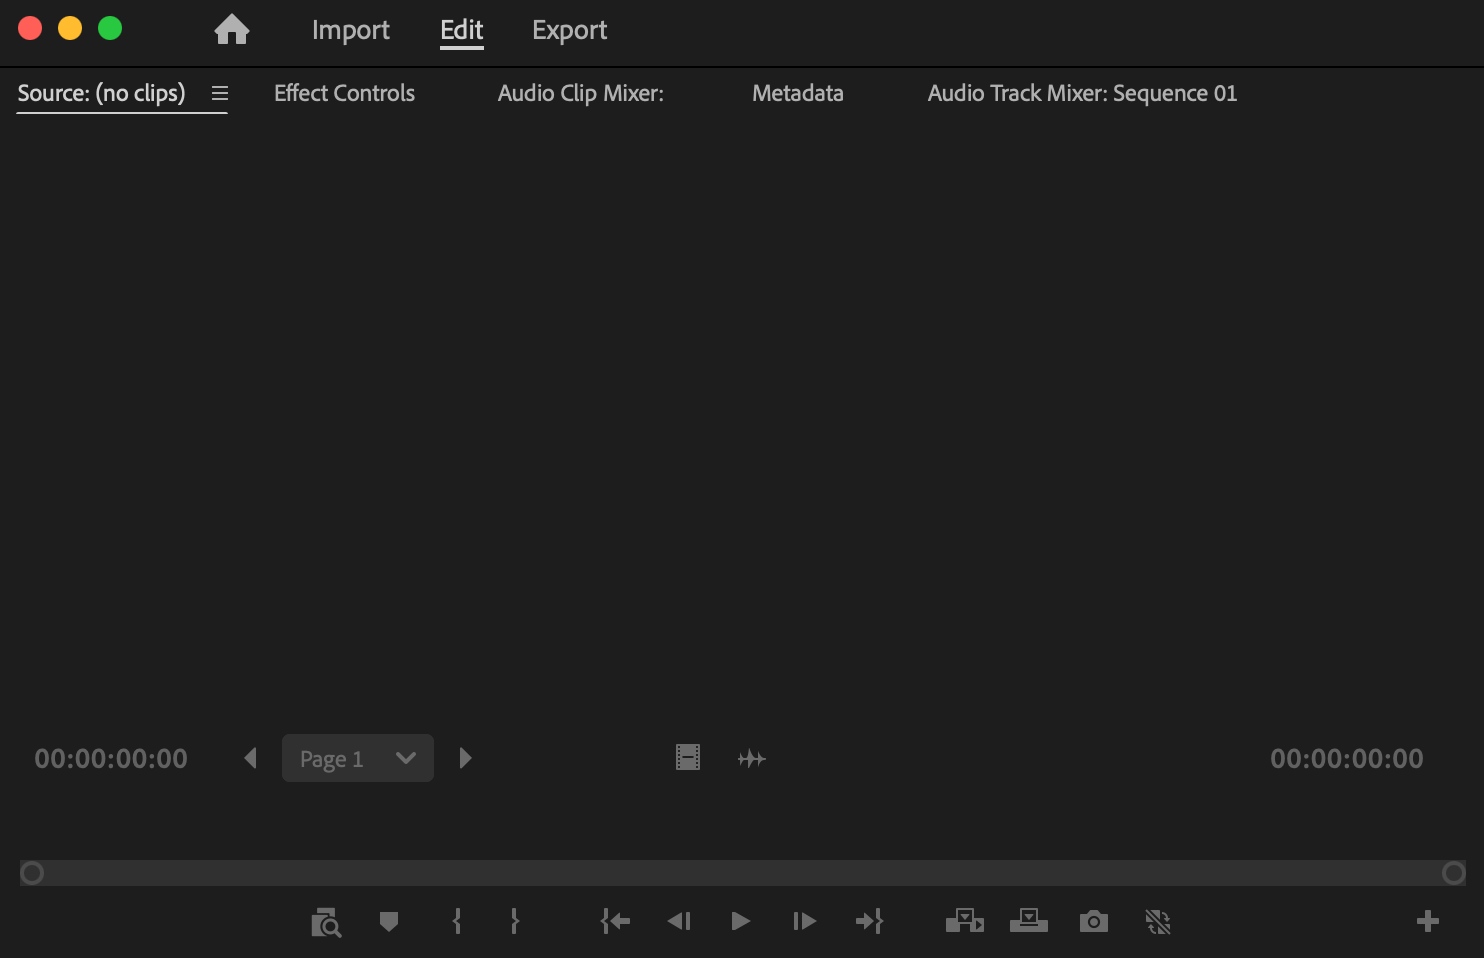
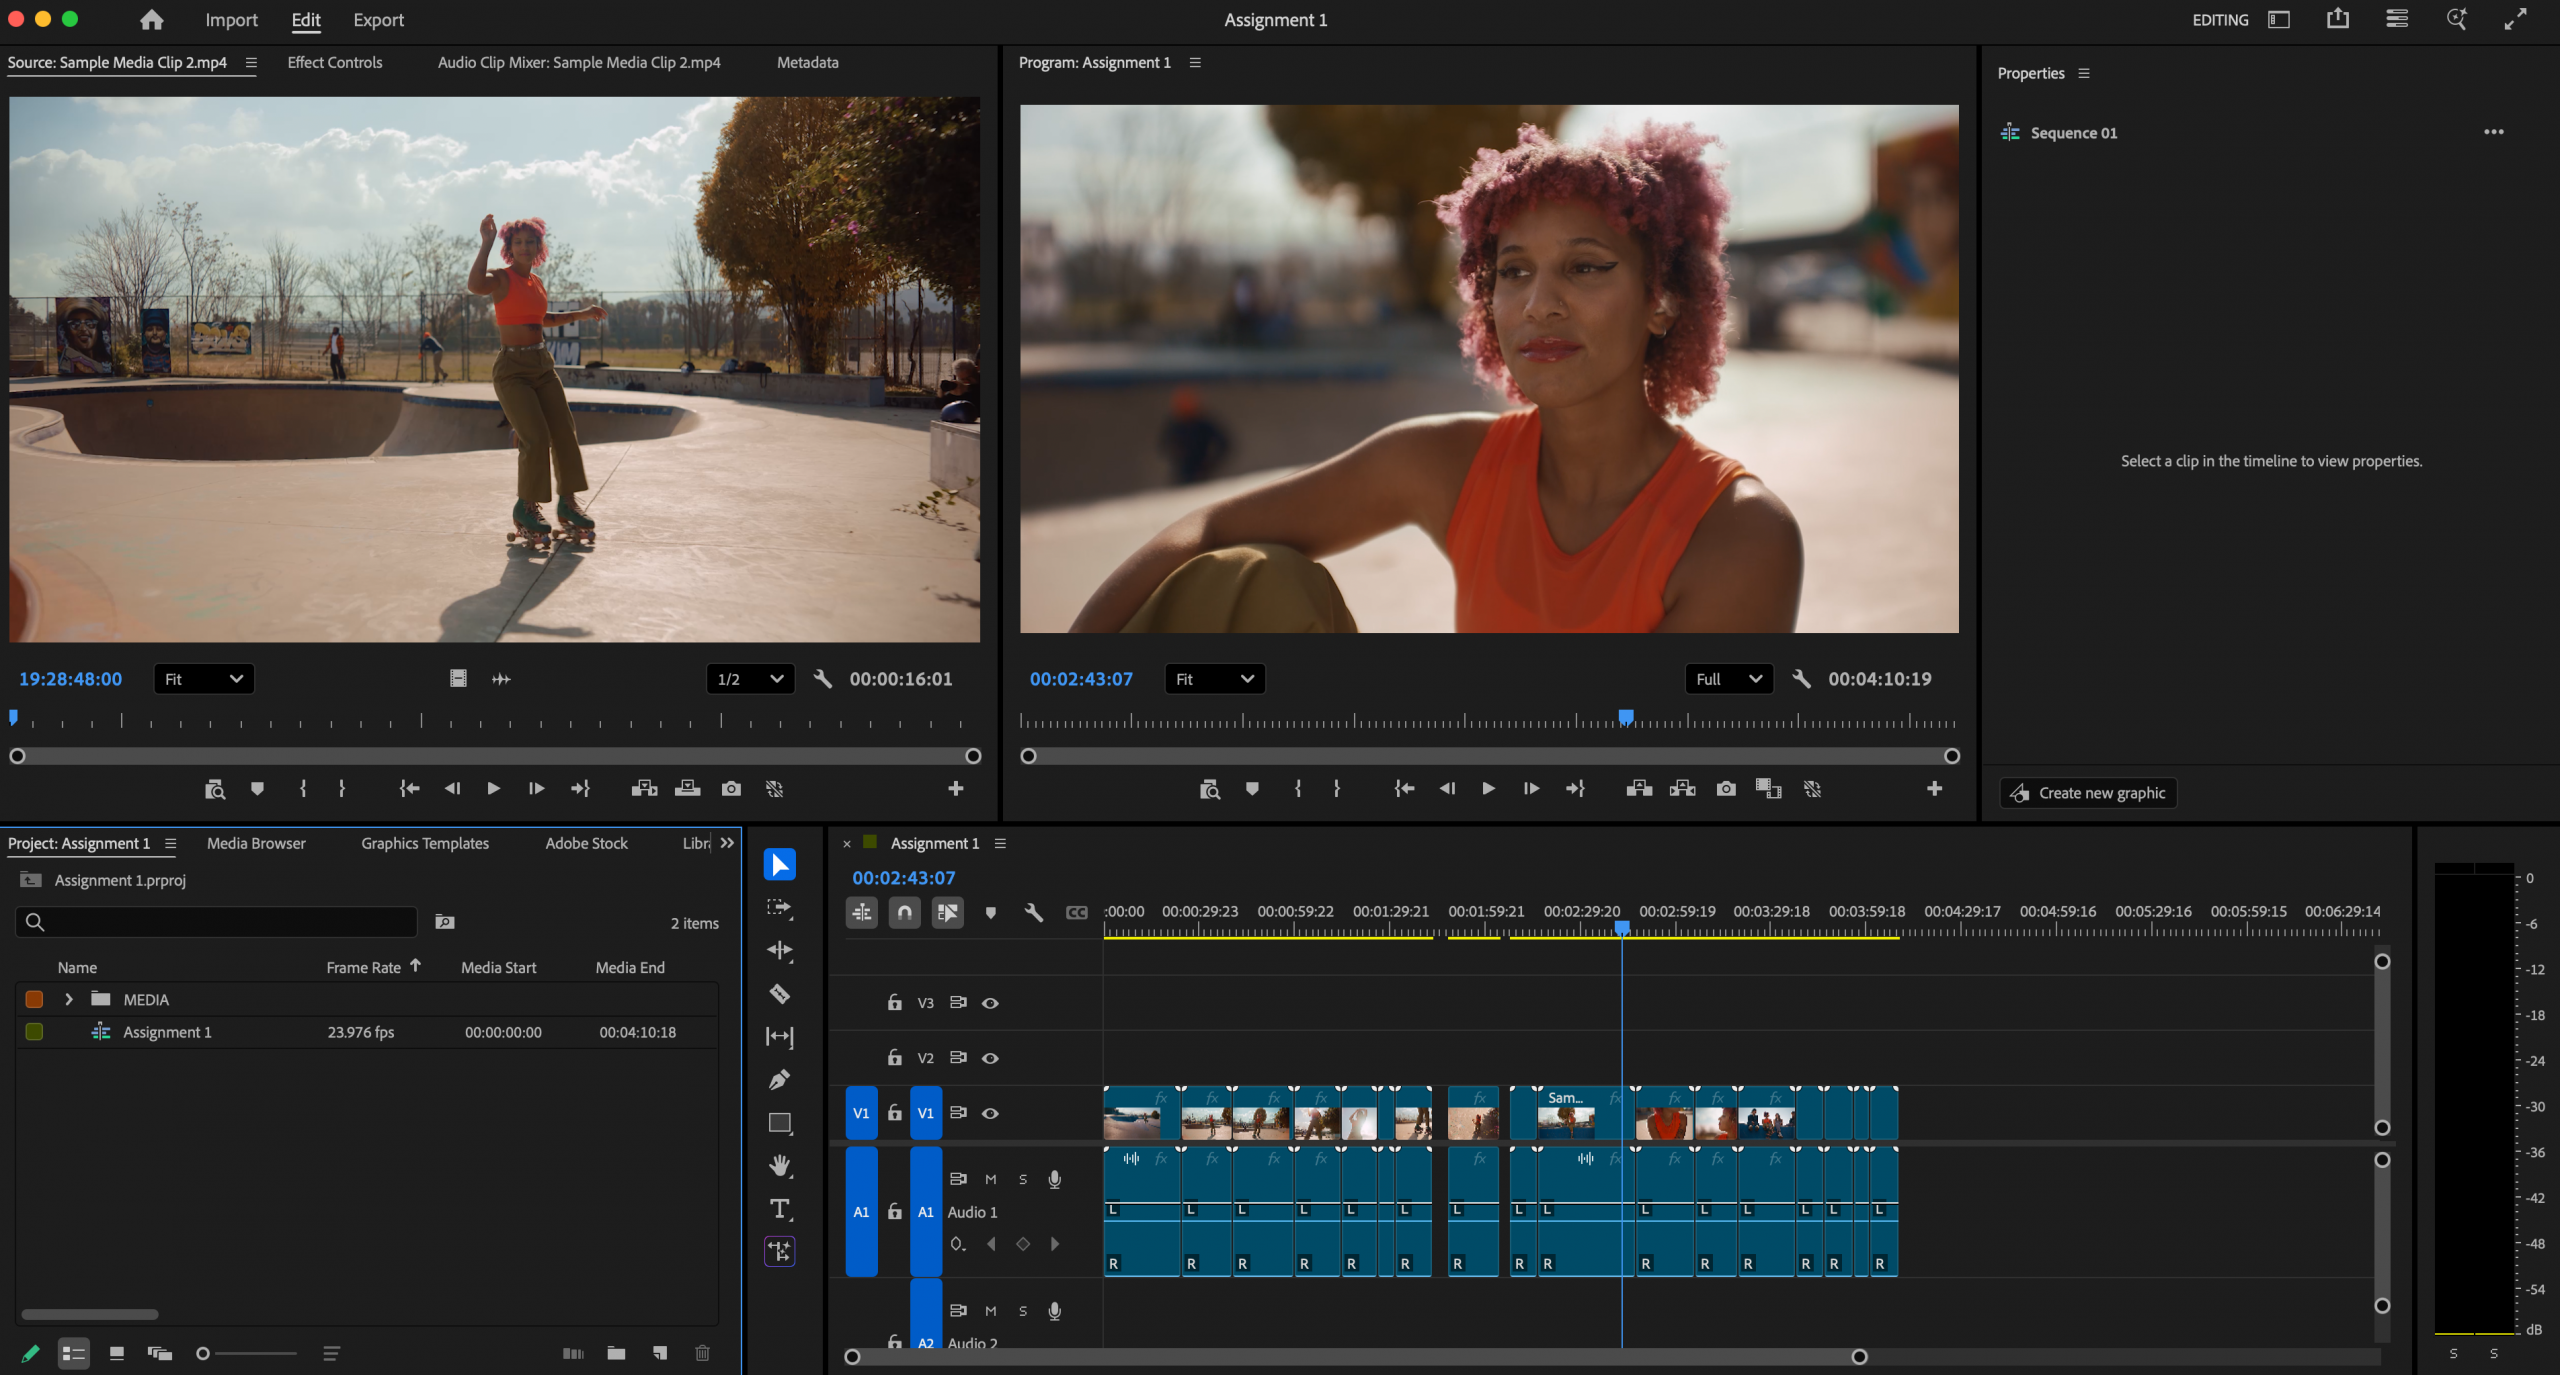
Once in the EDITING section, let’s explore Premiere’s interface and its FOUR main panels:
*If the Project panel shows you Adobe Stock right at the start, you can get out of that by selecting the Project: Assignment 1 tab to the left to see the box where all your media will live.
Project panel (lower left)– a media organizer. Footage imported with live here. Double-click on a clip in the Project panel, and it will open in Source monitor where it can be reviewed easily.
Source monitor (upper left) – Preview media clips selected from the Project panel before adding footage to the timeline.
Timeline panel (lower right) – where media clips can be arranged into the story you want to tell. You can use Hotkeys + and – to zoom in and out of the assembled video to see more detail or entirety.
Program monitor (upper right) – When media is added to the Timeline, you’ll be able to preview your assembled sequence in the Program monitor.
Also, note that the Audio Meter is located in the lower right corner of the interface next to the timeline. This is where you will check to make sure your sound levels are accurate.
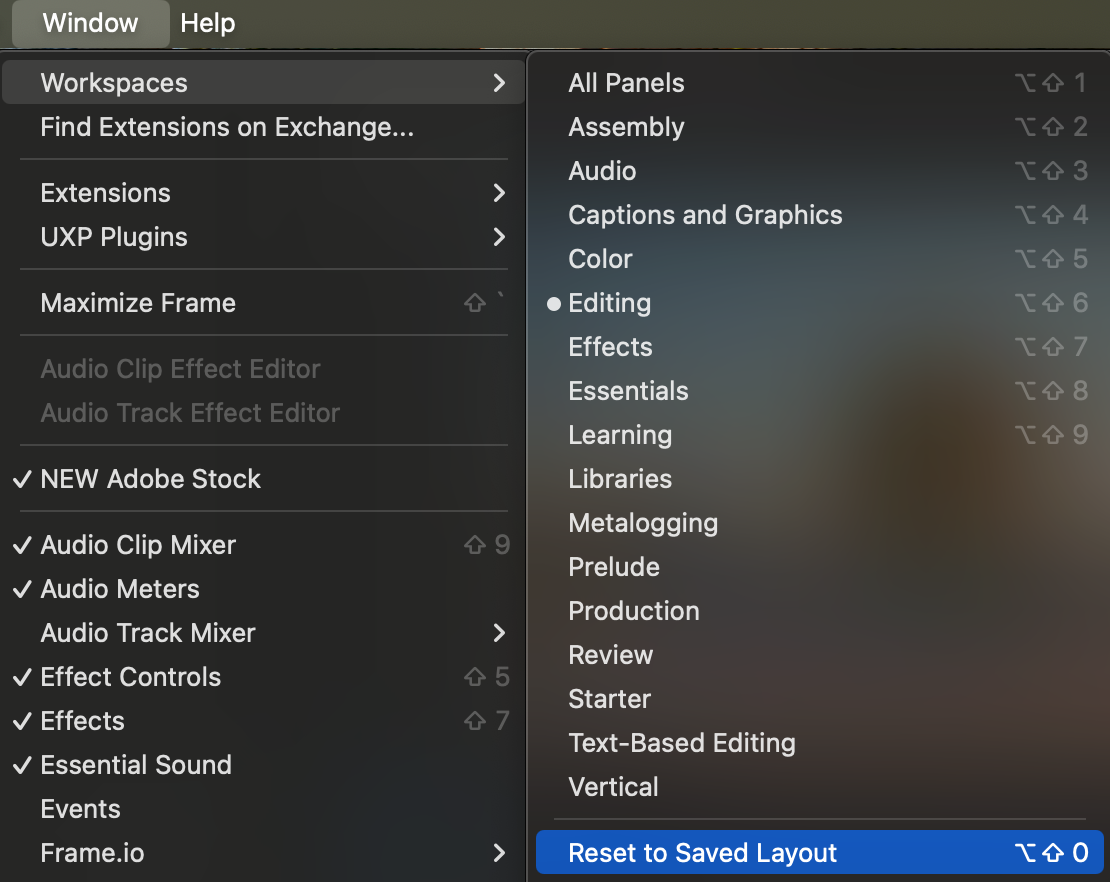
*Tip: If the layout feels cluttered, just go to Window at the top, then Workspaces and Reset to Saved Layout. The interface layout will go right back to where you started. It’s important to look through and test the various workspaces. As you work more in the software, you’ll toggle back-and-forth between different workspaces depending on what part of the editing process you’re focusing on, e.g. sound editing, creating captions, color correction or grading, etc.
Core Editing Tools and Uses
The editing tools, found in the toolbar, allow for precise video manipulation.

Selection Tool (V)
The primary tool for editing. Select, move, trim, and reposition clips directly in the timeline.
Track Select Forward / Backward (A / Shift + A)
Selects all clips on a track forward or backward from the cursor. Ideal for moving large groups of clips at once without affecting timing elsewhere.
Ripple Edit Tool (B)
Trims clips while automatically closing or creating space in the timeline, keeping everything in sync.
Razor Tool (C)
Cuts clips into separate segments at a specific point. Use for precise edits or removing unwanted sections.
Slip Tool (Y)
Moves the content of a clip forward or backward in time while keeping its position and duration fixed in the timeline.
Pen Tool (P)
Creates and adjusts keyframes for animation and control of effects such as opacity, volume, and motion.
Rectangle Tool
Creates customizable shapes (often used for lower thirds, backgrounds, or graphic overlays).
Hand Tool (H)
Navigates horizontally through the timeline quickly without changing clip positions—especially helpful in complex, multitrack edits.
Type Tool (T)
Creates and edits text directly in the Program Monitor for titles, captions, and graphics.
Generative Extend Tool
Uses AI to extend:
-
Video + audio up to 2 seconds
-
Audio-only up to 10 seconds
Useful for smoothing cuts, extending reactions, or filling small timing gaps.
Editing Techniques
To achieve seamless cuts, better pacing and polished storytelling, note some of these Premiere editing techniques: trimming, transitions, text-based editing, J-cuts/L-cuts.
Zoom in and out of your timeline to edit detail or look at entire video – Use the hot keys (+) to bring yourself closer to media clips to edit in detail. Use hotkey (-) to pull out of your timeline to look at the edit as a whole.
Video Channels and Audio Channels – Layer video, text, graphics, sound clips on your timeline. The eye will toggle off and on the visibility of the track. The lock will toggle off and on to lockdown the track so nothing can be moved or changed on that track. You can label tracks by right-clocking for example ‘Video 1′ and selecting Rename. In the same window, you can add or delete tracks (or just pull media above Video Track 3 (V3) and it will automatically create a fourth track above.
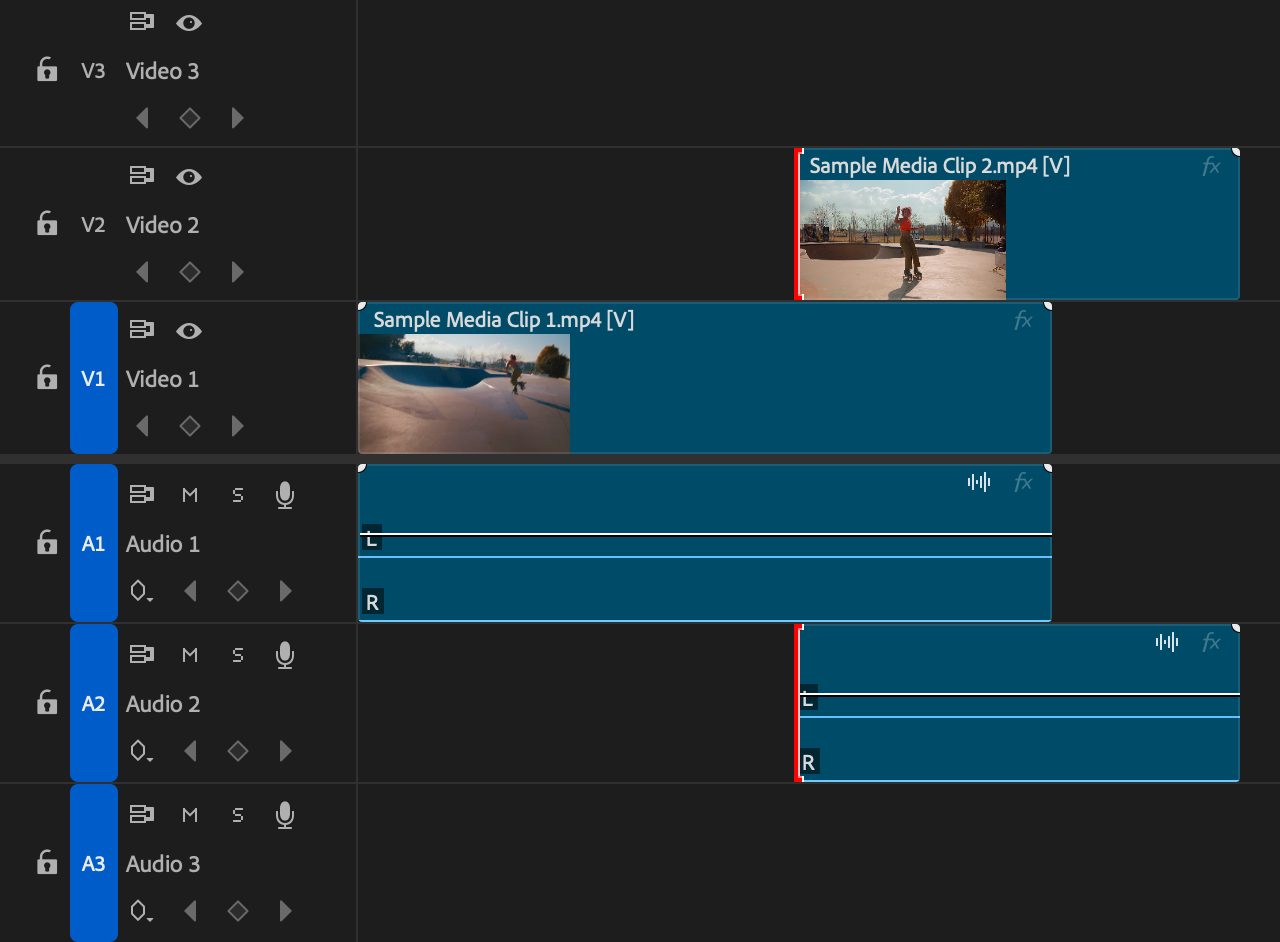
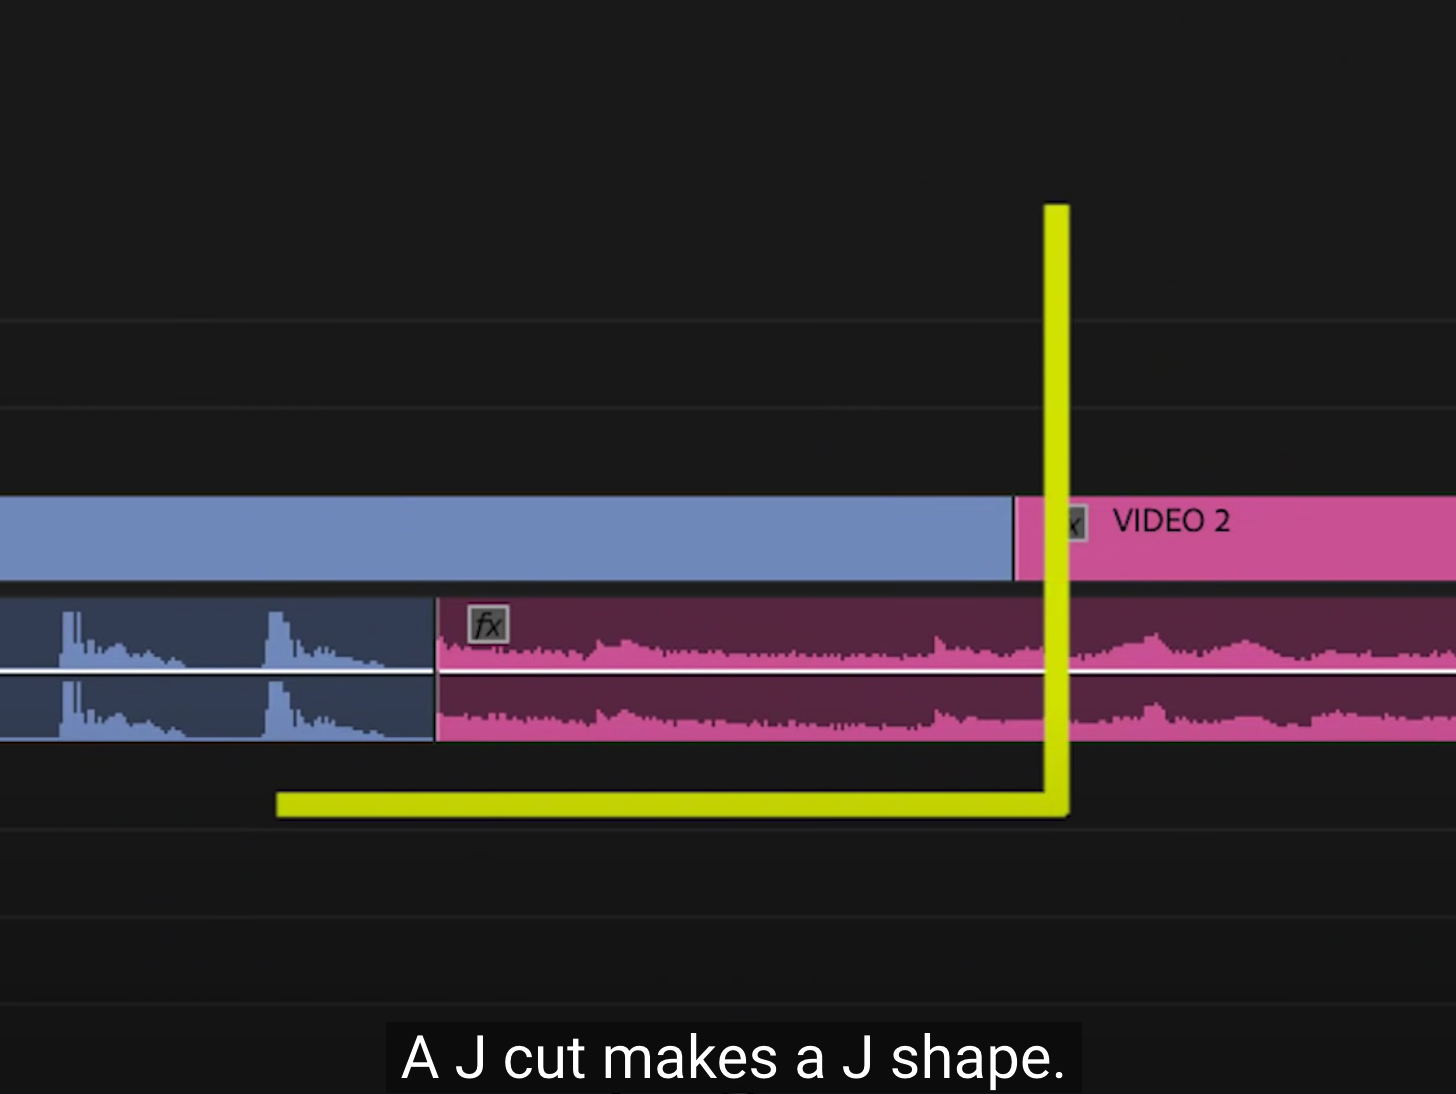
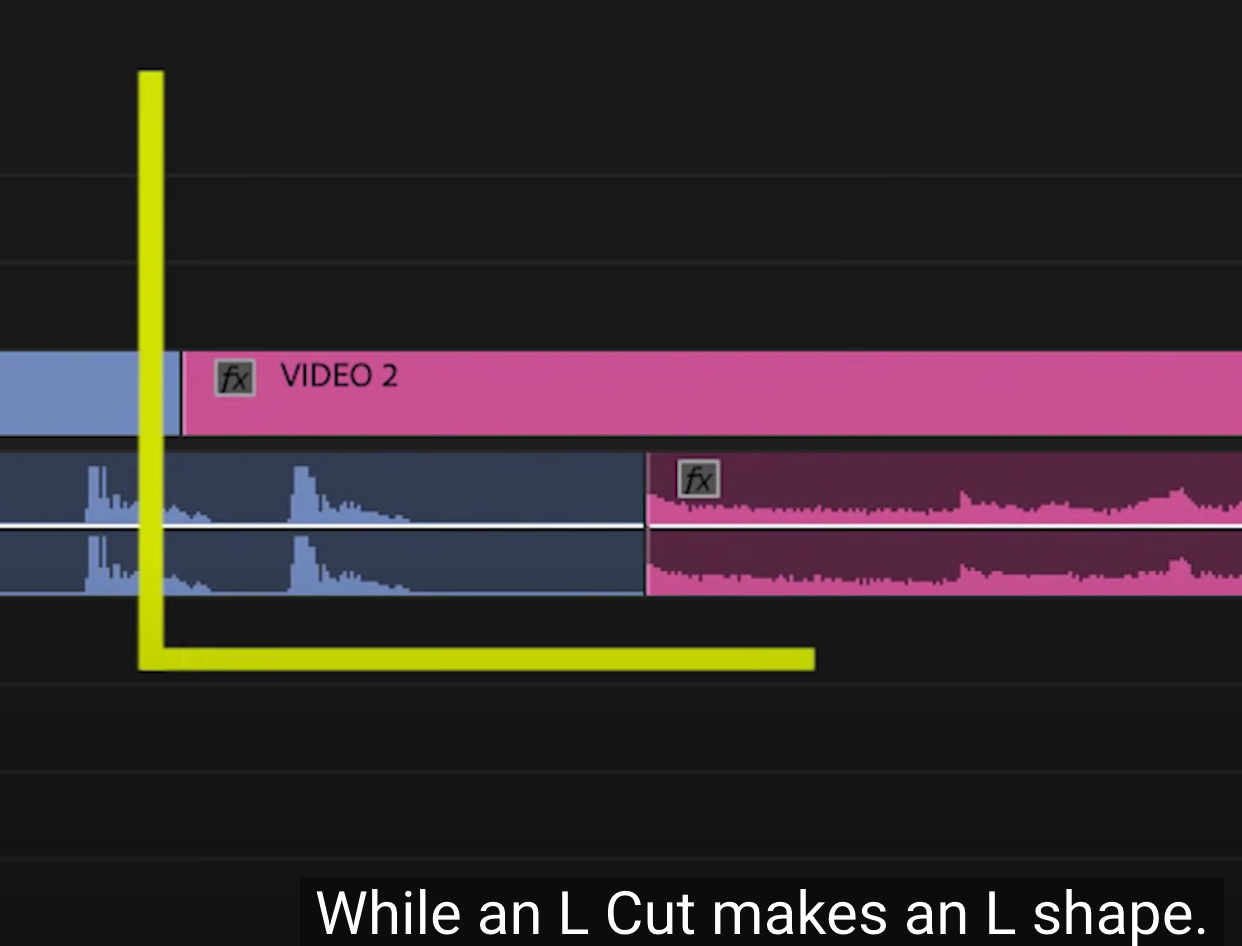
J-Cuts & L-Cuts: audio from the next clip starts before the video (J-cut), or audio from the previous clip continues over the new video (L-cut) for smooth transitions.
Transitions & Effects: Add fades, dissolves, and other effects to smooth cuts + build mood.
Title & Graphics: Create on-screen text and graphics, using templates within Premiere in the upper right corner. Or, simply create your own using the Text tool on the Program monitor.

Basic Color Correction
Using the Lumetri Color panel (Window > Lumetri Color) to fix exposure, white balance, and contrast using the Basic Correction tab, adjusting sliders for Temperature, Tint, Exposure, Contrast, Highlights, Shadows, Whites, and Blacks for a neutral, balanced look before adding creative grades. 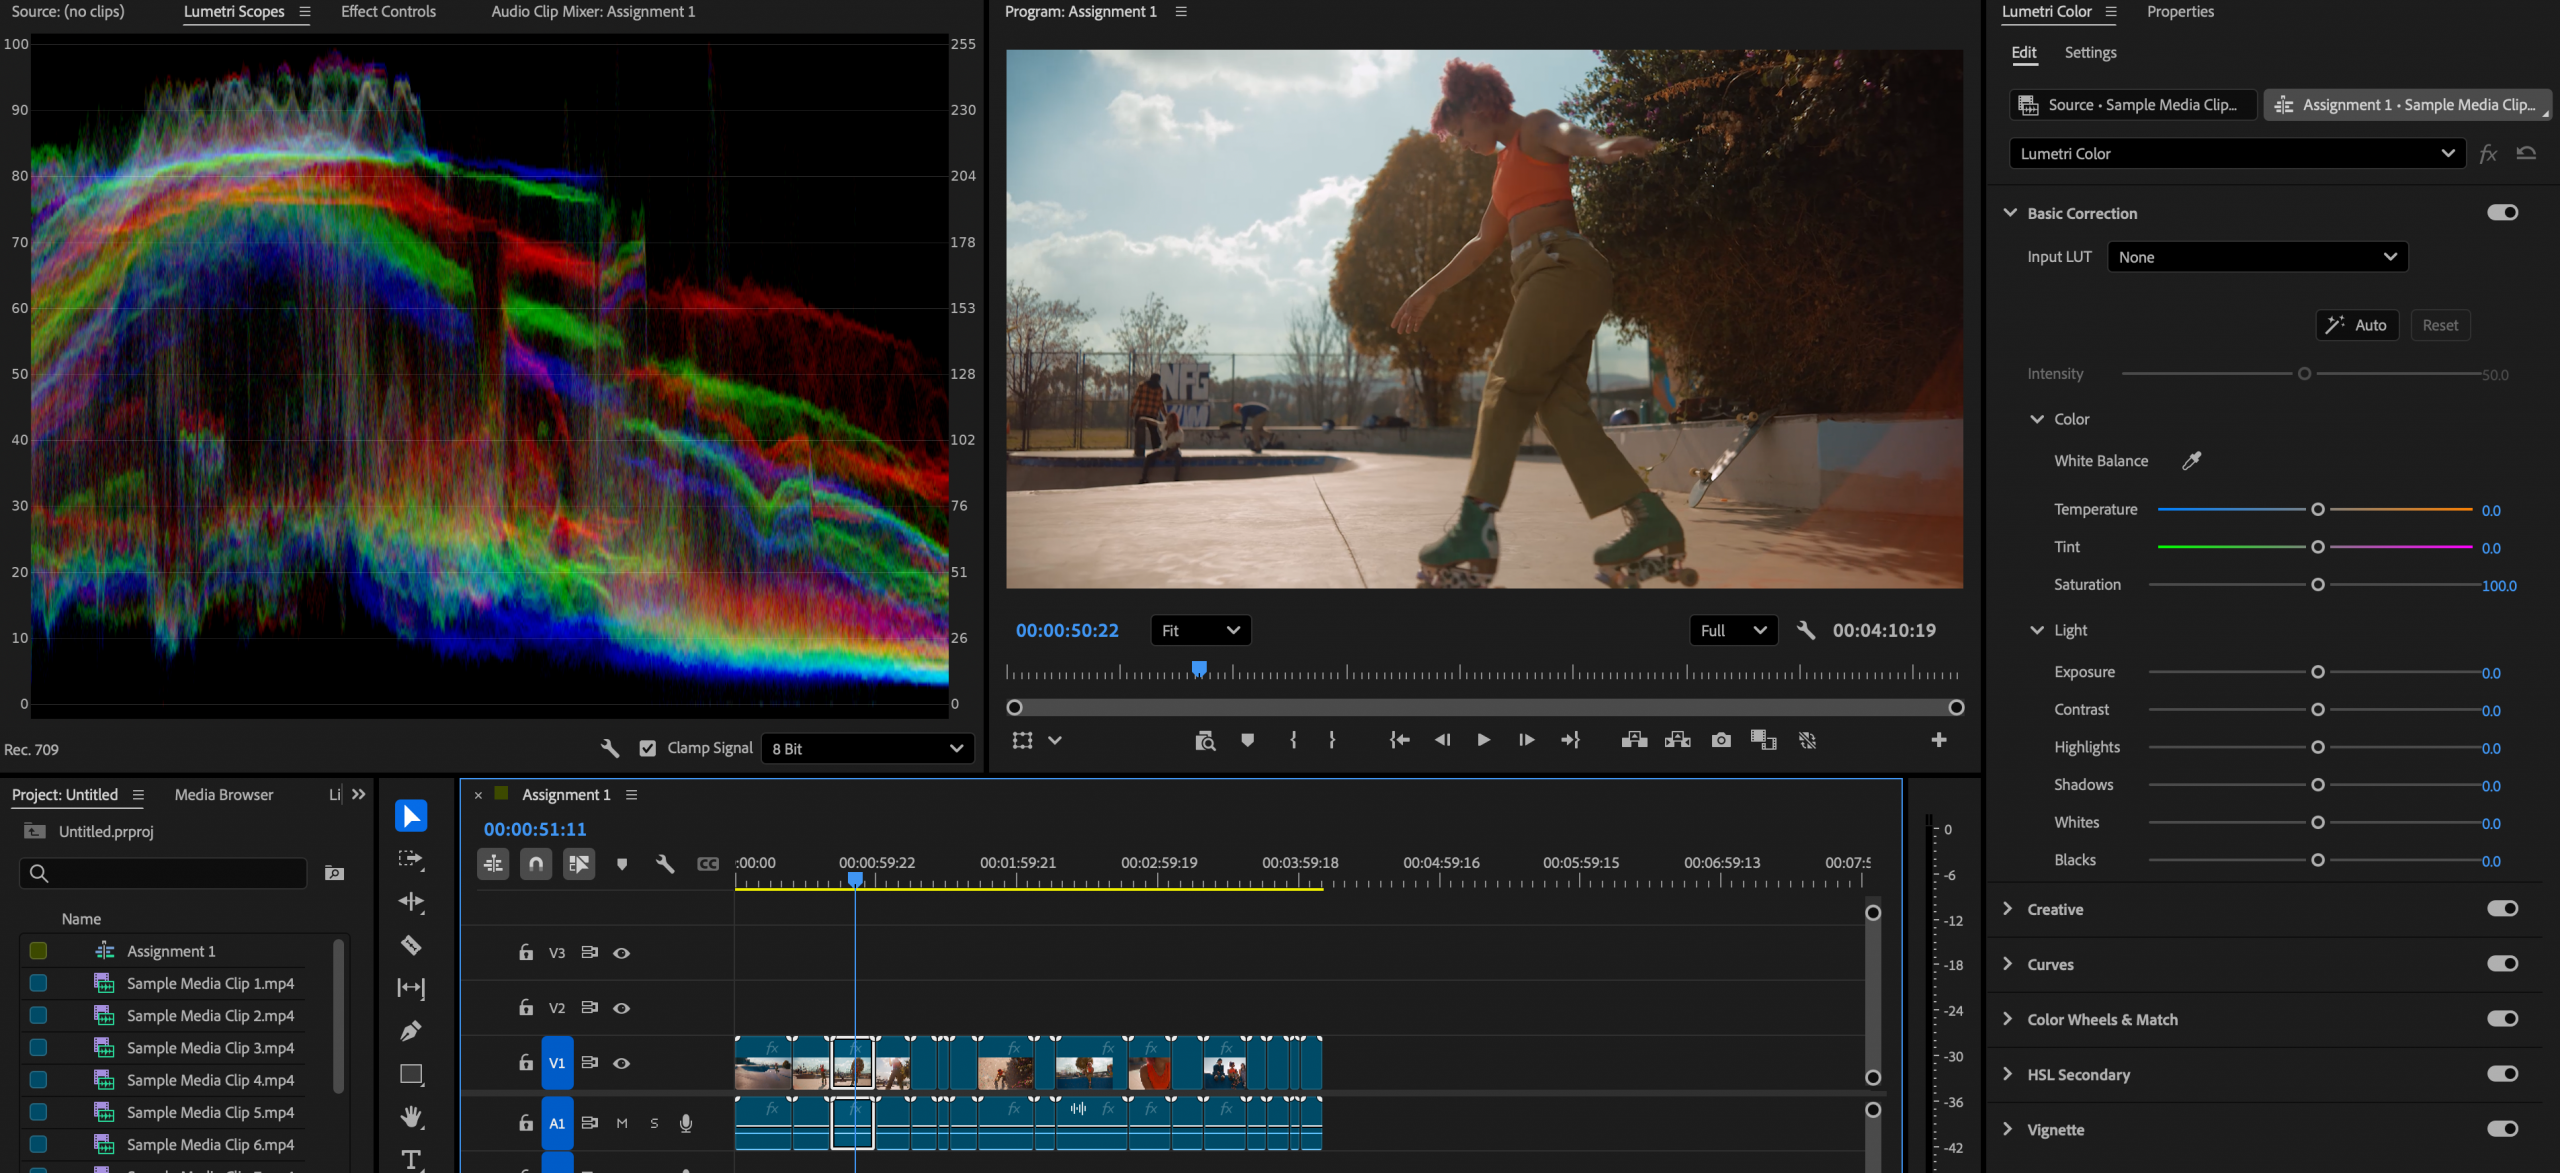
Select your clip, and on the right side of the interface under the BASIC CORRECTION section, you can create adjust the white balance of your video through the temperature (warm/orange or cool/blue) to get as close to accurate white as possible. If you want to use the eye dropper next to White Balance, select a part of your image that is white and it can help you with this. Try the Auto button above and sometimes that helps you, as well. Otherwise, adjust the temperature, tint, saturation here. And you can pull up the exposure or bring the exposure down, and adjust contrast, highlights, shadows, whites and blacks. Note: more advanced breakdown of these tools will be added in future guides. For now, stick to basic correction by making sure the white in your footage is actually white and not slightly blue, orange, too green or purple, etc.
Adjusting and Balancing Audio Levels
To adjust and balance audio, we will use the Essential Sound Panel.
Drag the white line on clips for manual gain, or right-click clips for Audio Gain normalization; for precise stereo balancing, using the panner in track options or Effects Controls to create keyframes.
Aim for audio levels between –12dB and –6dB, peaking near –3dB, using the Audio Meters as a guide to avoid clipping (0dB)
Exporting
First, ensure you’ve set in/out points (I/O Hotkeys) of desired section of the video exporting.
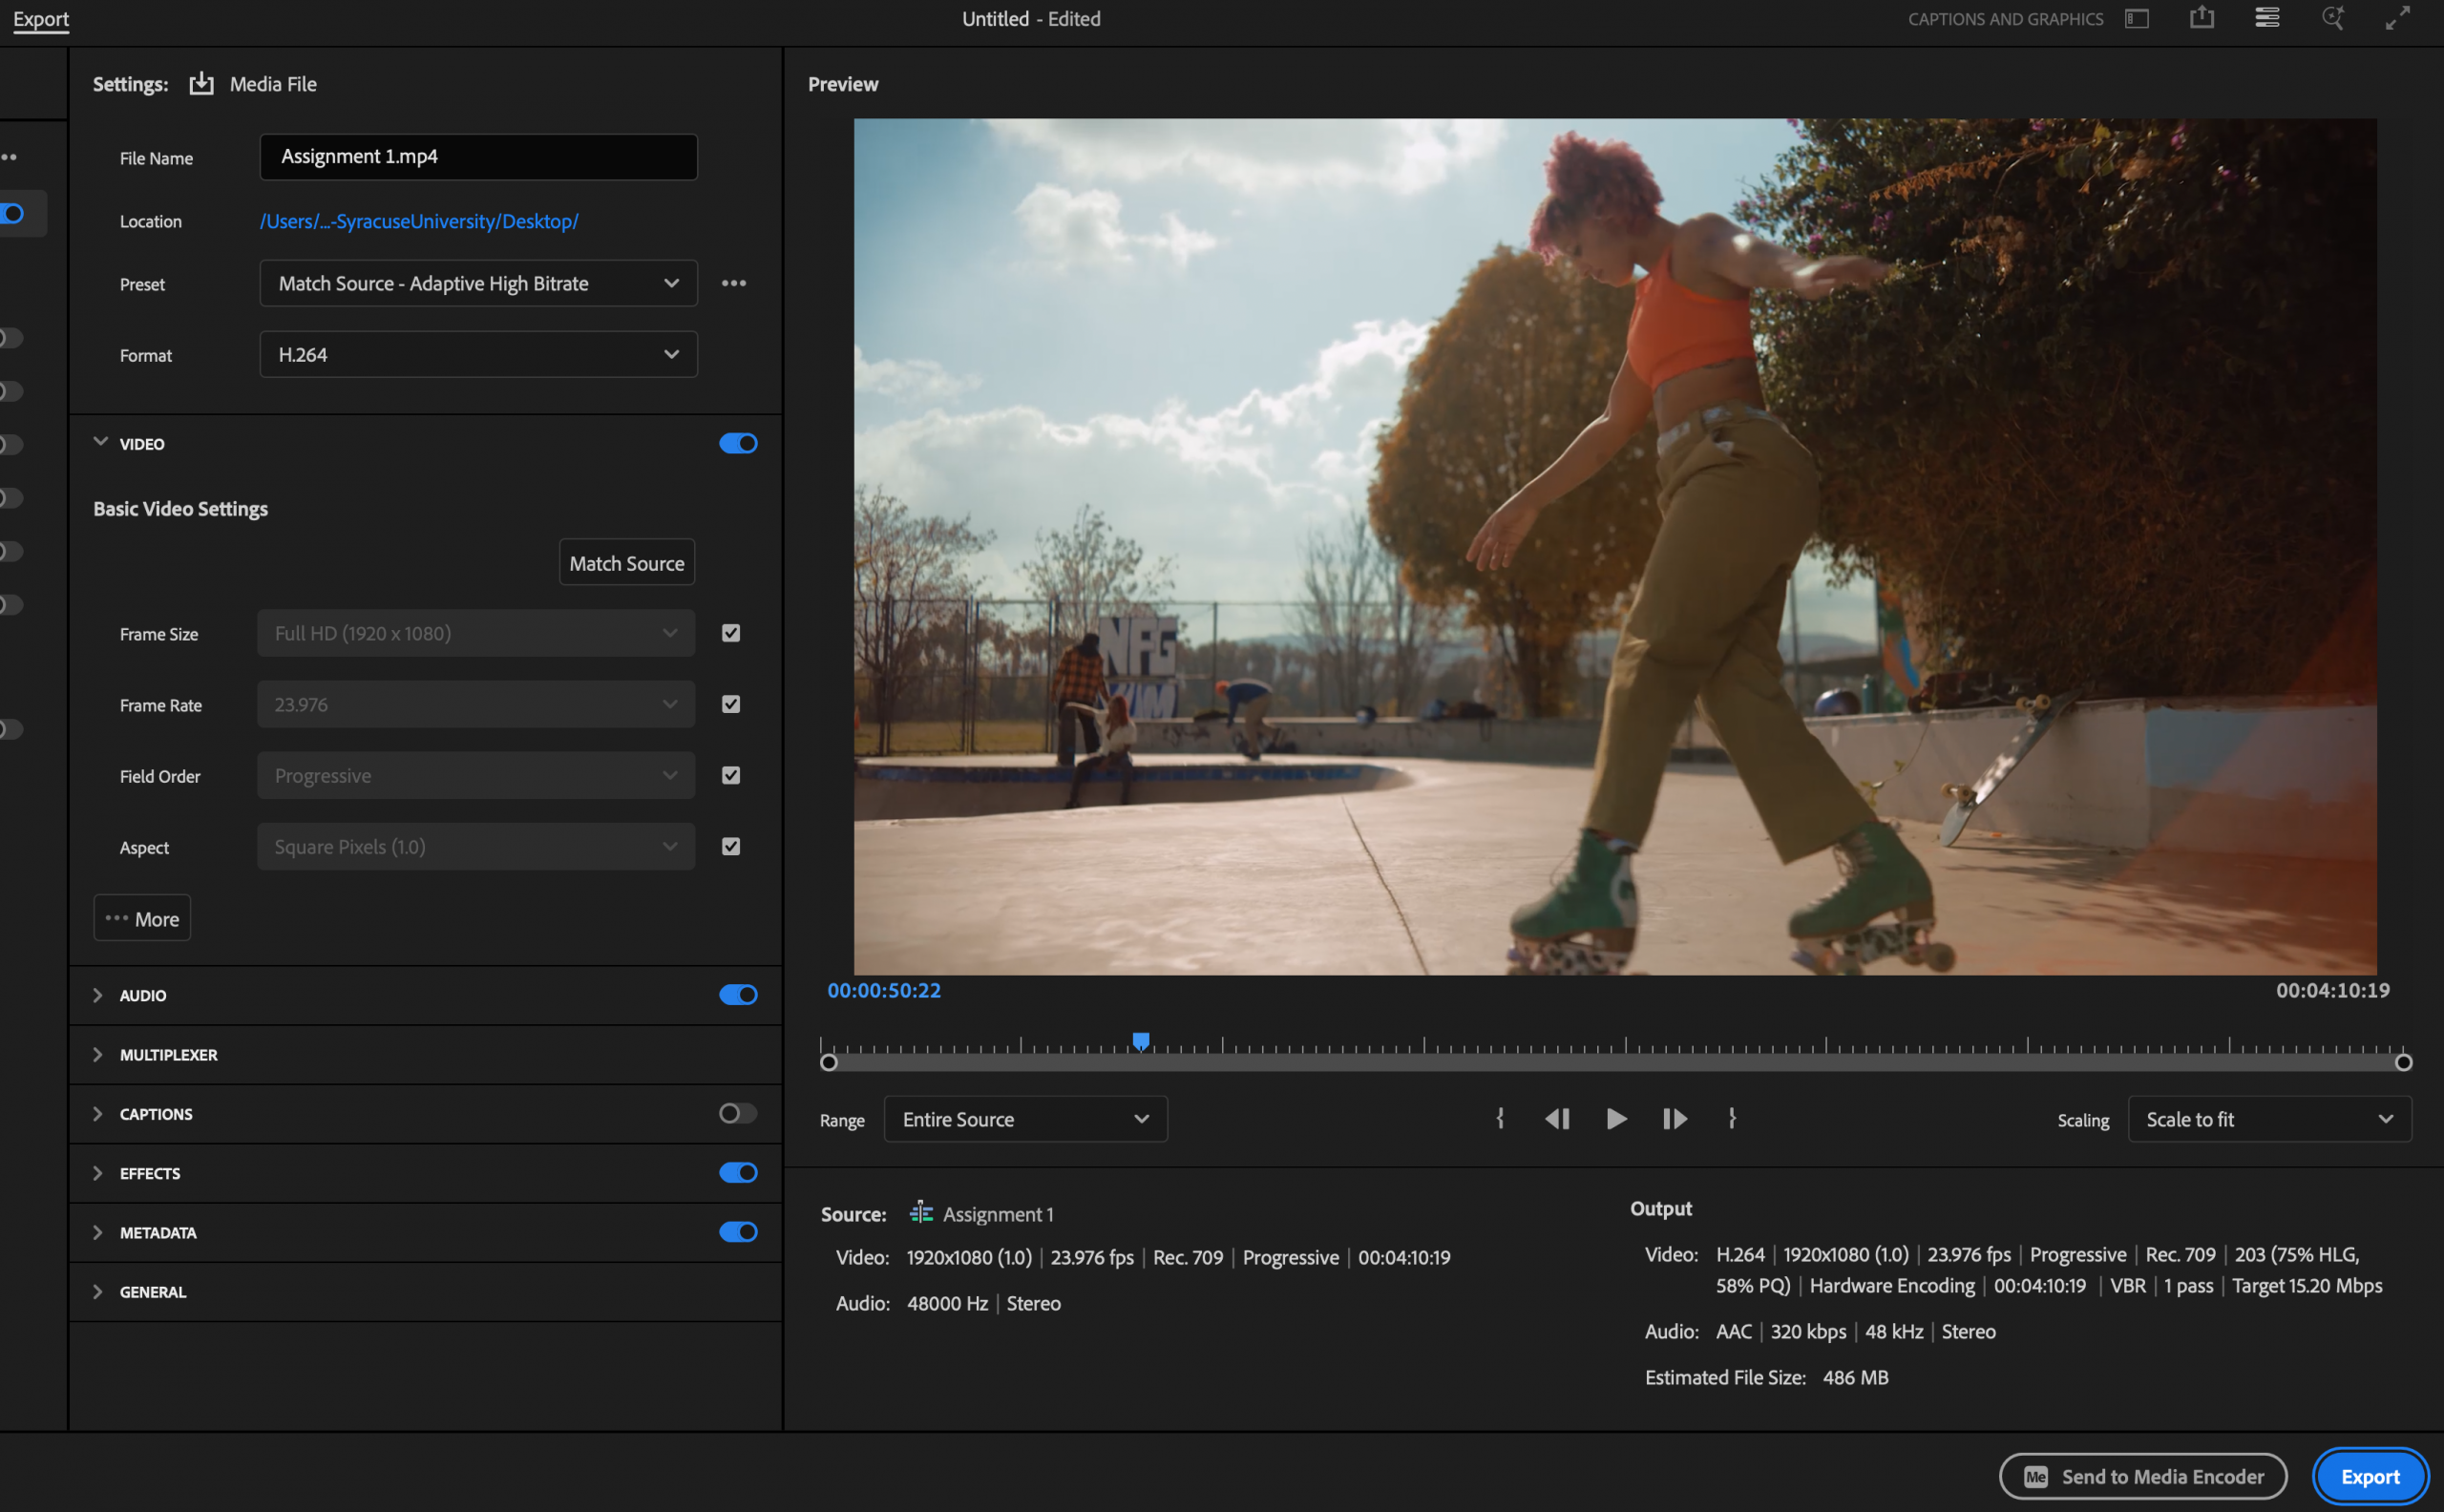
Select the EXPORT section of Premiere (up at the top) or go to File > Export > Media (Hotkey Ctrl/Cmd + M)
Create a FILE NAME (e.g. Assignment 1)
Set LOCATION (Set to ‘Export’ folder on external hard drive or where project lives)
Use Preset or Adaptive High Bit Rate for best quality of export.
Set FORMAT (H.264 is perfect for uploading on the web)
Check your Video Settings to make sure frame size + frame rate match the footage. Typically you fill in Full HD (1920 x 1080) with a 23.976 Frame Rate, Progressive field order and Square pixels (1.0) aspect.
Make sure to include caption, if you created them.
Accessibility
Providing captions to accommodate all audiences is imperative. In the upper right corner, change your WORKSPACE to CAPTIONS and GRAPHICS.
Here you will prompted to transcribe the audio of your final video, which will automatically create captions that you can later edit yourself. You can also create a script here to help you reorder your story or interview.
This guide was updated Jan. 2026. Please reach out to our digital trainer, Britt Spagnola at bhwait@syr.edu with any further questions.