In This Guide
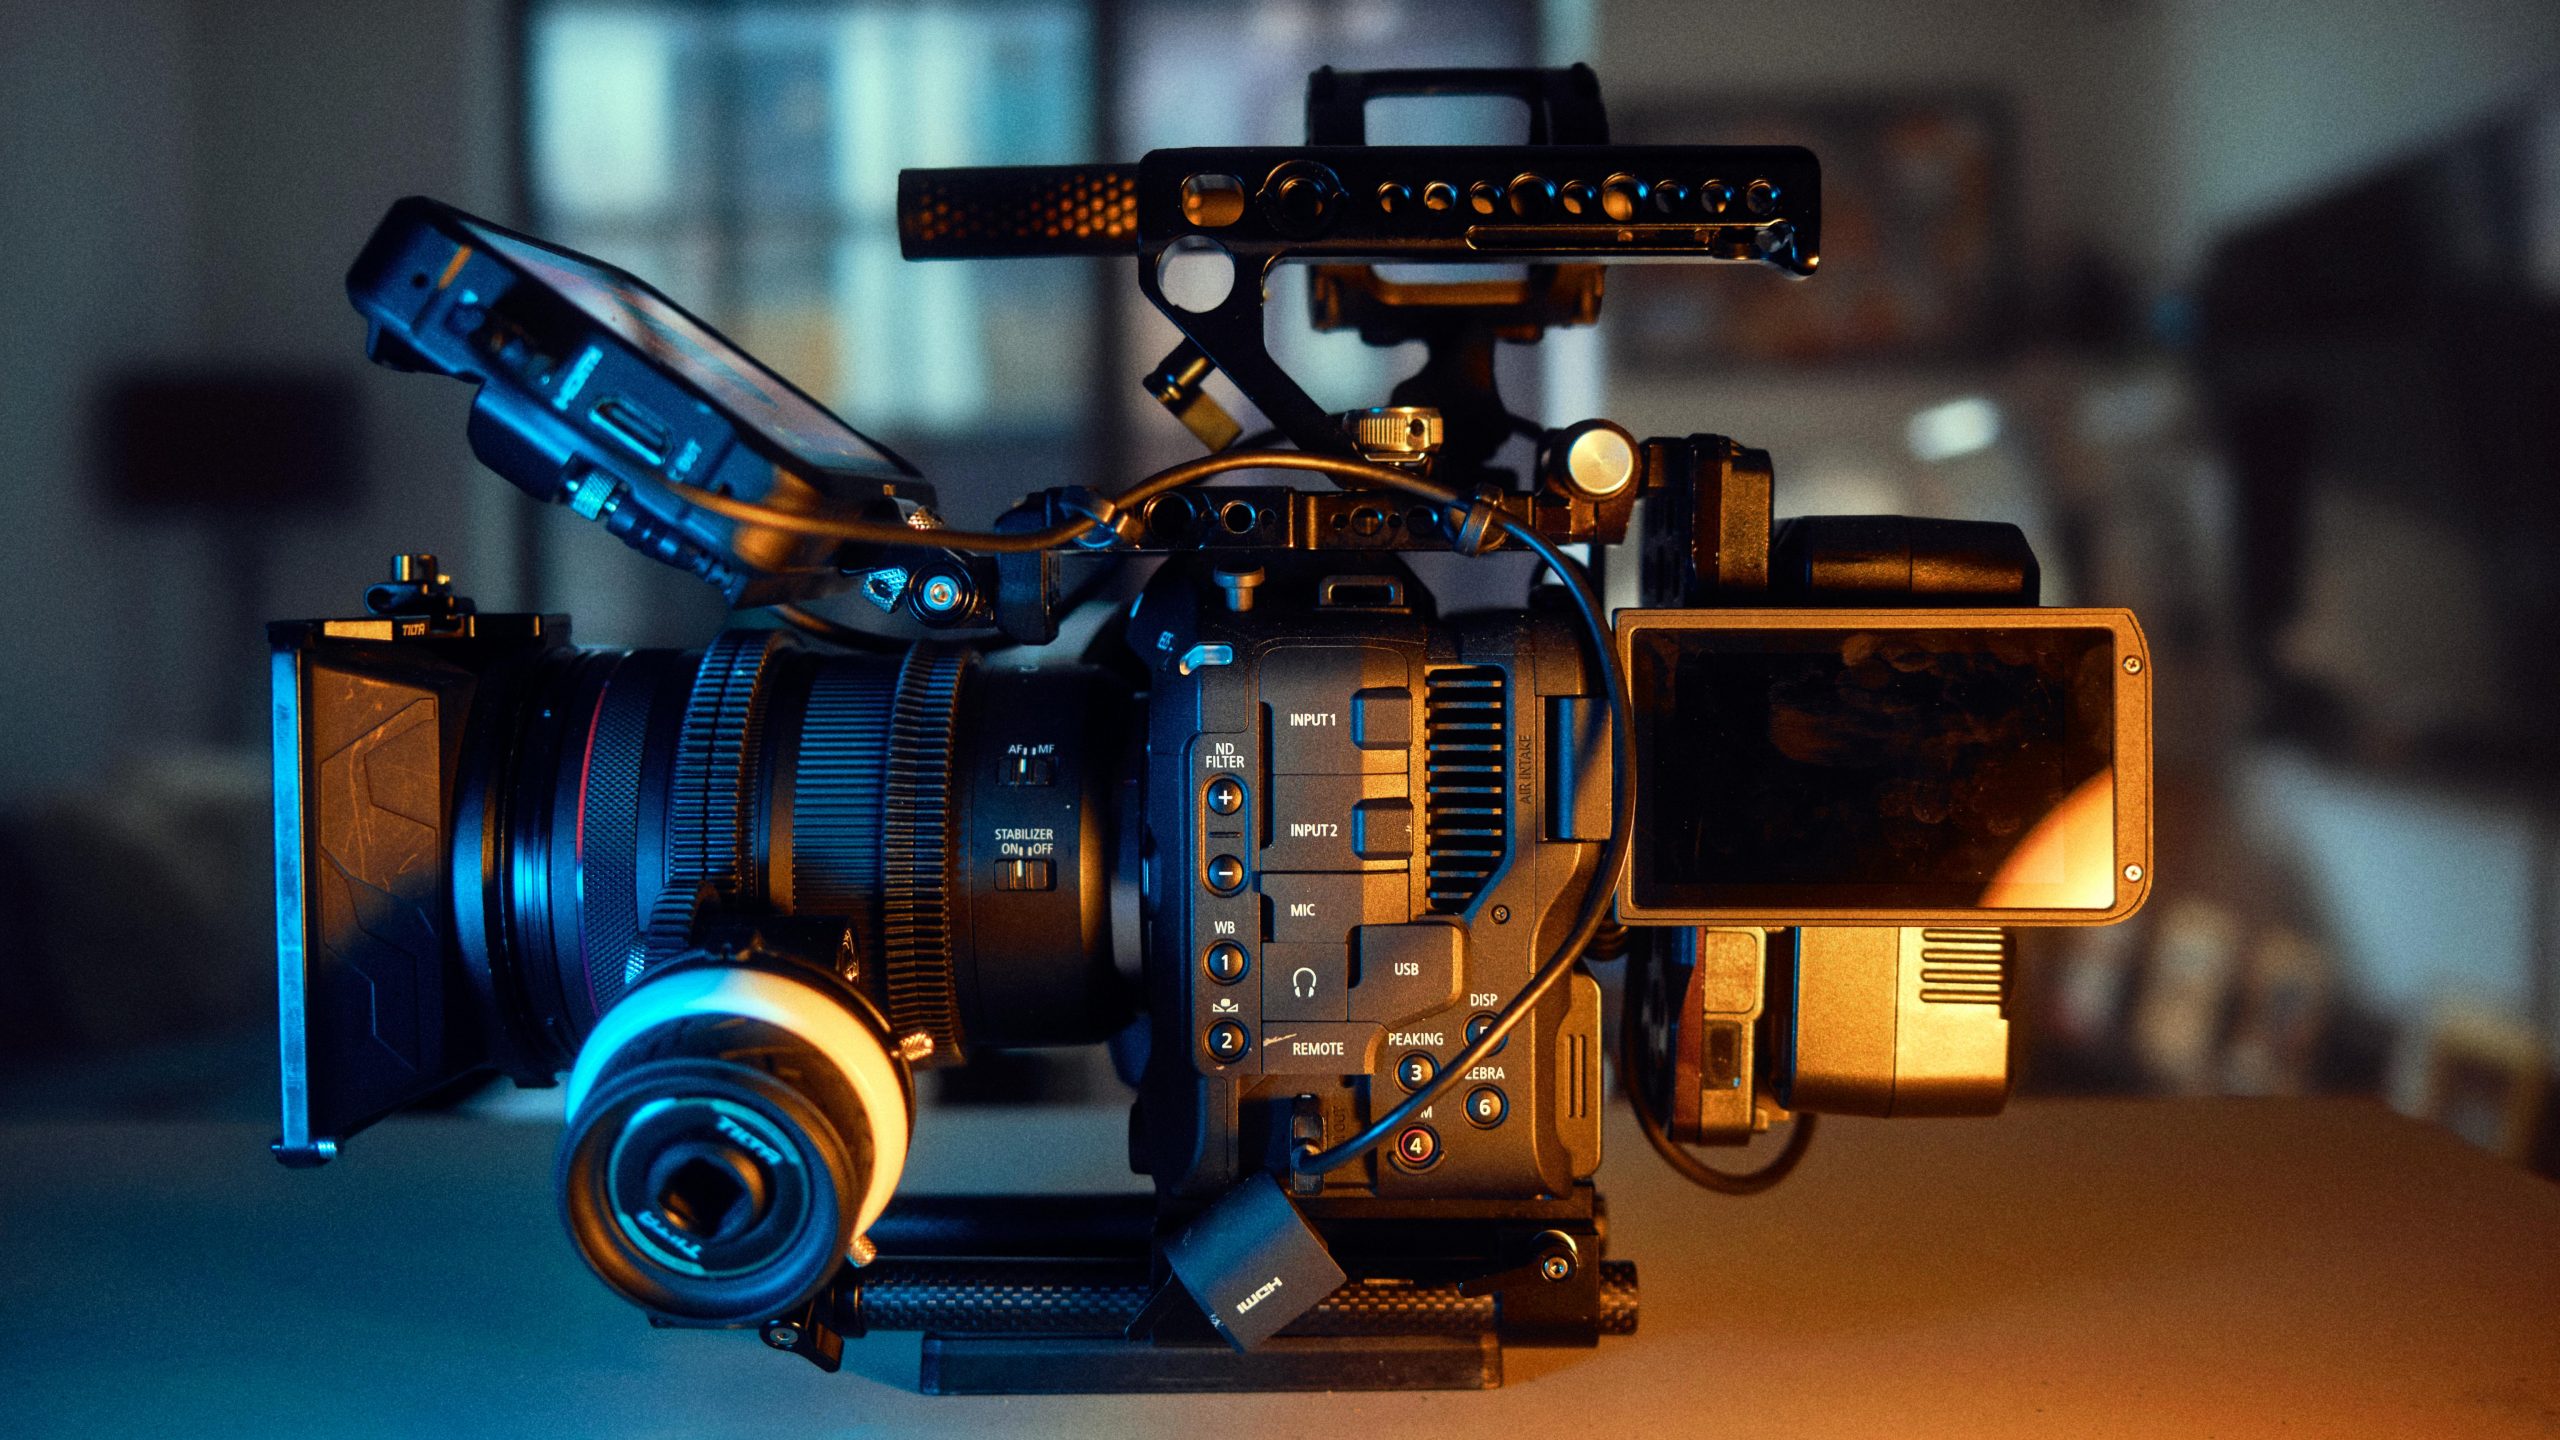
Big Screen Energy: Cinema Camera Guide
to confidently build and operate the Canon EOS C70 Cinema Camera.
Here’s a downloadable one-page cheat sheet on how to get the C70 up and running + fast.
First, you’ll need the following items:
- C70 Kit [Camera body, Canon 24-105mm lens, Sony headphones, XLR mini (for shotgun mic), AC adapter, lens adapter]
- 128 or 256Gb media card
- 1-2 BP-A30 Canon batteries
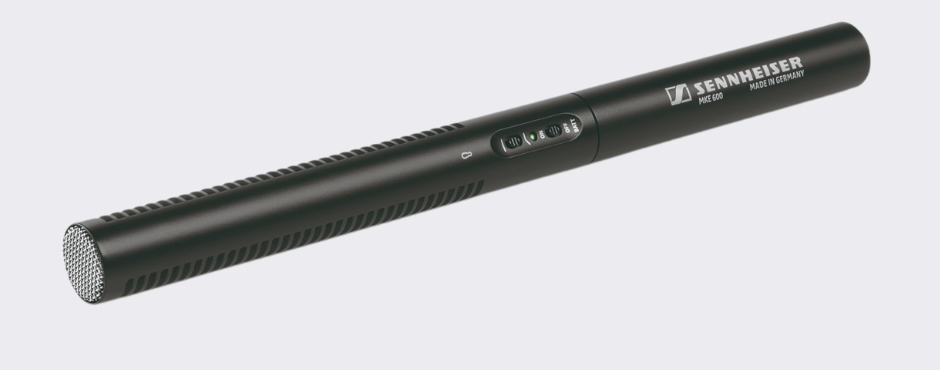
- Sennheiser MKE600 Shotgun Microphone
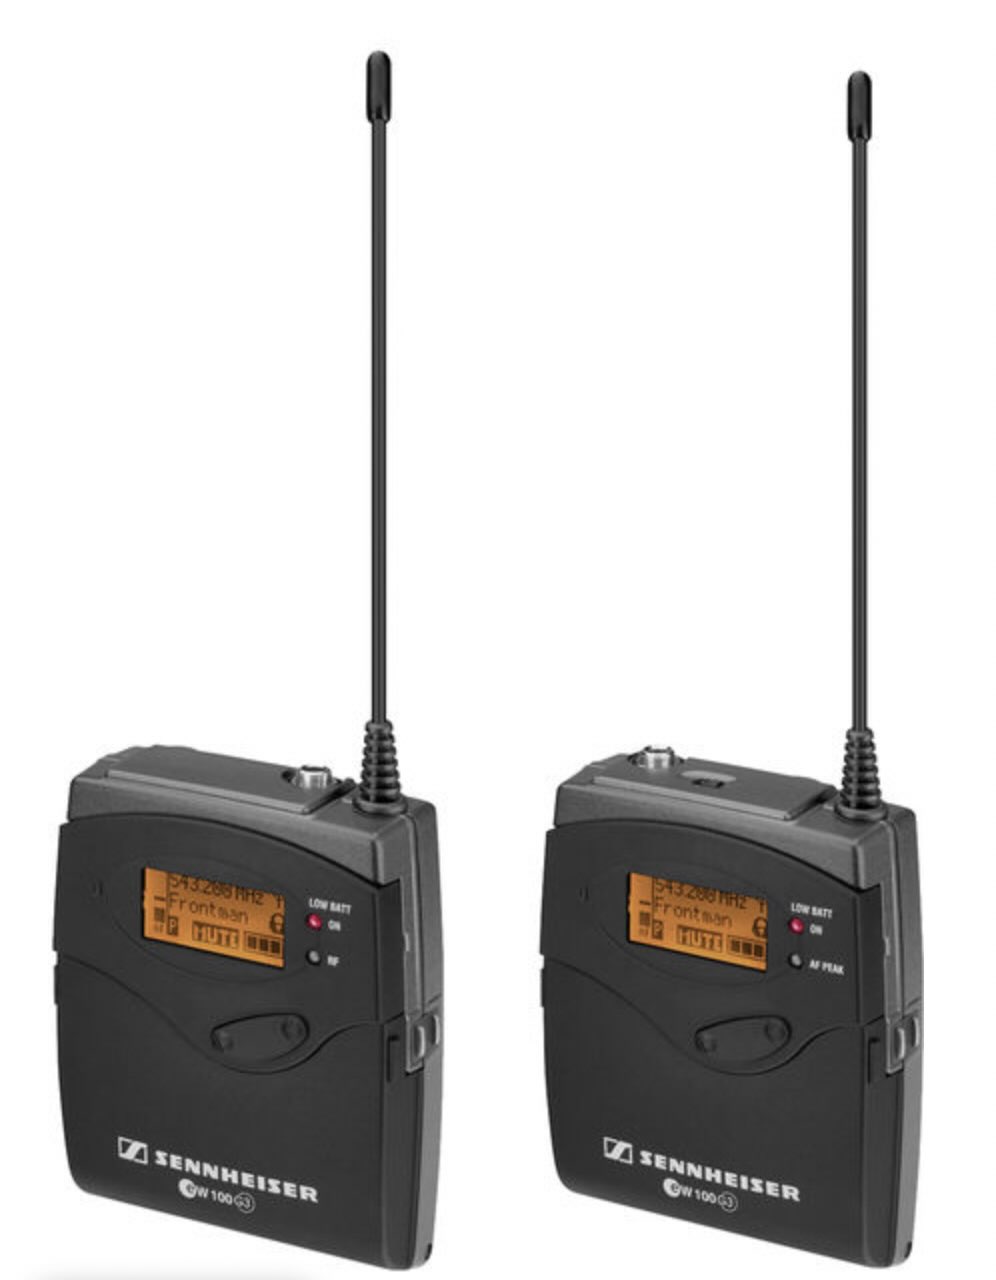
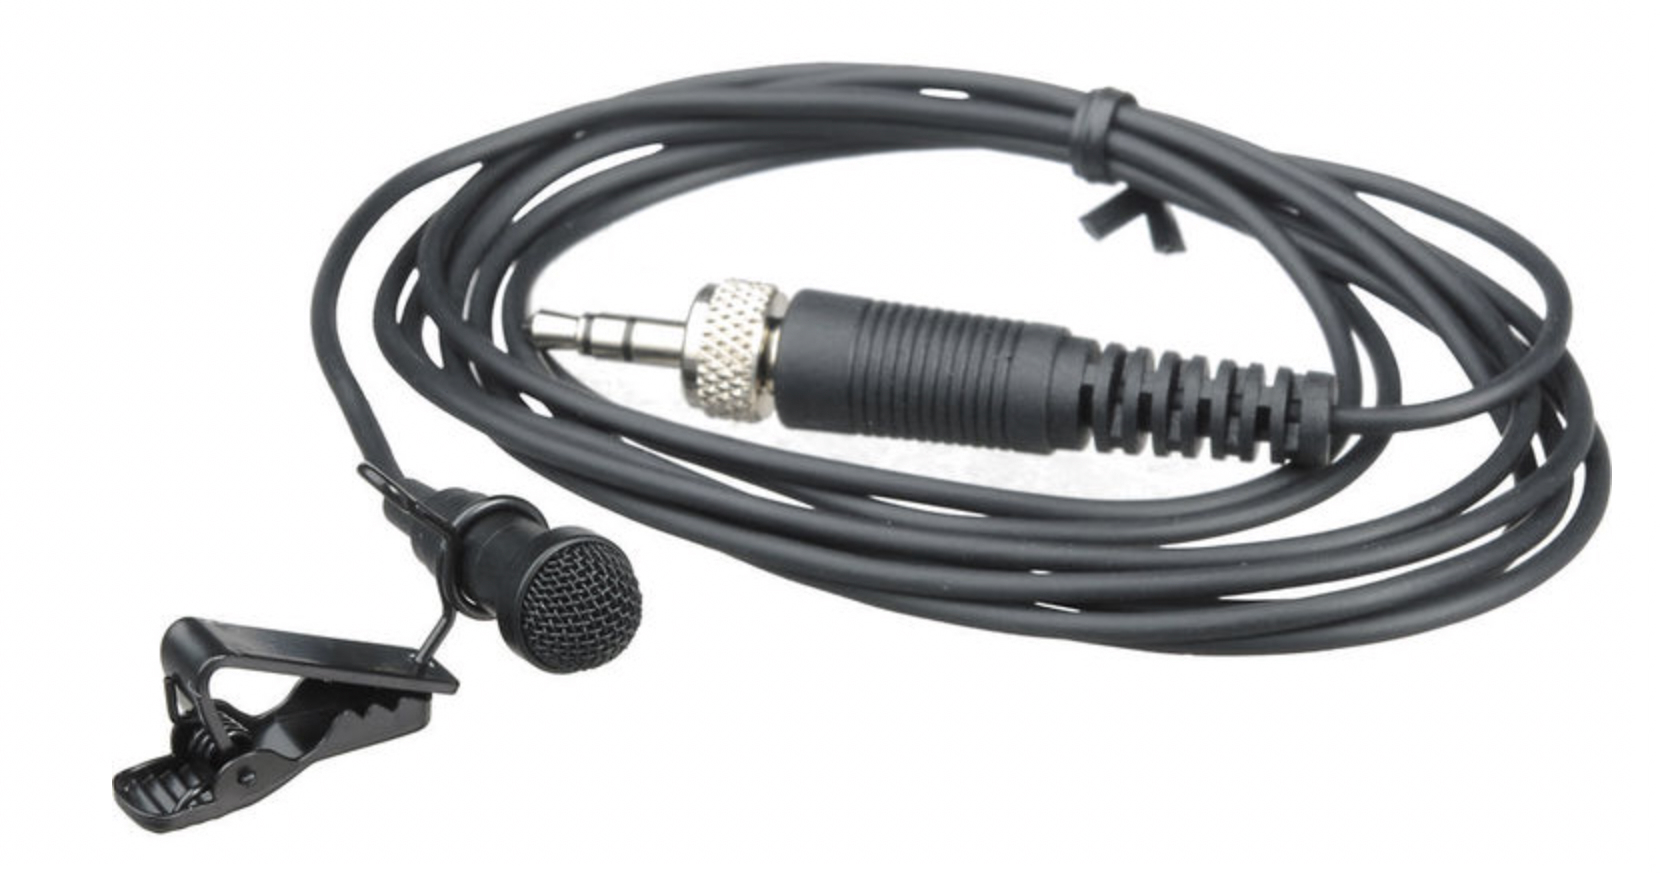
- Secondary audio: Wireless Sennheiser ew100 G3 with lavalier microphone w/ extra mini XLR (three pin) blue cable
- Satchler tripod
THE BUILD
- First, stabilize the camera on a tripod by building the Sachtler tripod, making sure its ball head is balanced + legs are stable. With the tripod plate attached to the camera, safely lock in and mount the camera body. Ready the tripod’s tilt + pan knobs, setting +/- pan/tilt friction for intentional movement.
- Attach top handle with mic holder to the top accessory shoe of the C70.
- Insert fully-charged BP-A30 battery. Have a second battery as a backup.
- Carefully attach camera lens. Store lens cap + C70’s sensor cover in the pelican case.
- Plug in headphones.
- Connect microphones. The C70 supports 4-channel audio recordings.
- Place Sennheiser MKE600 shotgun mic in mic holder + connect mini XLR to INPUT 1.
-
- Connect wireless Sennheiser ew100 G3 mic to INPUT 2 using extra mini XLR*
MEDIA + POWER
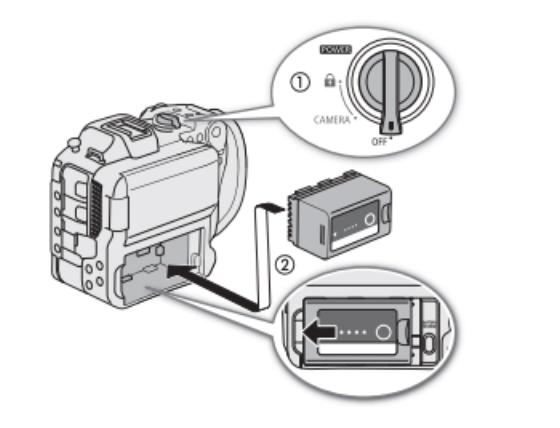
- Next, insert a 128GB SD media card in Slot A and close media door. If inserting two media cards, use the SLOT SELECT button to pick which media card to record to.
- Turn on the camera. Notice the lock feature on the switch, which will lock + hold settings.
CAMERA SETTINGS
Input your Recording Settings to meet project needs via the Menu button;
-
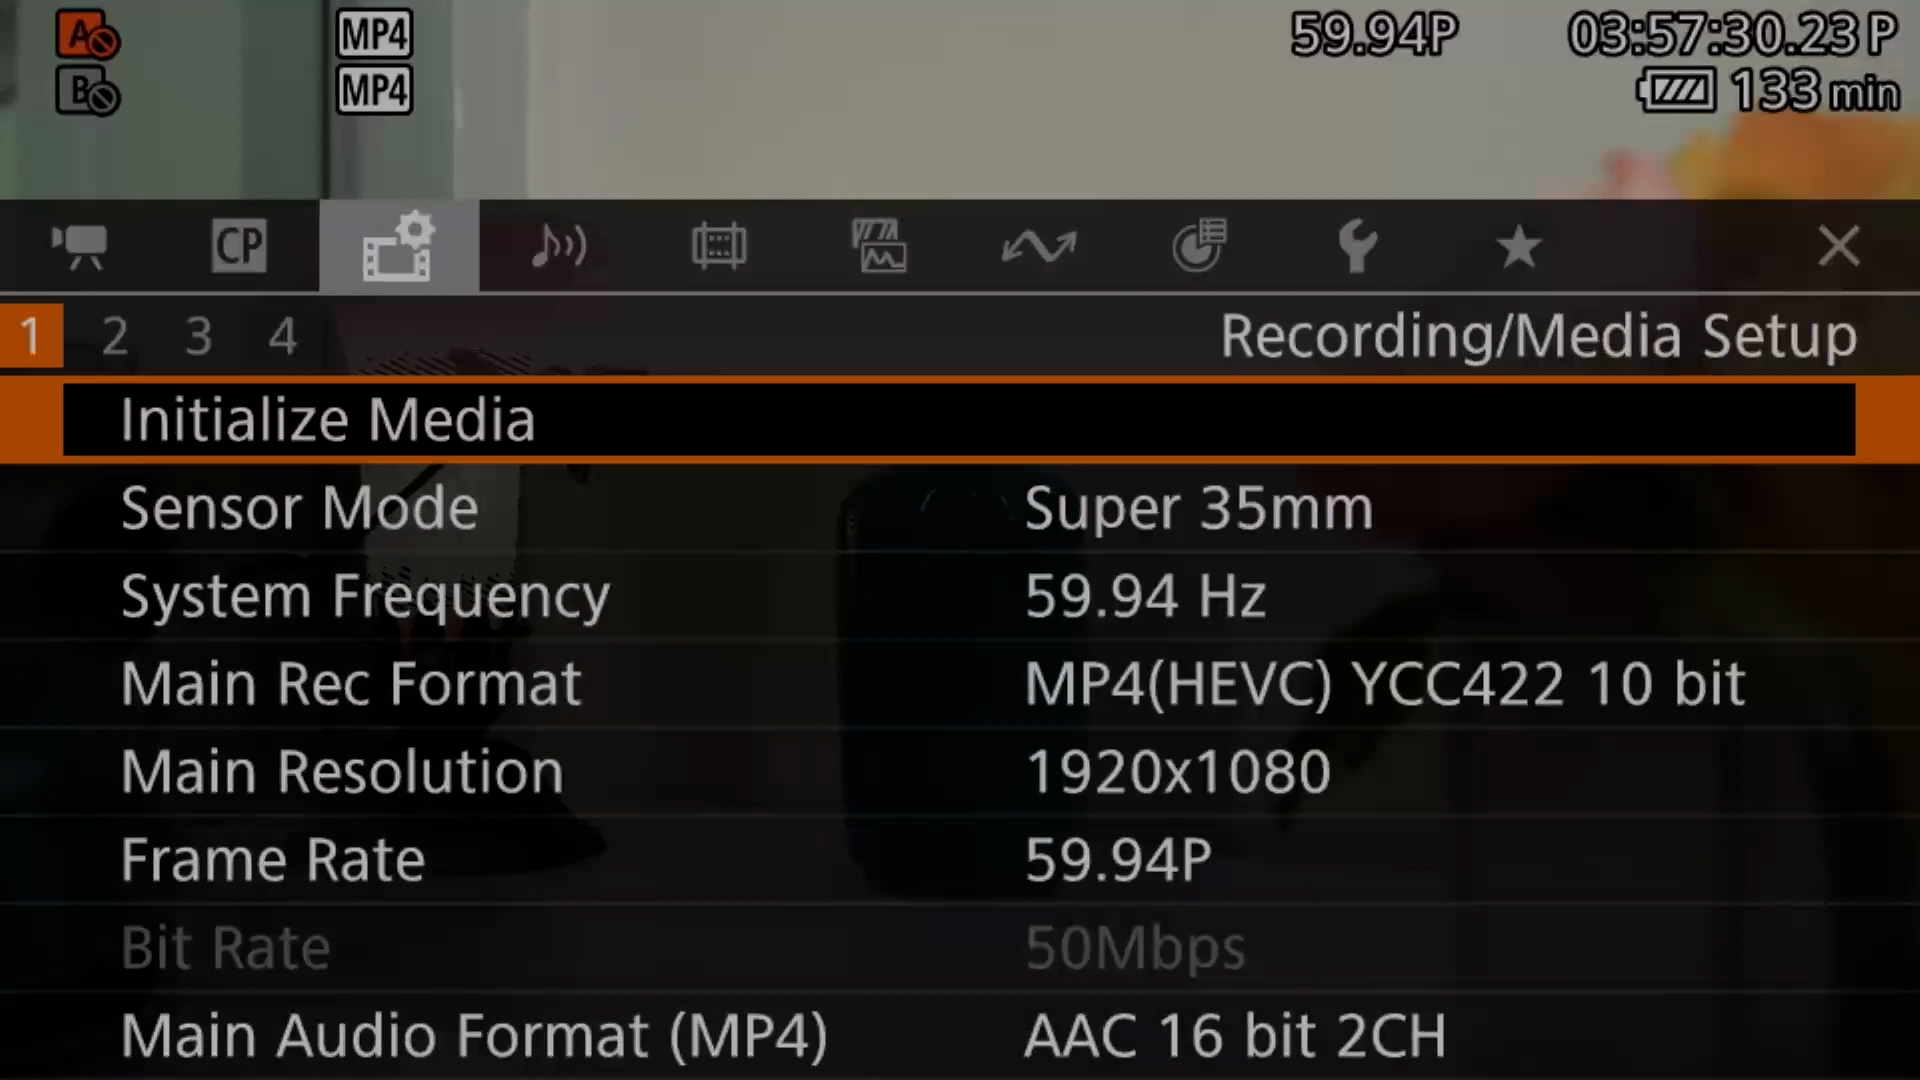
- MENU > RECORDING / MEDIA SETUP section
- Initialize media (will erase media on the SD card + allow for compatibility using the C70)
- If shooting at 24FPS, first, set System Frequency to 24Hz, which will reboot camera to allow you to go back and set Frame Rate to 24.00P (Frames Per Second)
- Main Rec Format: XF-AVC YCC422 10 bit – *XF-AVC (.MXF) is ideal for heavy post- production while MP4 (HEVC/H.264) offers smaller files for fast turnaround times.
- Main Resolution: 4096×2160 Intra-frame (to crop in without losing quality) or 1920×1080 (crop in, and image will lose quality) *Intra-frame vs. Long GOP – Intra-frame is smoother to edit and higher in quality but larger in file size. Long GOP compresses resulting in smaller media files.
- MENU > RECORDING / MEDIA SETUP section
Page 2 – Set Recording Mode: select Normal to record footage at the standard base frame rate (e.g., 24fps) with audio. S&F Motion changes the shooting frame rate, automatically speeding up or slowing down video in-camera.

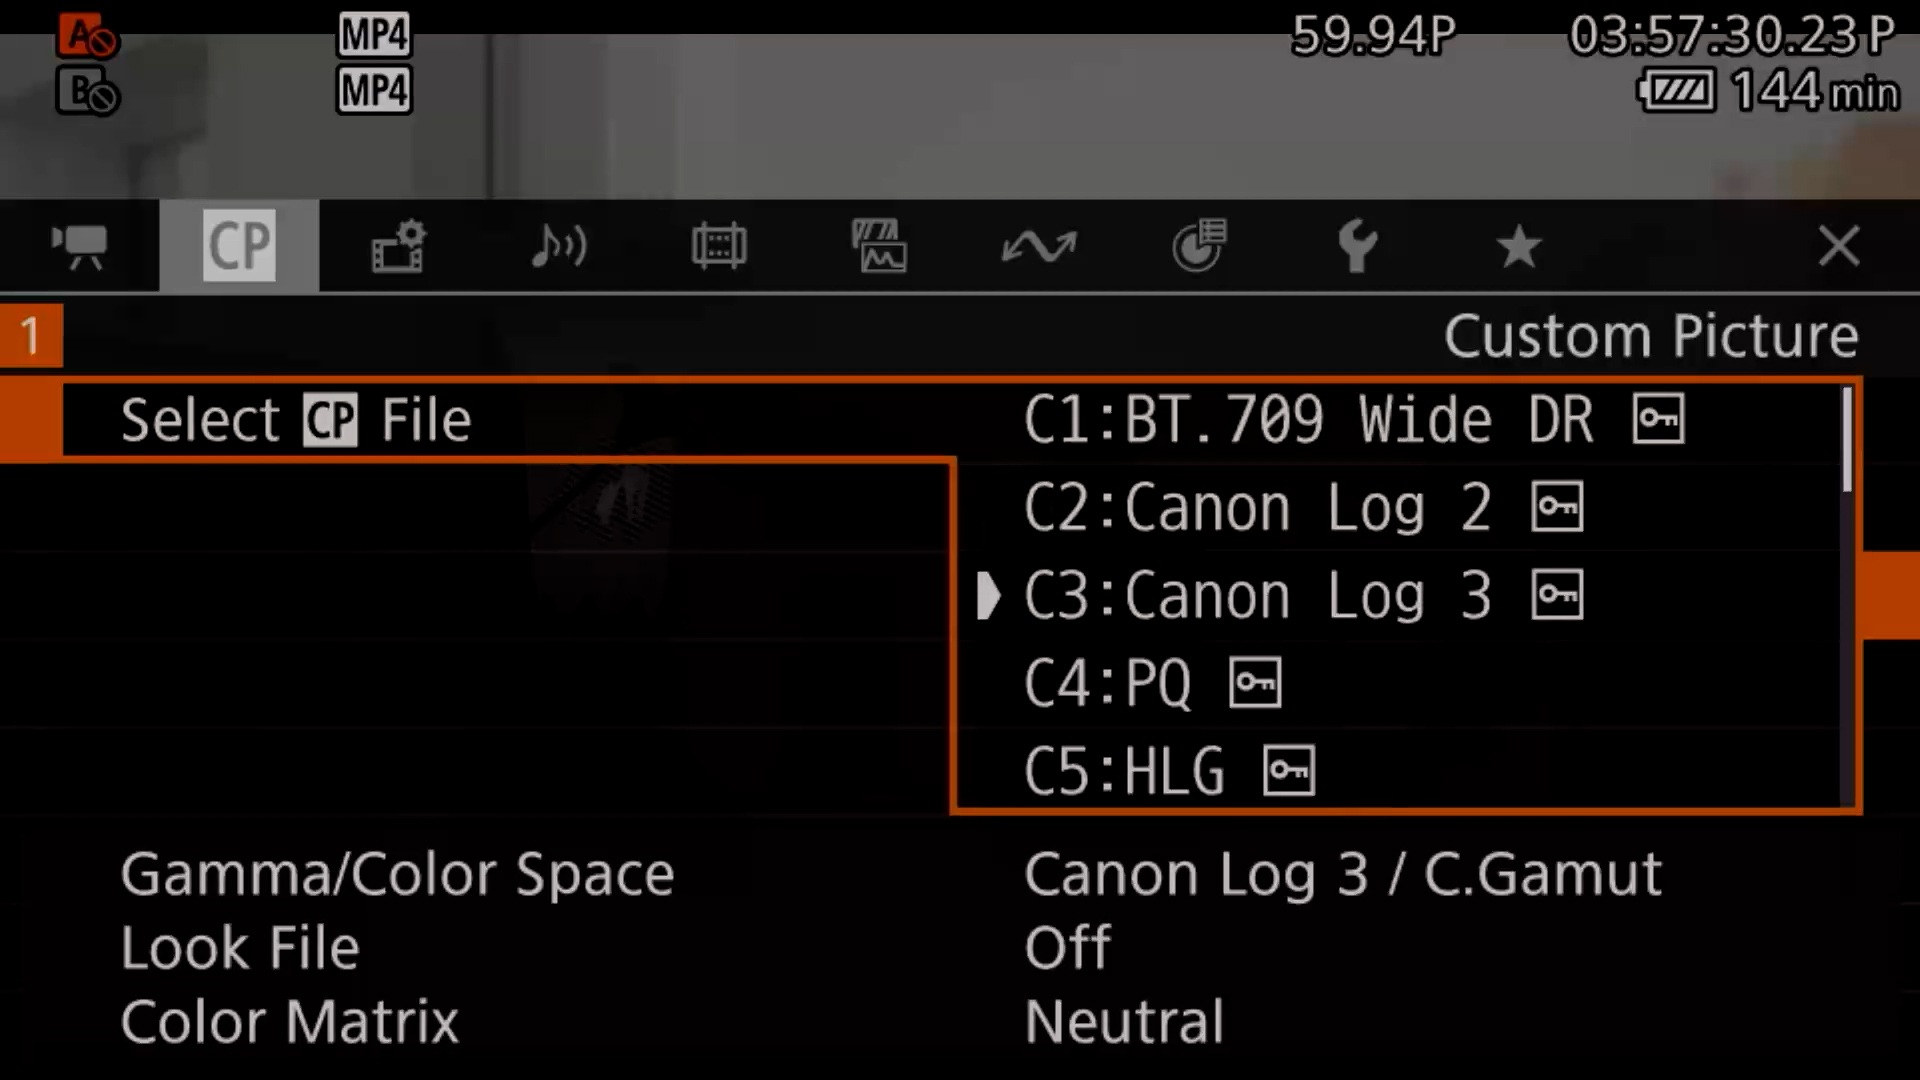
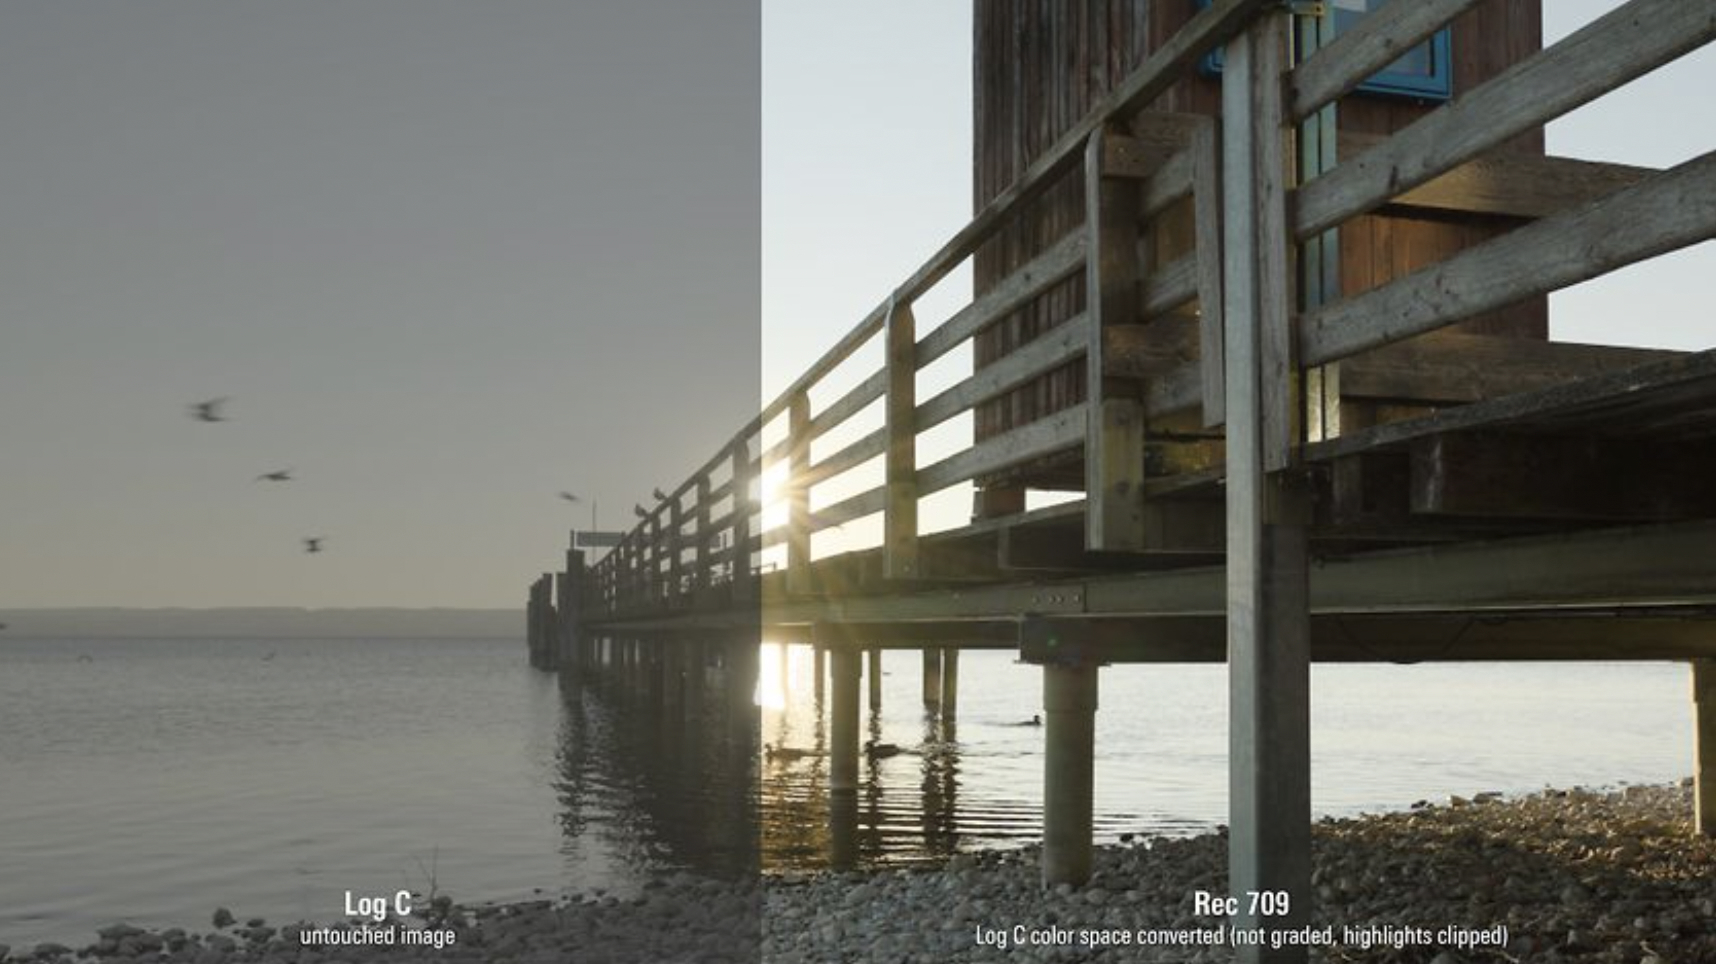
CP / Custom Picture is where you select the color profile that suits your project needs. BT.709 Wide DR is a standard profile with baked in color. If you have more time in editing, choose Log – Canon Log 2 or 3. *C-Log 2 offers max dynamic range, superior shadow detail, ideal for high-contrast scenes needing heavy grading, but introduce noise in shadows. C-Log 3 is meant for a faster workflow with cleaner noise floor, higher contrast and is easier to grade.
*If choosing to shoot in Log, you can set a BT.709 LUT on the LCD screen to make it easier to expose your image. To do this, under MONITOR SETUP > Page 7 > LUT: LCD – Turn on. LUT Selection: BT.709.
SOUND
- Set safe sound levels by visually monitoring the Sound Meter + wearing headphones listening for noise issues.
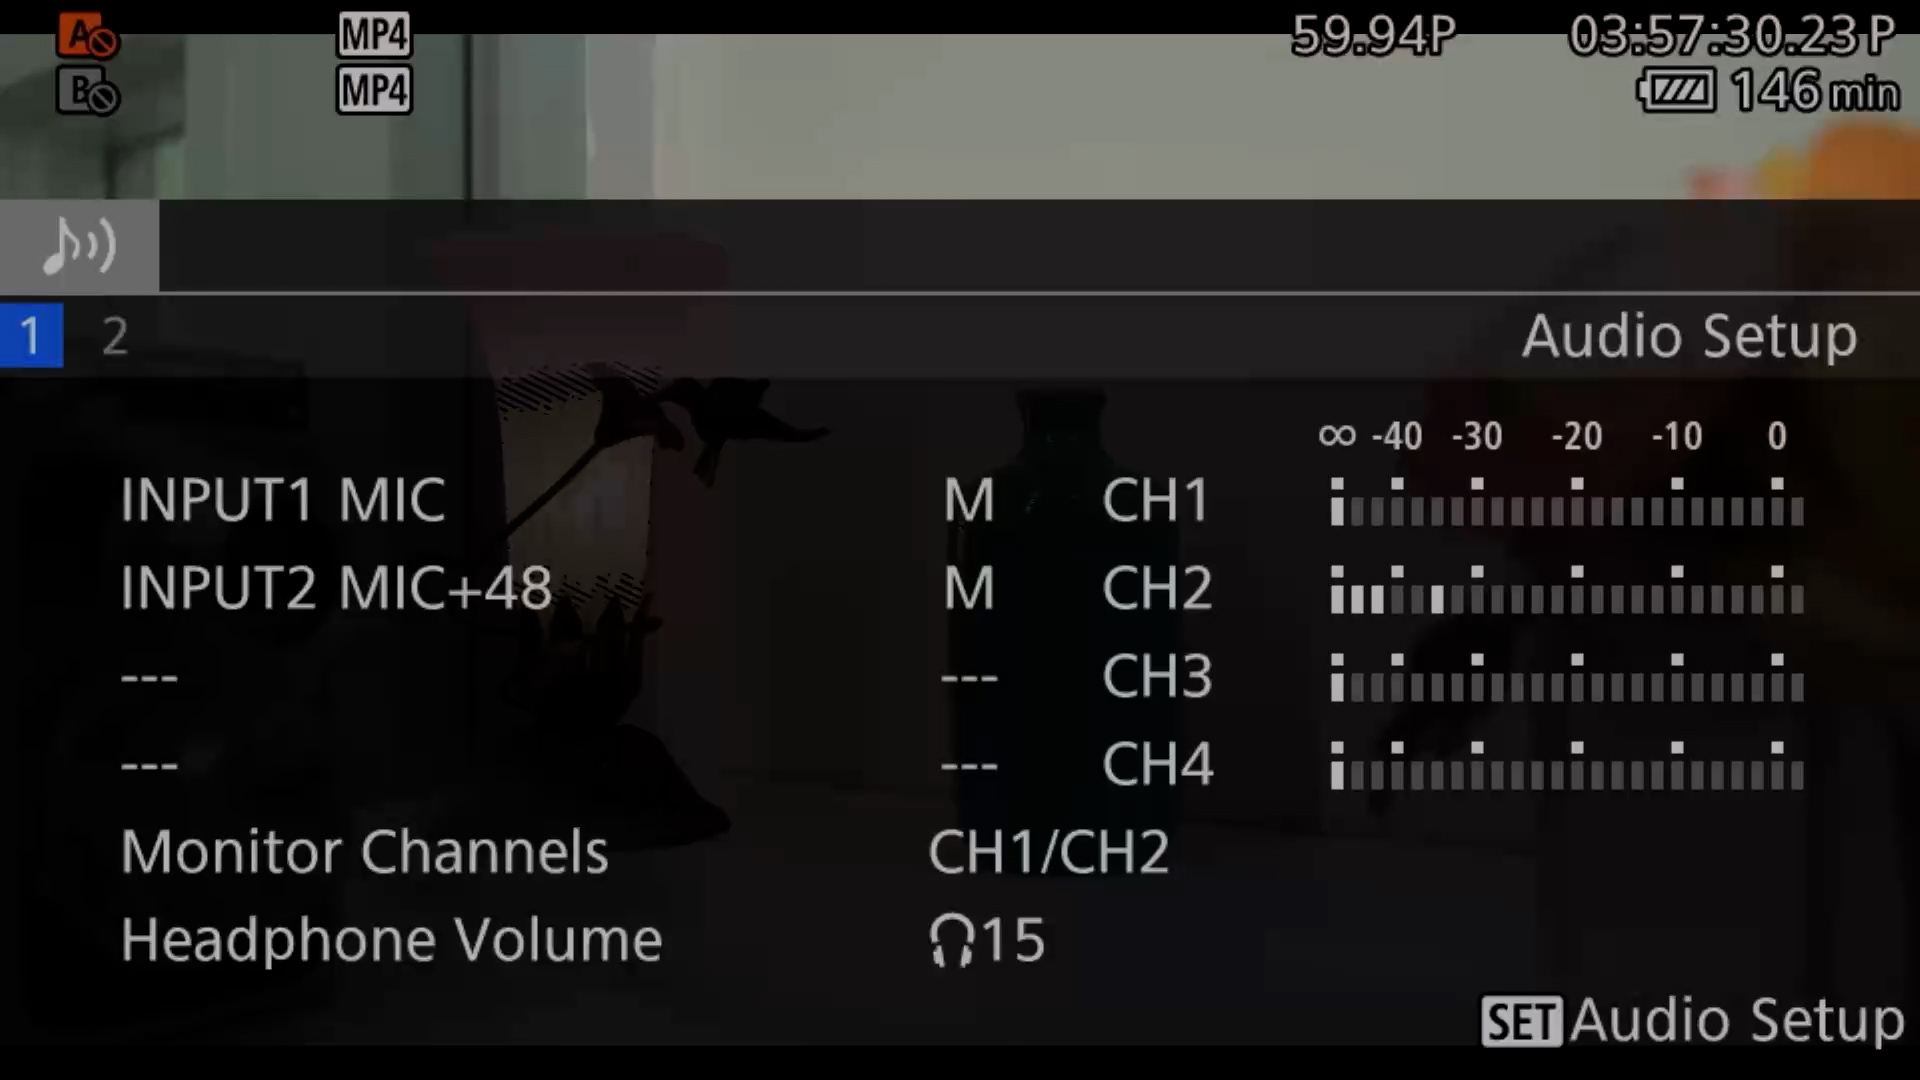
- Next, set AUDIO INPUT based on mic/audio sources. MENU > AUDIO SETUP > AUDIO INPUT SELECTION
-
- CH1/CH2 – options: INPUT TERMINALS (Mini XLR inputs), MIC Terminal (3.5mm mic jack), or Built-in Mic (camera’s tiny built-in mic).

In the backside where the monitor flips out, you will see sound settings. 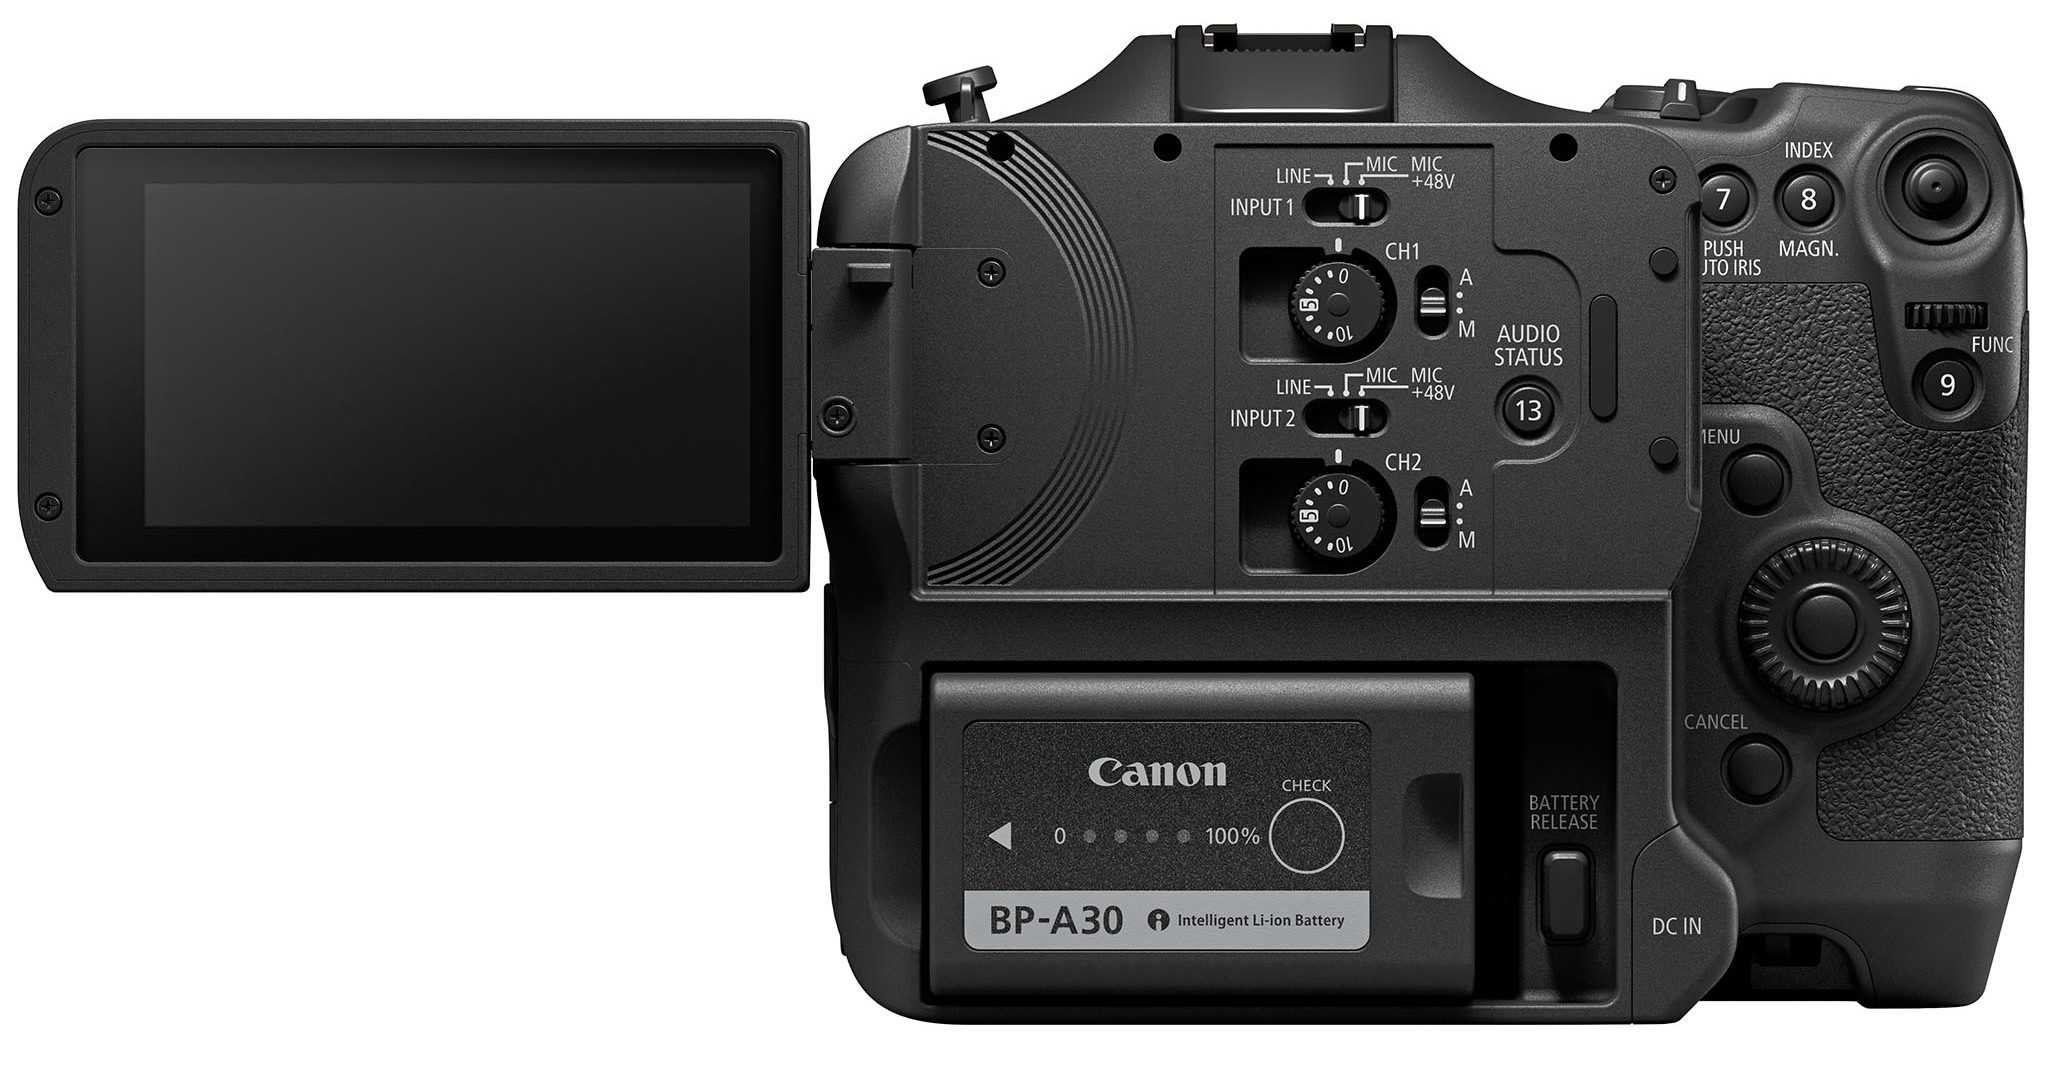
- First, choose how you will power each microphone.
- INPUT 1 / CH 1 – Power Switch: Line, Mic, Mic +48V (Phantom Power) Set to Line input when connecting a device to output audio signal to mixing boards, soundboards, or external field recorders. If the mic has an internal AA battery, set it to MIC. If a mic doesn’t use a AA battery or can do both, set to Mic +48V to use phantom.
- Turn switch to MANUAL (M) instead of Auto (A), so you are able to adjust sound levels yourself. If this is set to Auto, and the environment is loud, the sound could peak at 0dB and cause distortion, making the sound of the recording unusable.
- Run a test and adjust the gain knob (0 – 10) to achieve safe sound levels (between –12 and –6db). *Set it halfway to 5/6 to start. If still on Auto, you won’t be able to make these adjustments, so it’s important to turn the switch next to both channels to Manual.
Press AUDIO STATUS (13) button –> AUDIO SETUP menu to see levels and inputs more clearly.
OPERATION
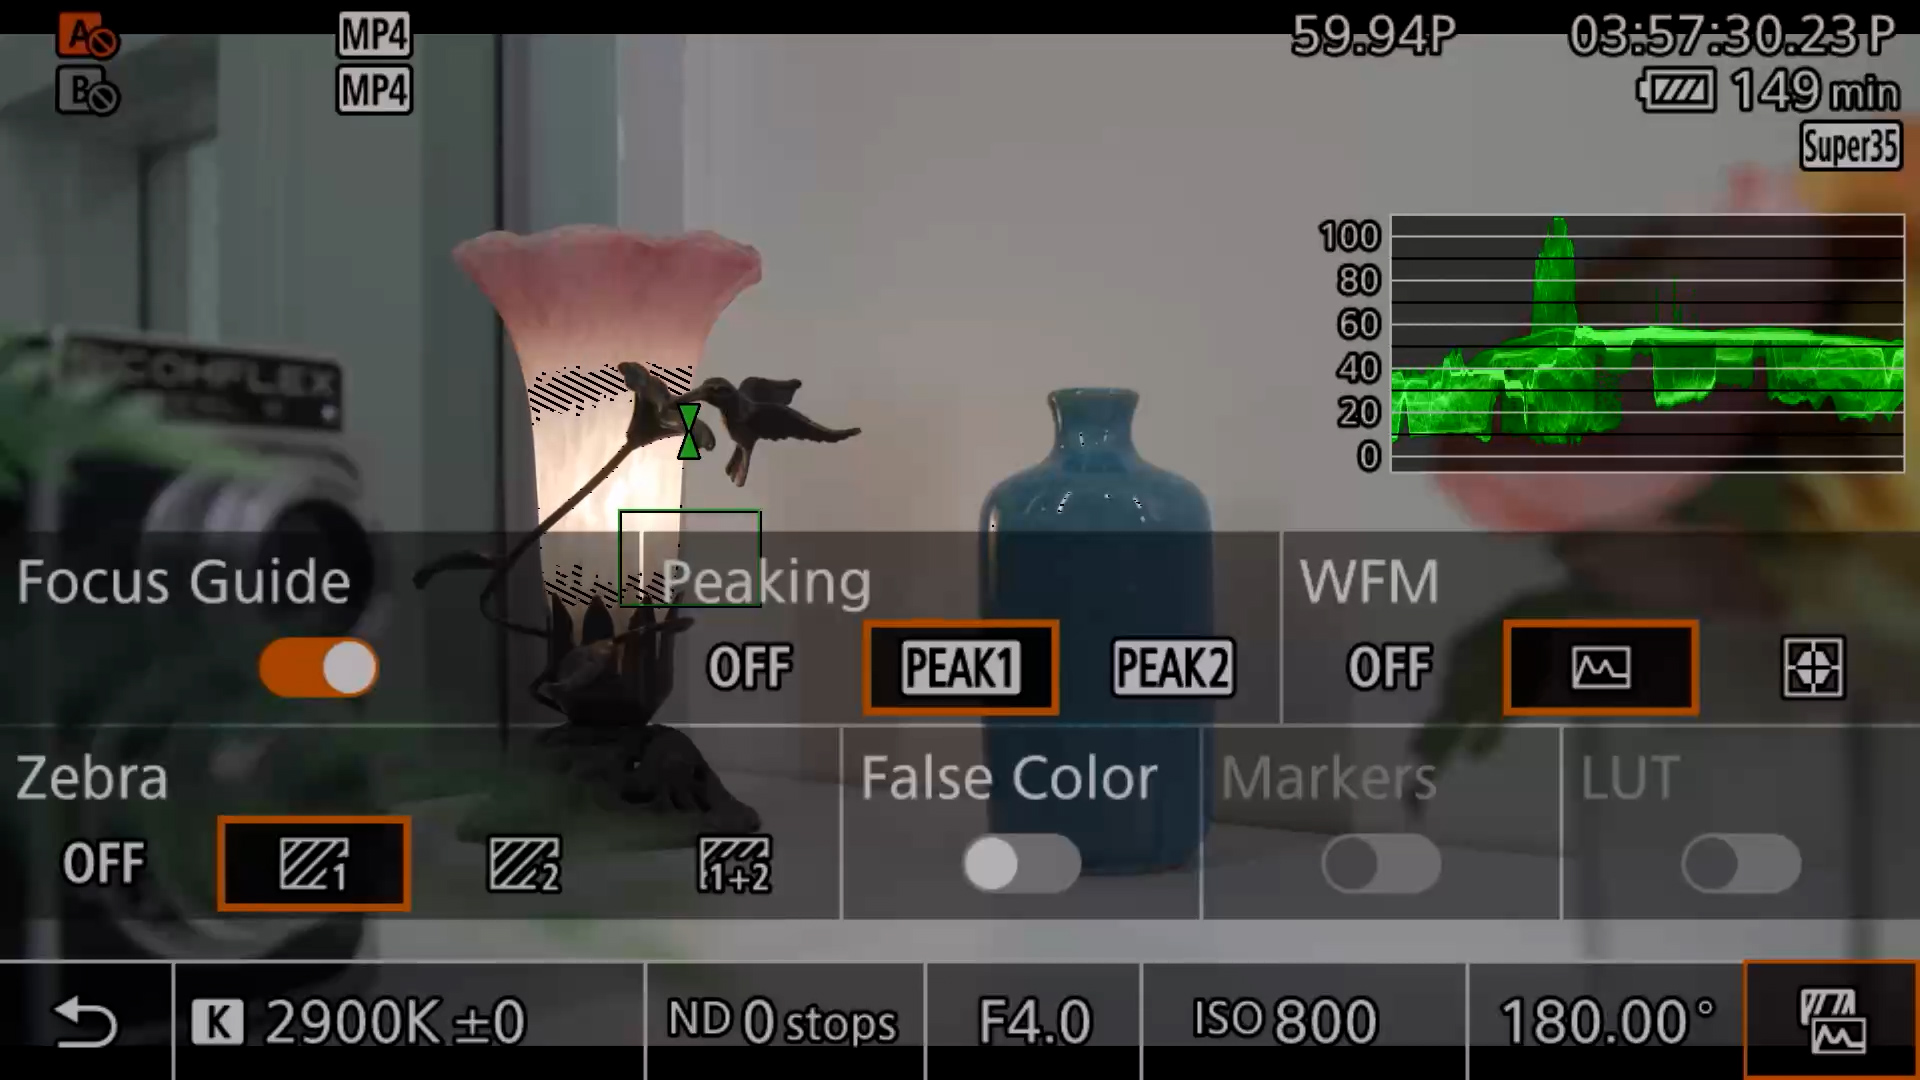
Engage the touchscreen by selecting the symbol in the lower left corner of the LCD screen. Then make quick adjustments to White Balance, Neutral Density (ND) filters, Aperture (f-stop), ISO, Shutter Angle/Speed, and engage the Focus Guide, Peaking, Waveform (WFM), Zebra, False Color and LUT.
Dial-in Exposure
First, switch shutter speed to shutter angle. MENU > Camera Setup > Pg.2 > Shutter Mode. *Shutter speed = shutter angle but angle is commonly used in production.
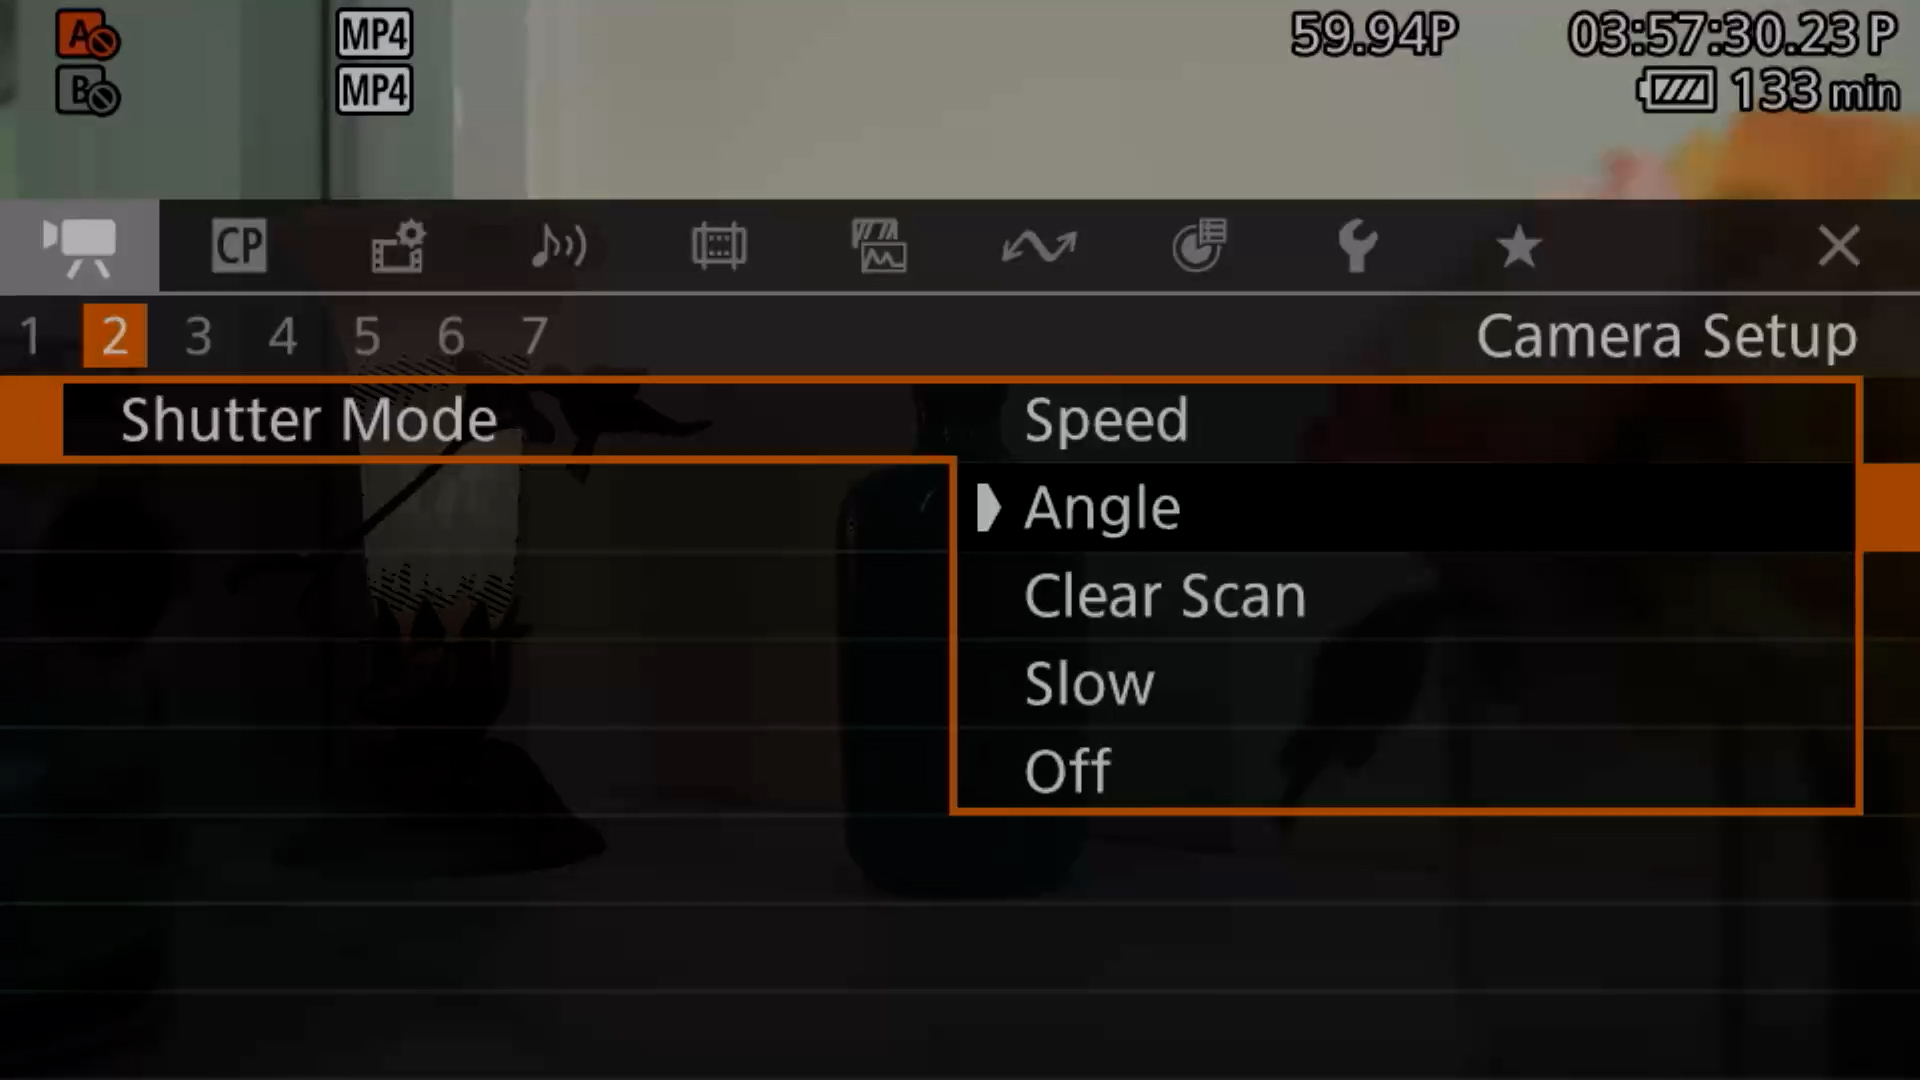
The 180° Shutter Rule dictates setting shutter speed to double the frame rate (24 frames per second (fps) = 1/48 = 180-degrees) to achieve natural-looking motion blur mimicking human vision creating a “cinematic” look, maintaining consistent motion across frame rates. The higher # = more frames captured = more smooth, slowed footage.
Depending on your creative goals, adjust the shutter angle to:
- 180° (up to 1/120): The gold standard. Gives a natural, cinematic look for footage you will slow down to 24p or 30p in editing.
- 90° to 144° (1/240 to 1/160): Use this for sports or action. It reduces motion blur for a sharper, crisper look.
- 360° (1/60): Use this to maximize light intake in dark environments or for a more “live broadcast” look
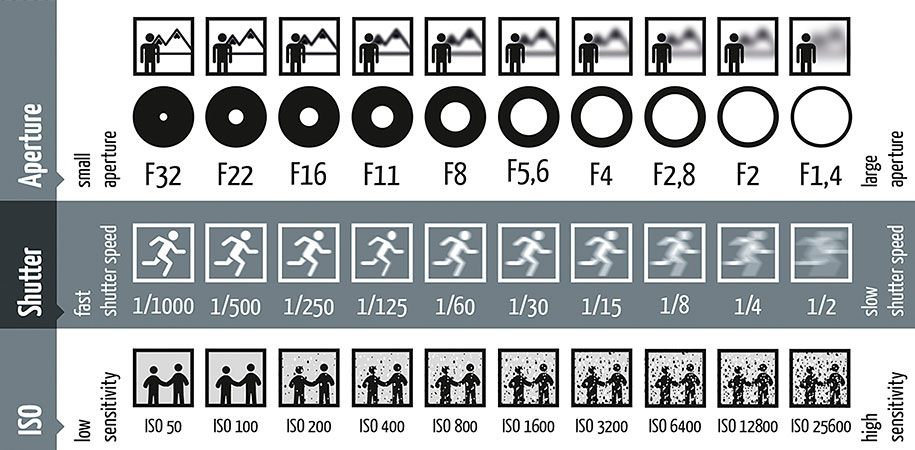
Set Aperture (measured in F-stops) = Depth of field (background blur) – this is the adjustable opening within a lens that controls the amount of light reaching the camera’s sensor. Aperture dictates the exposure / brightness + Depth of Field. The smaller the f-stop (ie. f/1.8) = wider opening allowing for more light to reach the sensor + the more blurred the background. The larger the f-stop (f/16) = narrower the opening allowing less light to the sensor / darker image + less blur.
Set ISO to camera’s native ISO – 800. ISO Measures camera sensor’s sensitivity to light. A lower ISO (100) reduces sensitivity for bright, clear, high-quality images. Higher ISO (3200) increases sensitivity, brightening images in dark scenes but introduces digital noise. C70’s Native ISO is 800 to produce the cleanest visual with the best dynamic range.
EXPOSURE TOOLS
Your eyes lie. Lean on these tools to tell the truth.
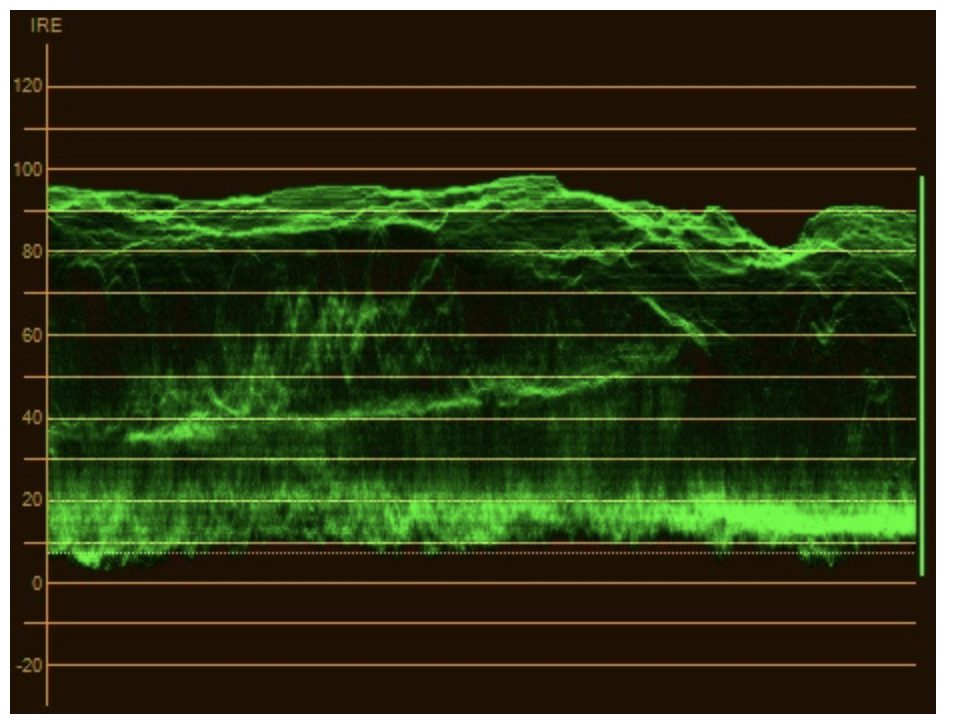
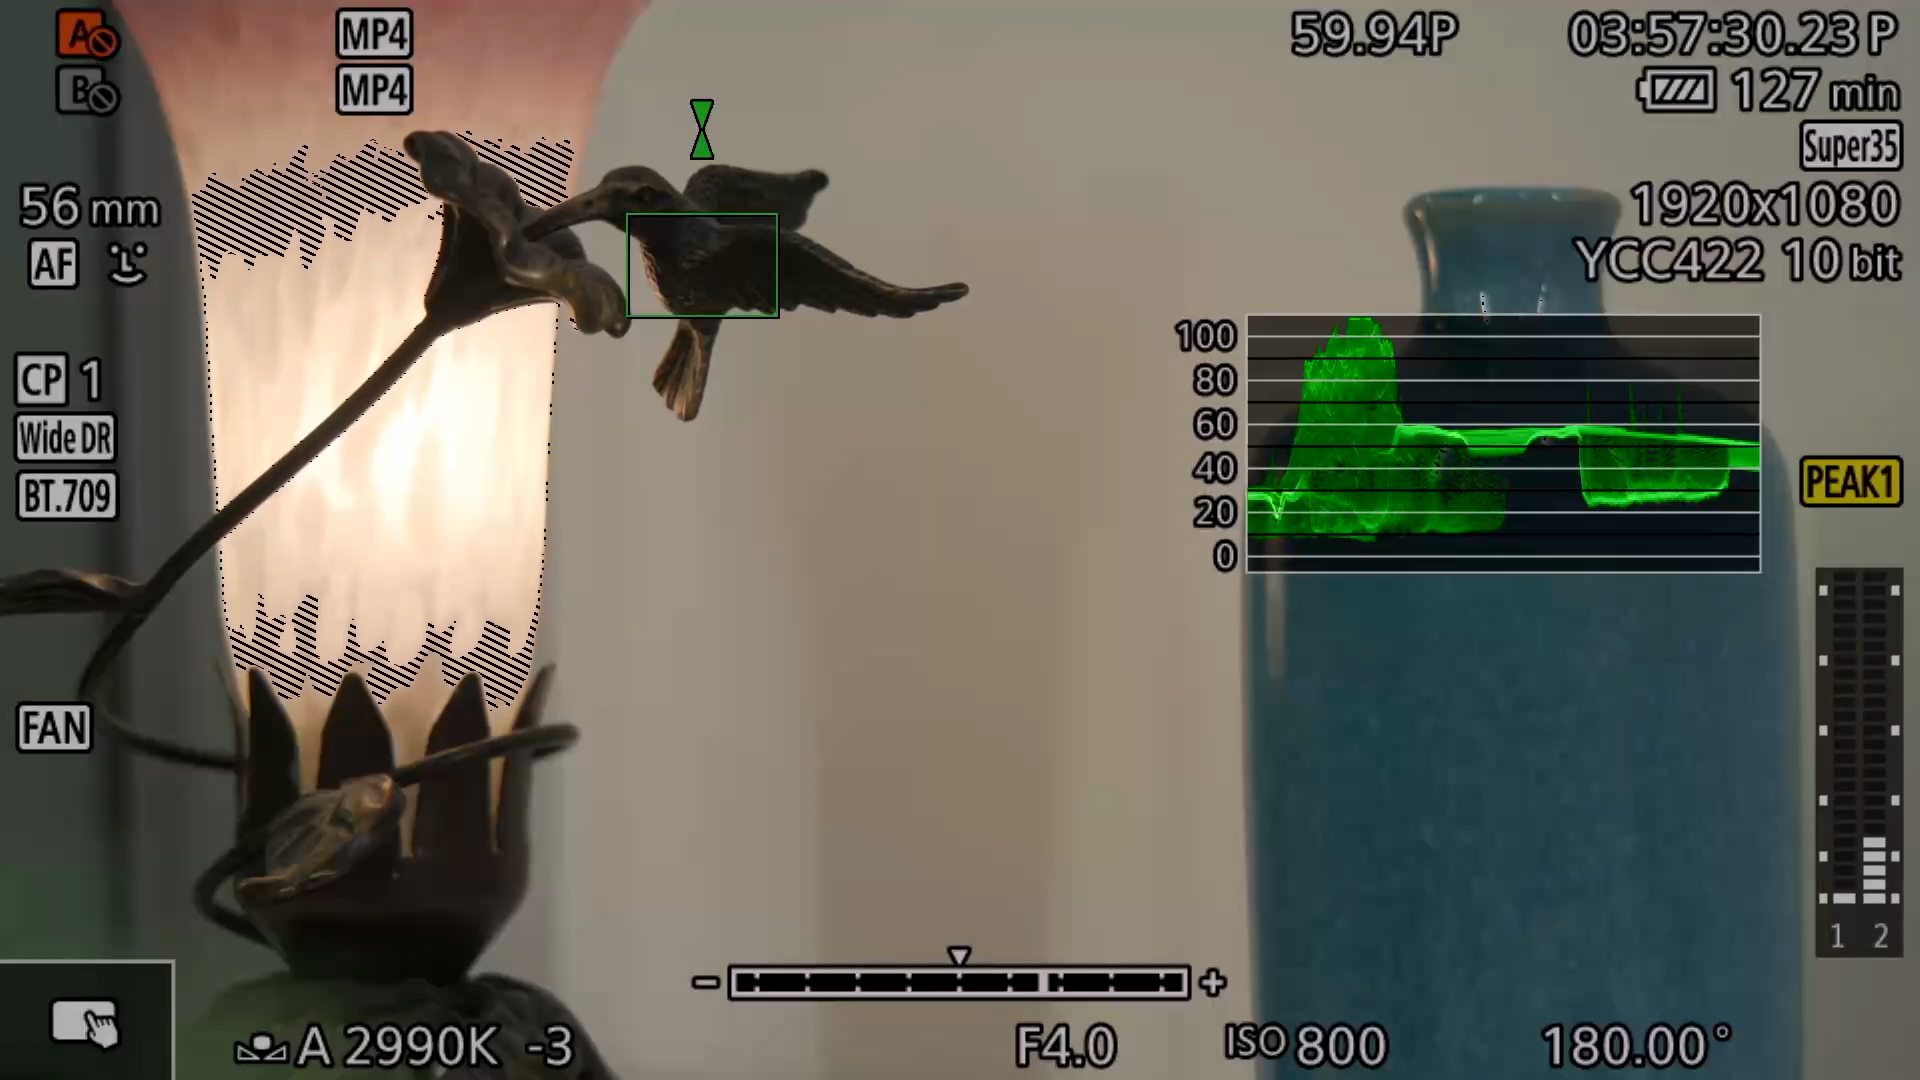
Waveform (0–100 IRE) – This tool involves analyzing image brightness from top to bottom and spatial positioning from left to right. Top represents highlights/whites, bottom represents shadows/blacks, and the horizontal axis matches the image’s horizontal composition, allowing precise exposure control and identification of clipping.
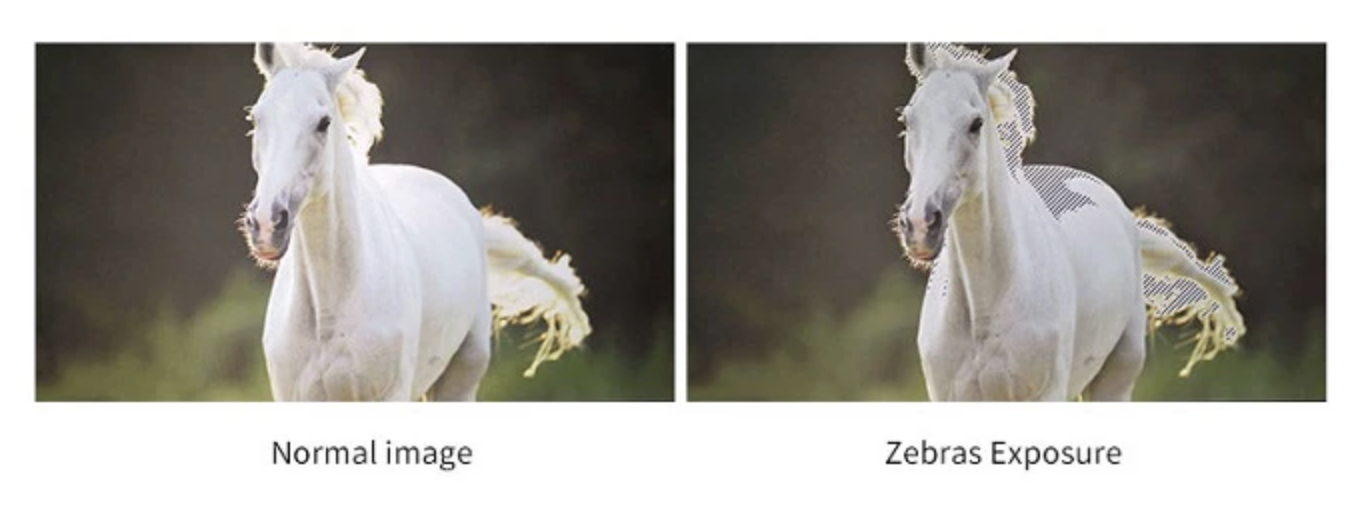
Zebra stripes /pattern is a tool that displays striped, blinking lines over bright areas to warn of overexposure and blown-out highlights. It acts as a visual guide, allowing for adjusting exposure tools (shutter speed, ISO), until stripes disappear. Setting zebra at 70 = zebra pattern appears on an image above 70% brightness. Sensitivities range between 70 and 100. Using the zebra setting at 100, you will see the pattern only when an area of your image is actually overexposed.
False Color is an exposure tool that replaces your image’s natural colors with standardized colors based on the brightness of the scene.
- Red will warn you of overexposed/clipped highlights which means you are losing detail.
- Green stands for middle gray, which is the perfect target for skin tones.
- Blue/Purple show underexposed/crushed shadows, which is when you‘re in danger of introducing noise into the image.
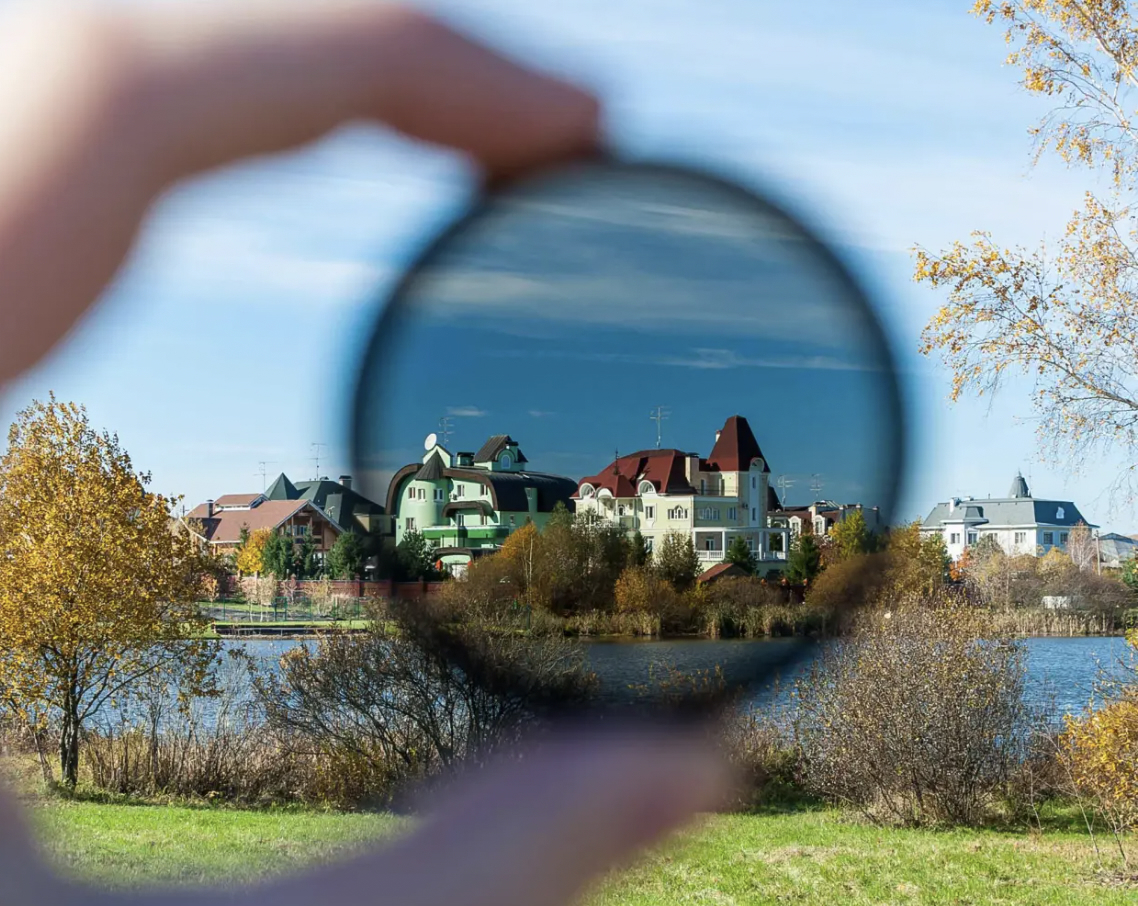
Built-in, motorized Neutral Density (ND) filters are essentially “sunglasses for your camera lens,” reducing the amount of light entering the camera, allowing for wider apertures or slower shutter speeds in bright conditions without altering color. NDs are crucial in creating motion blur in water and clouds + maintaining a shallow depth of field (blurred background) in bright daylight.
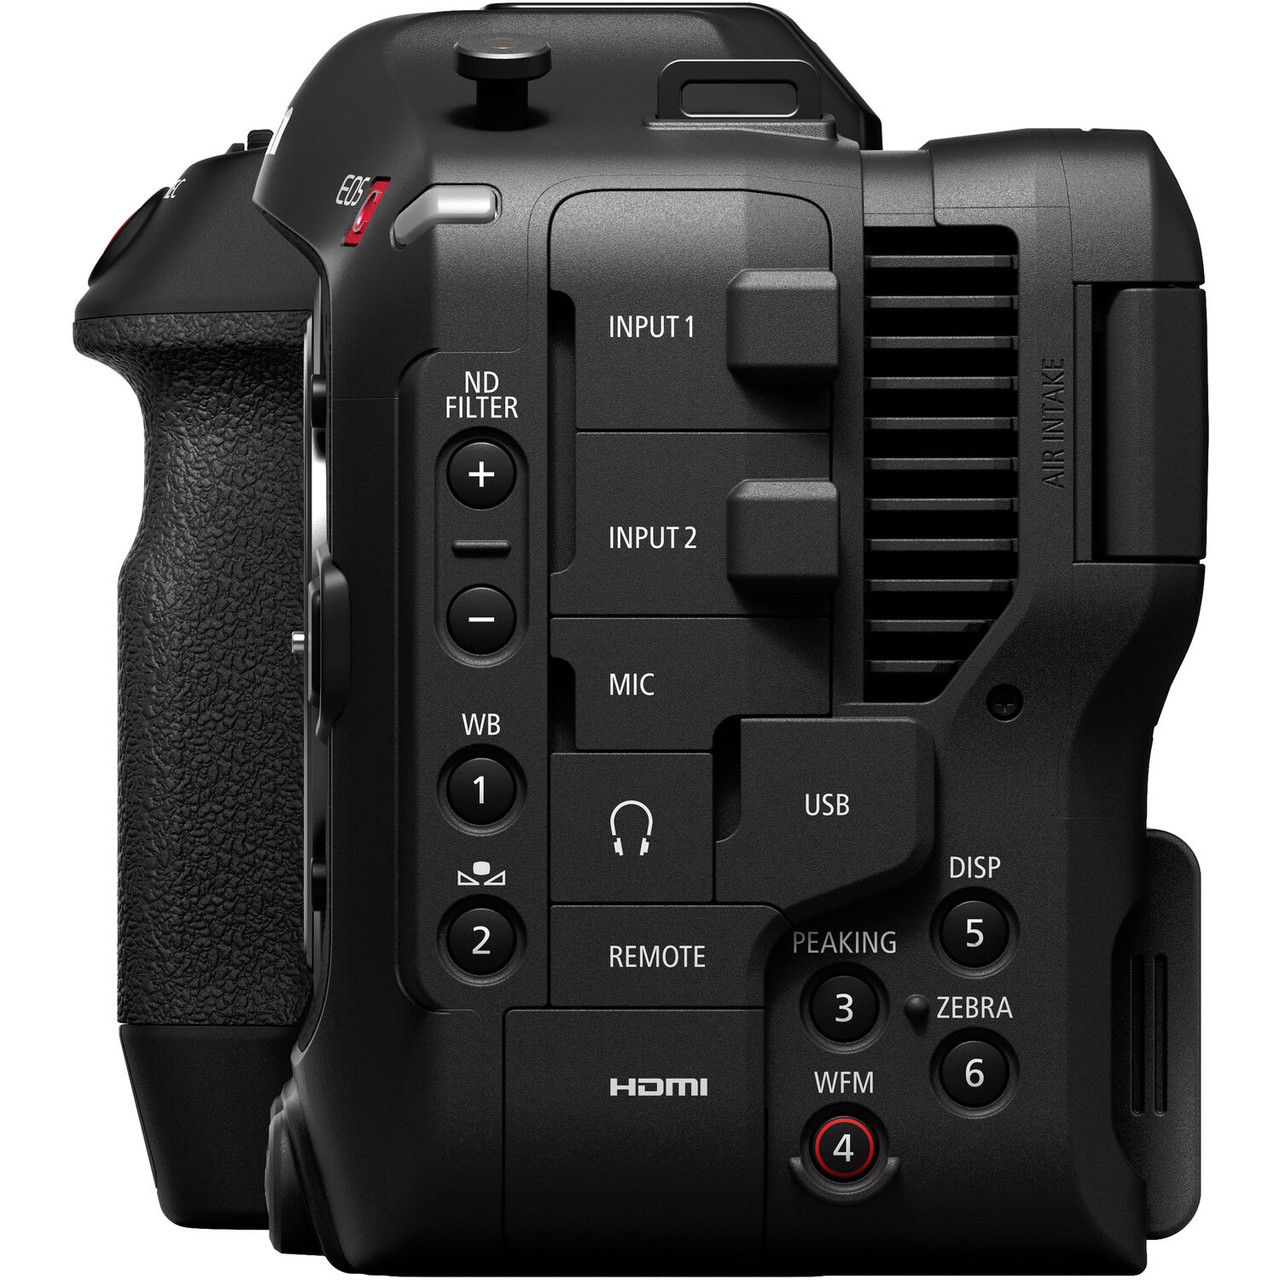
Adjust NDs after engaging the touchscreen or using the ND +/- buttons on the side of the camera. This offers different levels of filtering light – 2, 4, 6 stops of reduction, and extended 8/10 (must be turned on in Menu). Use lower settings (2-4 stops) for overcast days, shade. Use higher settings (6-8 stops) for bright daylight, and extended settings (8-10 stops) for direct sunlight to maintain a wide aperture for shallow depth of field.

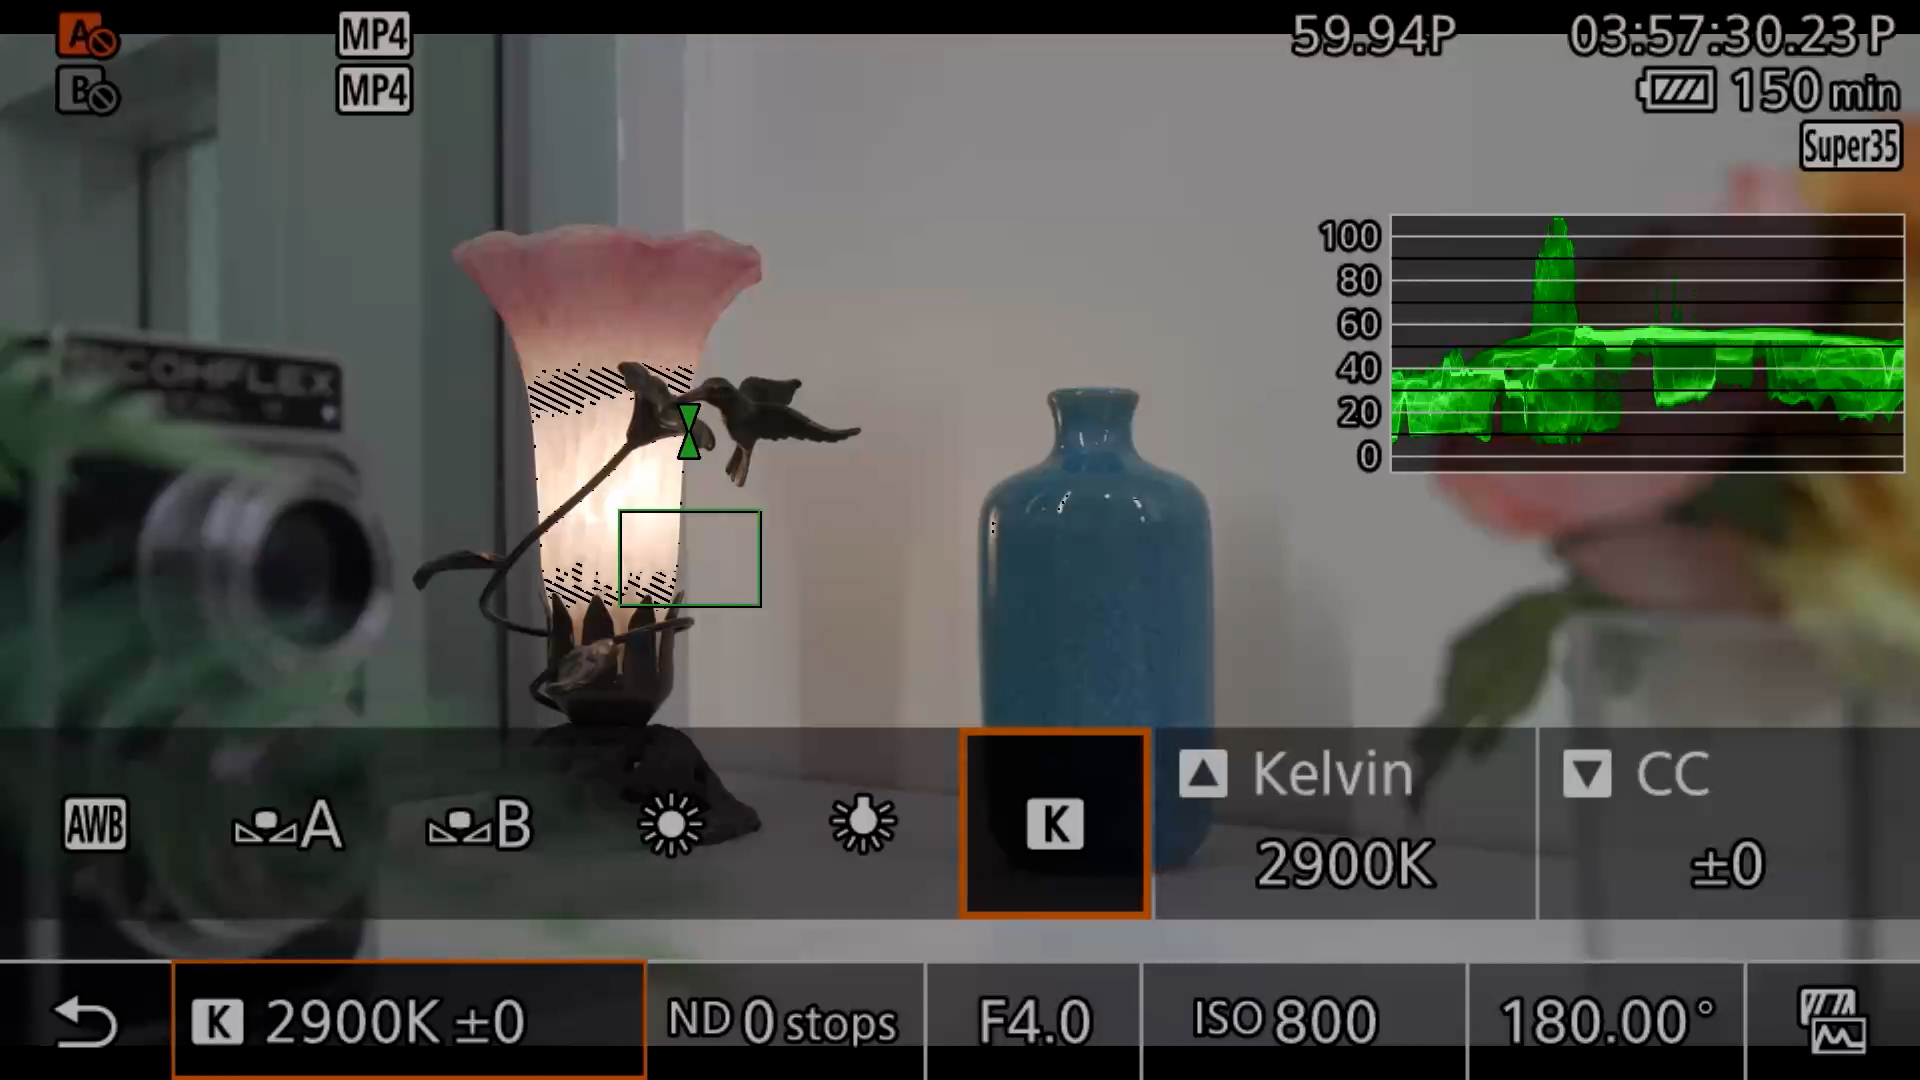
WHITE BALANCE / COLOR TEMPERATURE
White Balance – adjusts image’s color to ensure it appears natural and accurate, compensating for the color temperature of a light source. Is white truly white? Use the touch screen OR the WB (1) button on the left side of the camera body to toggle between white balance settings.
Theses are the options: Auto White Balance (AWB), set a custom preset A/B, tungsten /Warm – (3200 Kelvin), daylight / cool – (5600 Kelvin), or manual kelvin.
Use a gray card or white paper to set a Custom WB.
- Fill the frame with a gray card (for more accuracy) or white paper,
- Select Custom WB A/B under white balance settings
- Hold the (2) preset WB button below the WB button on the side until the A or B preset option stops blinking.
*Avoid using the Auto White Balance (AWB) setting. You will see the color shift with camera movement, which could be jarring to viewers.
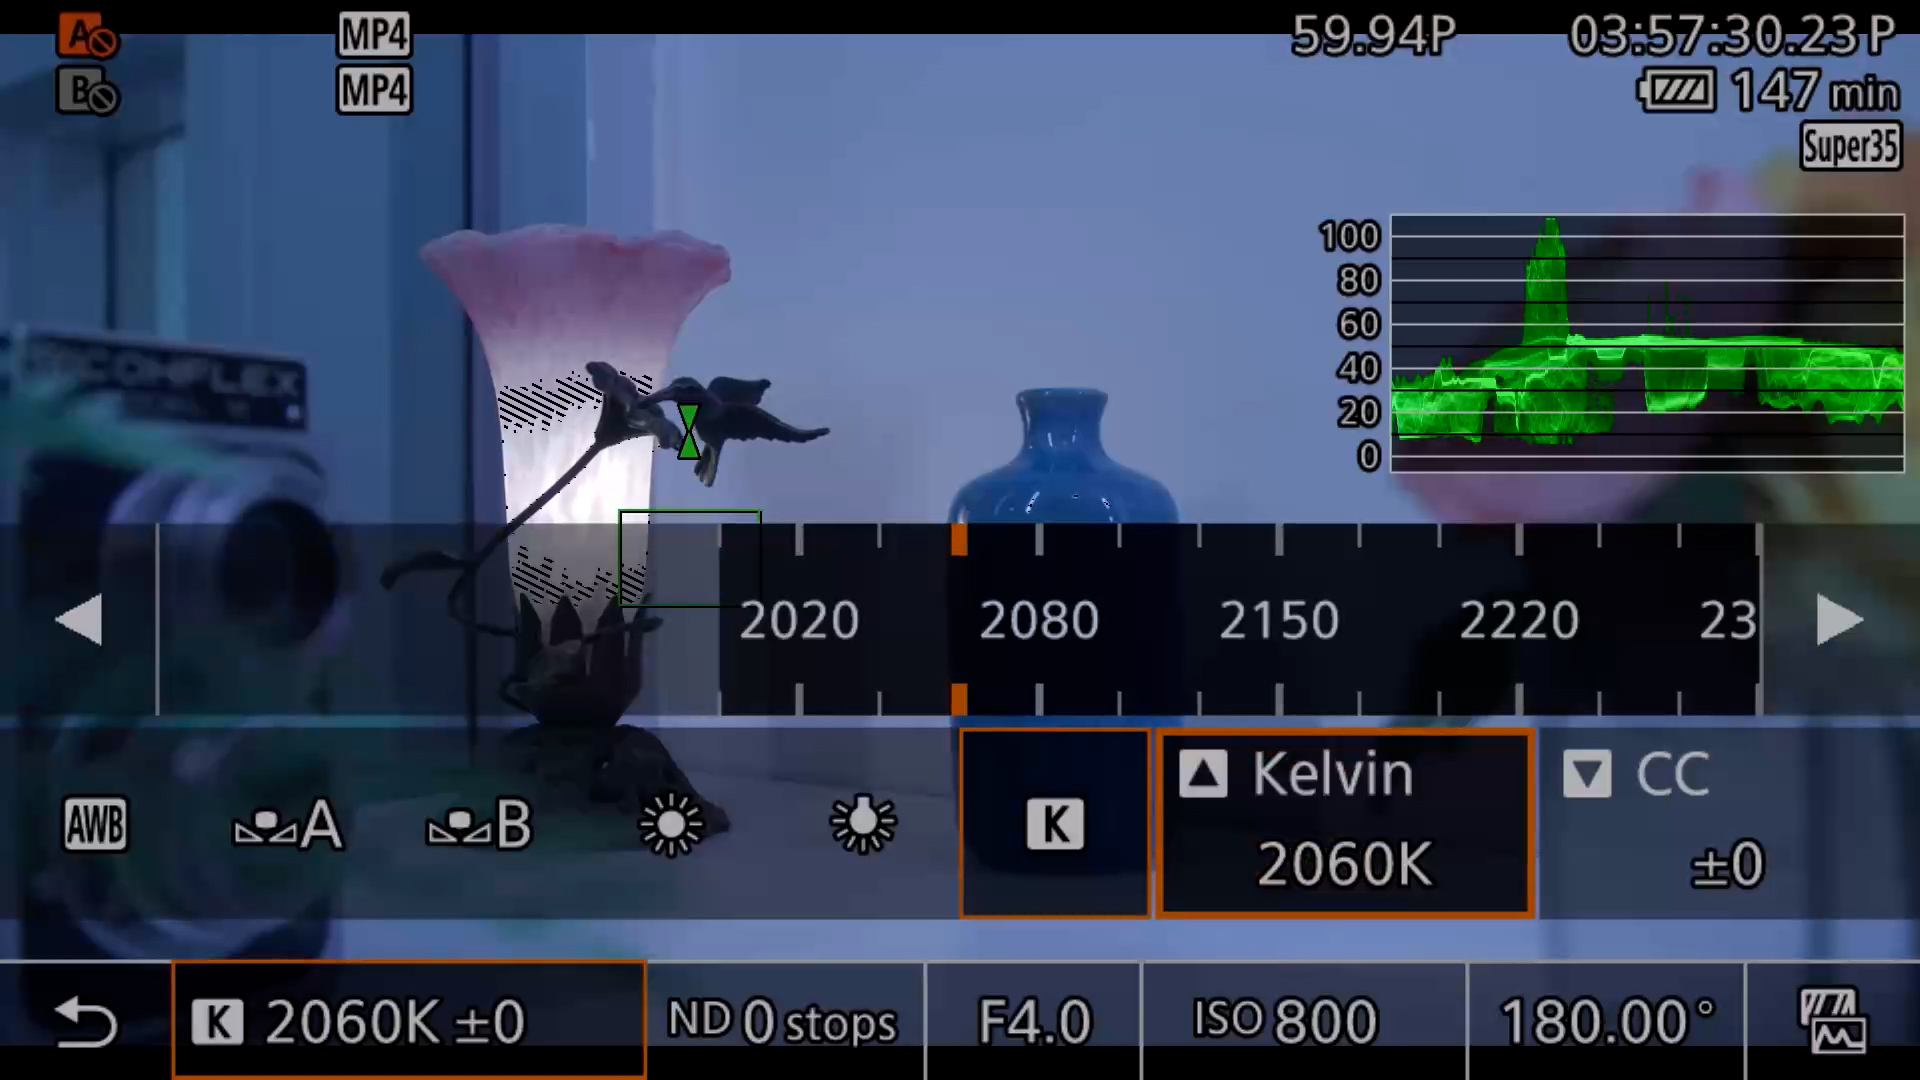
If using the manual Kelvin WB setting, select numbers based off the lighting in the space. Kelvin (K), a measurement of white balance, is a manual camera setting that measures the color temperature of light, allowing for precisely controlling image warmth, ranging from 2500K (warm/yellow, sunrise) to 9000K (cool/blue, shade).
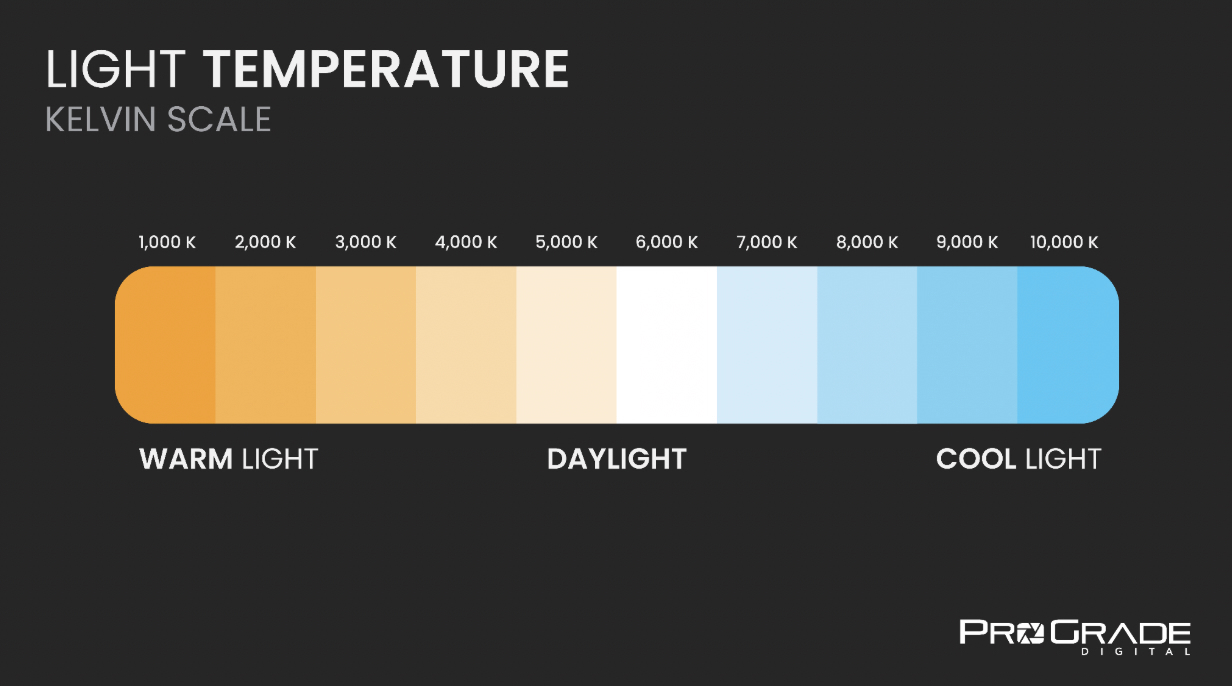
Here’s how different Kelvin values affect the color of light: Credit: ProGrade Digital
- 1,800 K (Candlelight): Warm, intimate, and cozy.
- 2,500 – 3,000 K (Sunset or Incandescent Bulbs): Warm, inviting, and yellowish.
- 4,000 – 5,000 K (Fluorescent Bulbs): Cool, bluish-white light.
- 5,500 – 6,000 K (Midday Sunlight): Neutral and balanced, bright white.
- 7,000 – 9,000 K (Shade or Overcast Sky): Cool and slightly bluish.
- 10,000 K (Clear Blue Sky): Very cool, bluish tones.
FOCUS
Focus is important, don’t just rely on your eyes. Flip the switch on the lens to choose between Auto Focus (AF) & Manual Focus (MF).
Manual Focus (MF) will allow you full manual control using camera lens focus rings.
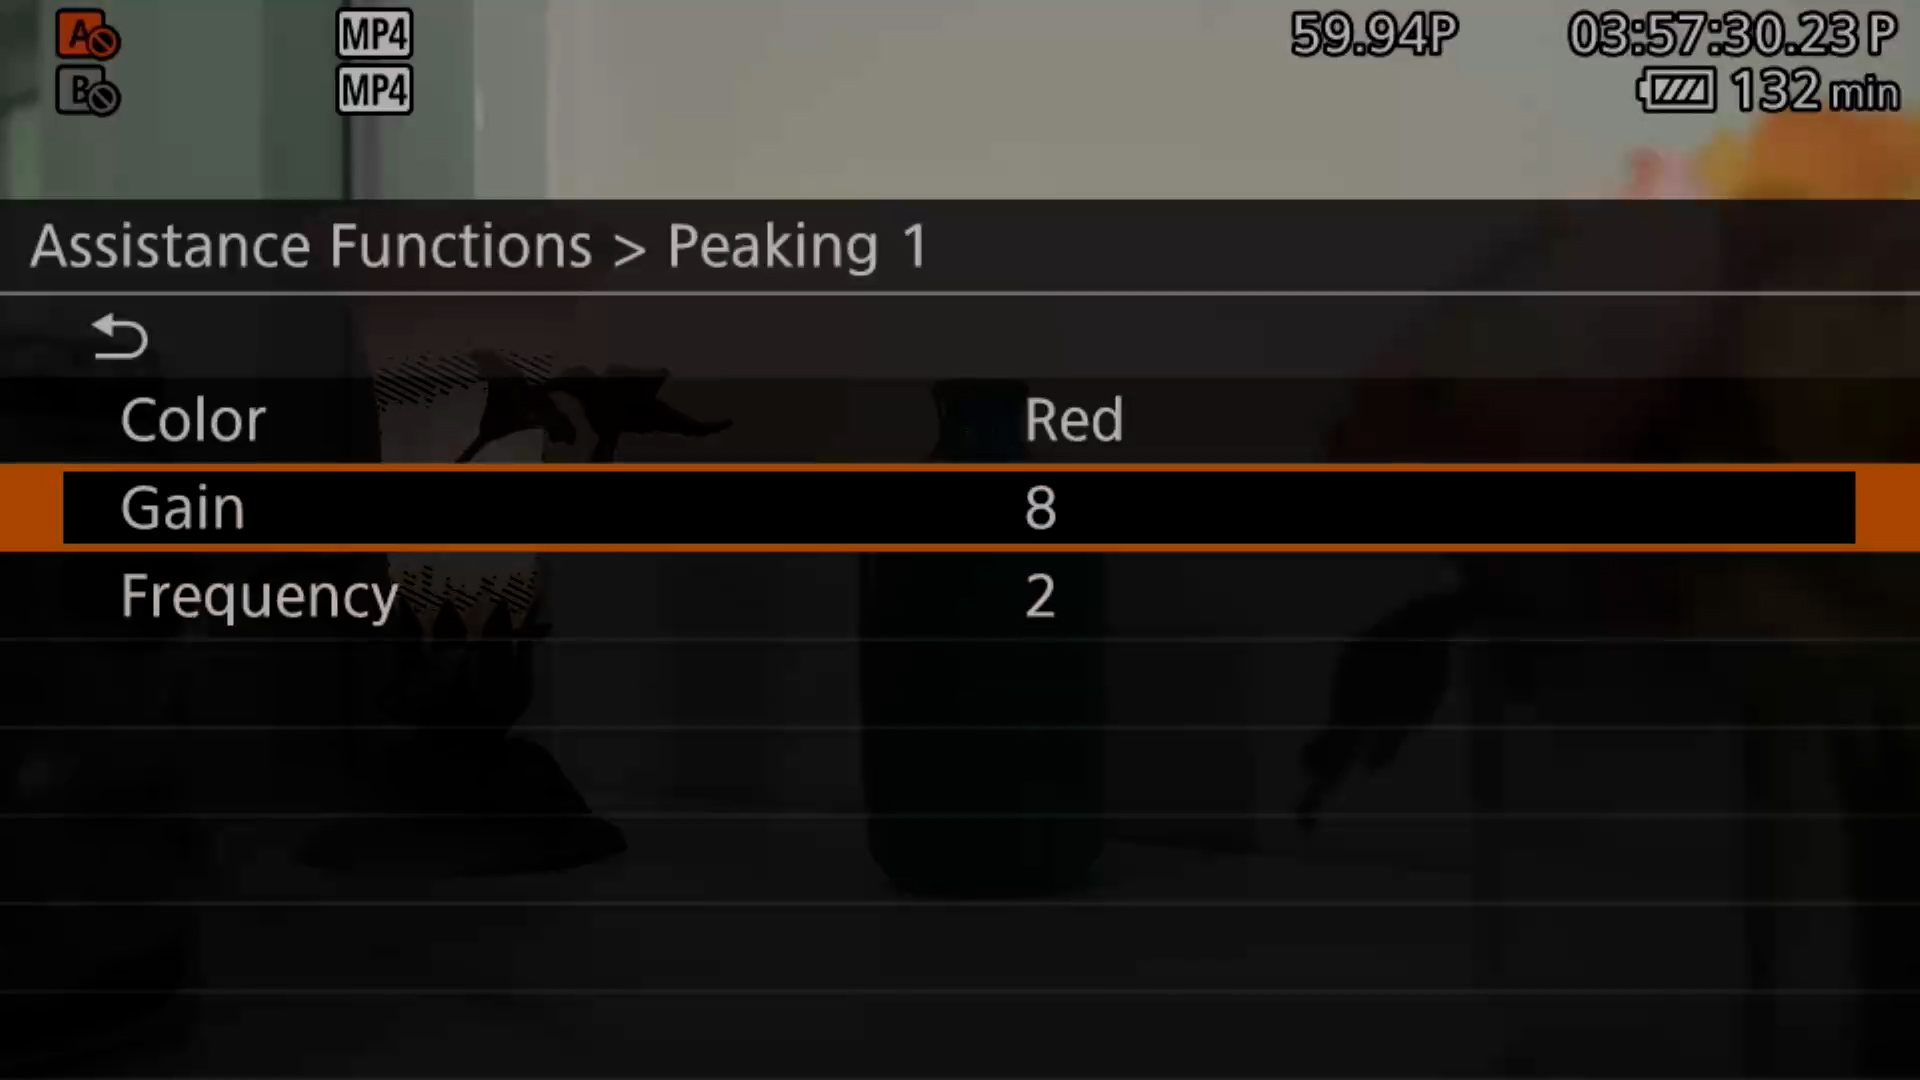
Use the Peaking focus tool to outline what is in focus in red (or another color). *Set to LOW, not high, to give you the best chance of crisp focus.
To “Zoom in” to dial in focus, select the ‘MAGN’ (8) button next to the C70’s monitor to magnify the LCD screen.
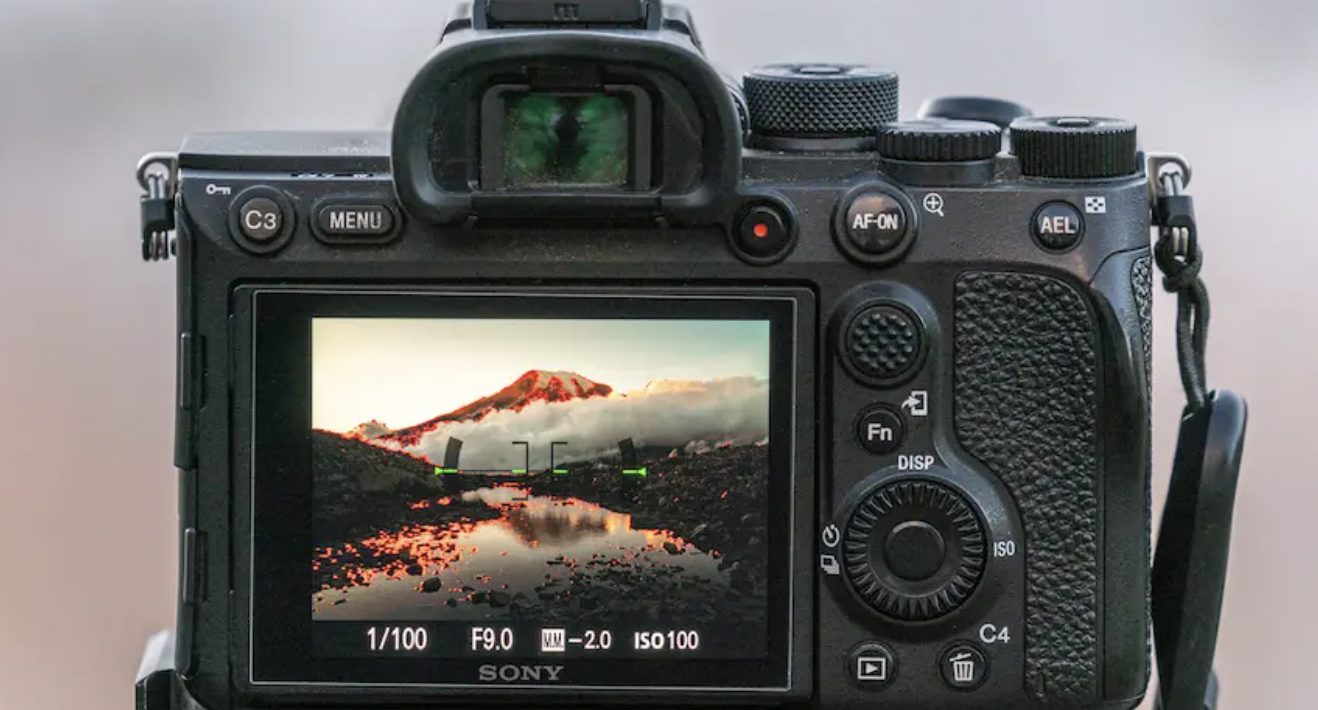
Utilize the Focus Guide for manually focusing within a box when two triangles come together and turn green when in focus.
*Tap LCD screen to pinpoint focus on subject
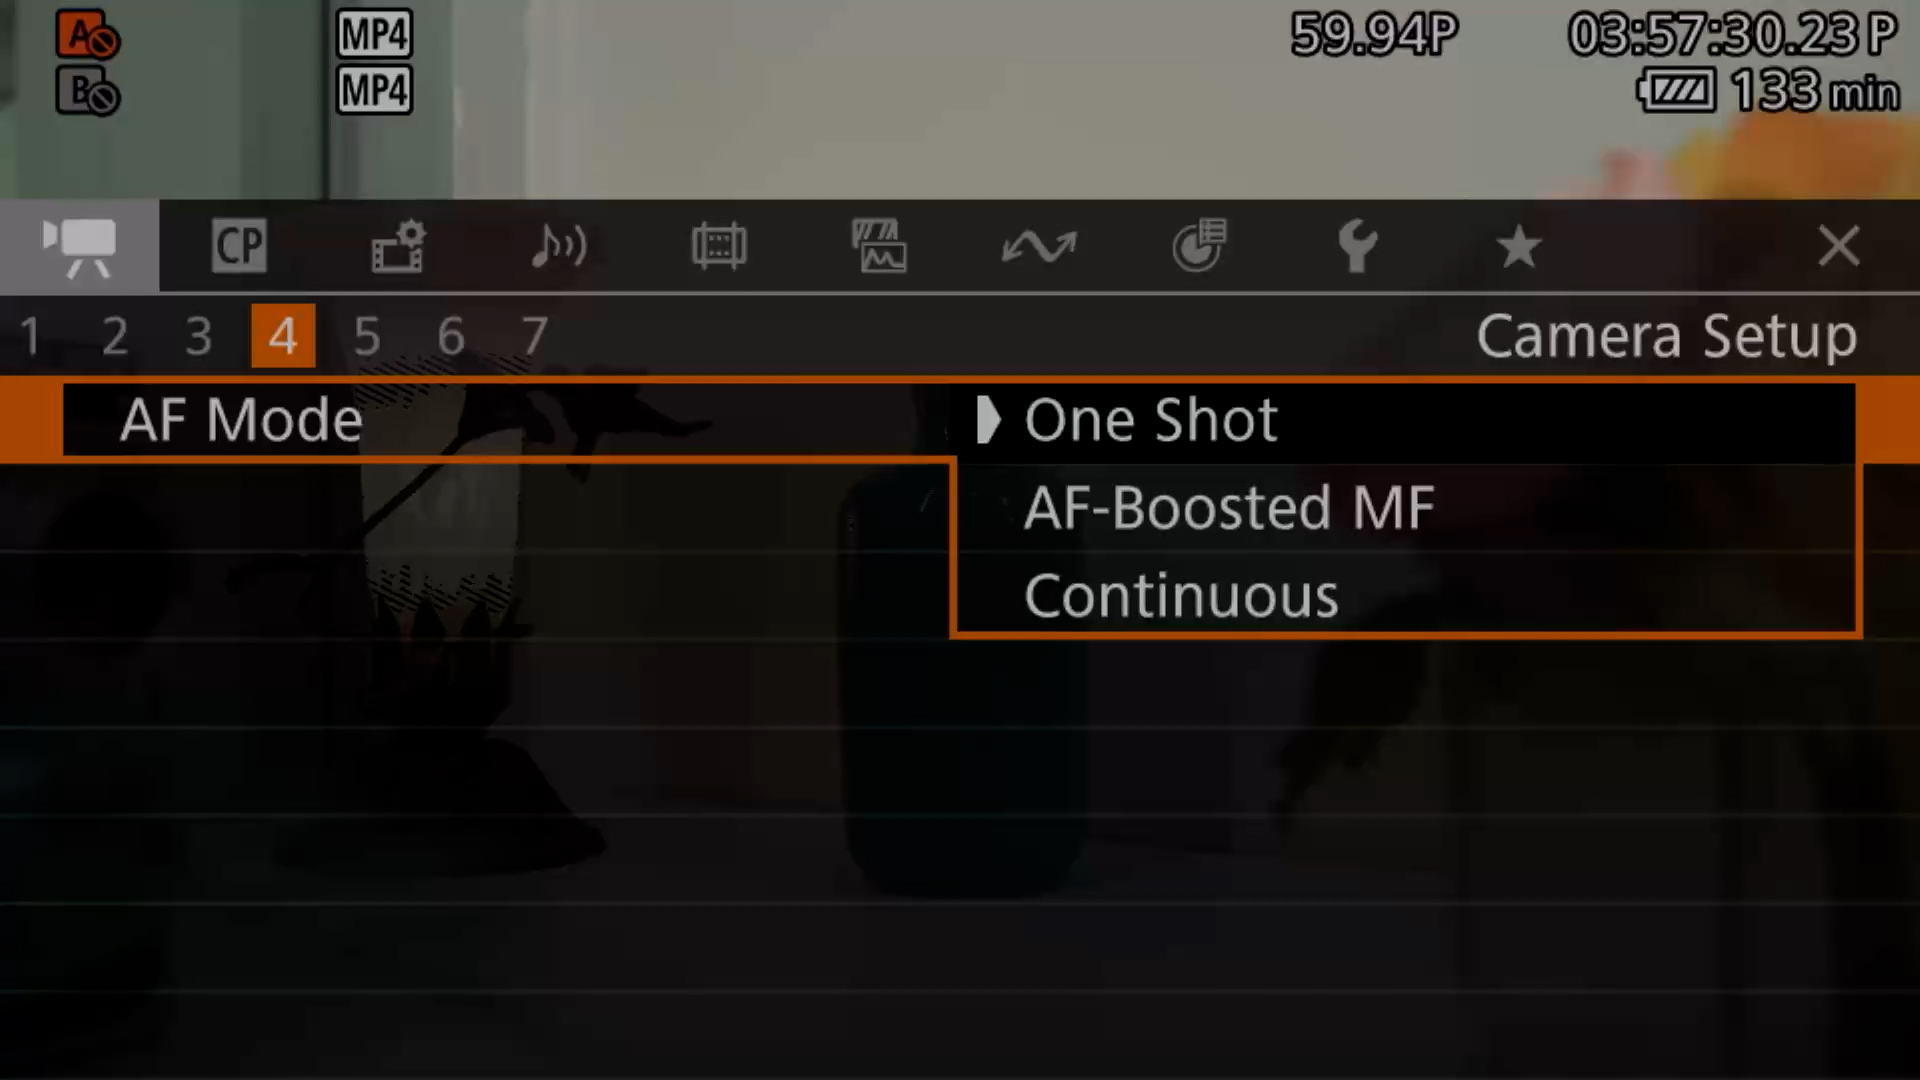
If using Auto Focus, explore the following options: – MENU > CAMERA SETUP > Page 4. > AF MODE
- One Shot – Performs quick autofocus adjustment when initiated.
- AF-Boosted MF – Uses Auto Focus to assist w/ focusing manually.
- Continuous – Automatic focusing throughout shot.
Dual Pixel Autofocus (DPAF) + Face Tracking – Covers 80% of image area and recognizes subjects, to maintain focus on the eyes and face. Subject Tracking can be activated via a custom button or tapping on the screen. [MENU > CAMERA SETUP > Pg. 5 > Face Det. & Tracking (ON)]