Okay, you’ve invested in an external hard drive for storing and organizing your projects and media. If you haven’t, you should. Popular Mechanics put together a great list.
Now, to make this drive compatible with your laptop and other computers, take the following steps: *Note: this process will erase all data and create a clean slate! This should only be done on a new external hard drive or to repurpose an older one.
Formatting an External Hard drive on a Mac
Using a Mac, plug your external hard drive into the computer and open ‘Disk Utility’ application.
- On the left, select the drive under the ‘External’ section. To the right, you will see the storage in gigabytes or terabytes and how much storage is being used.
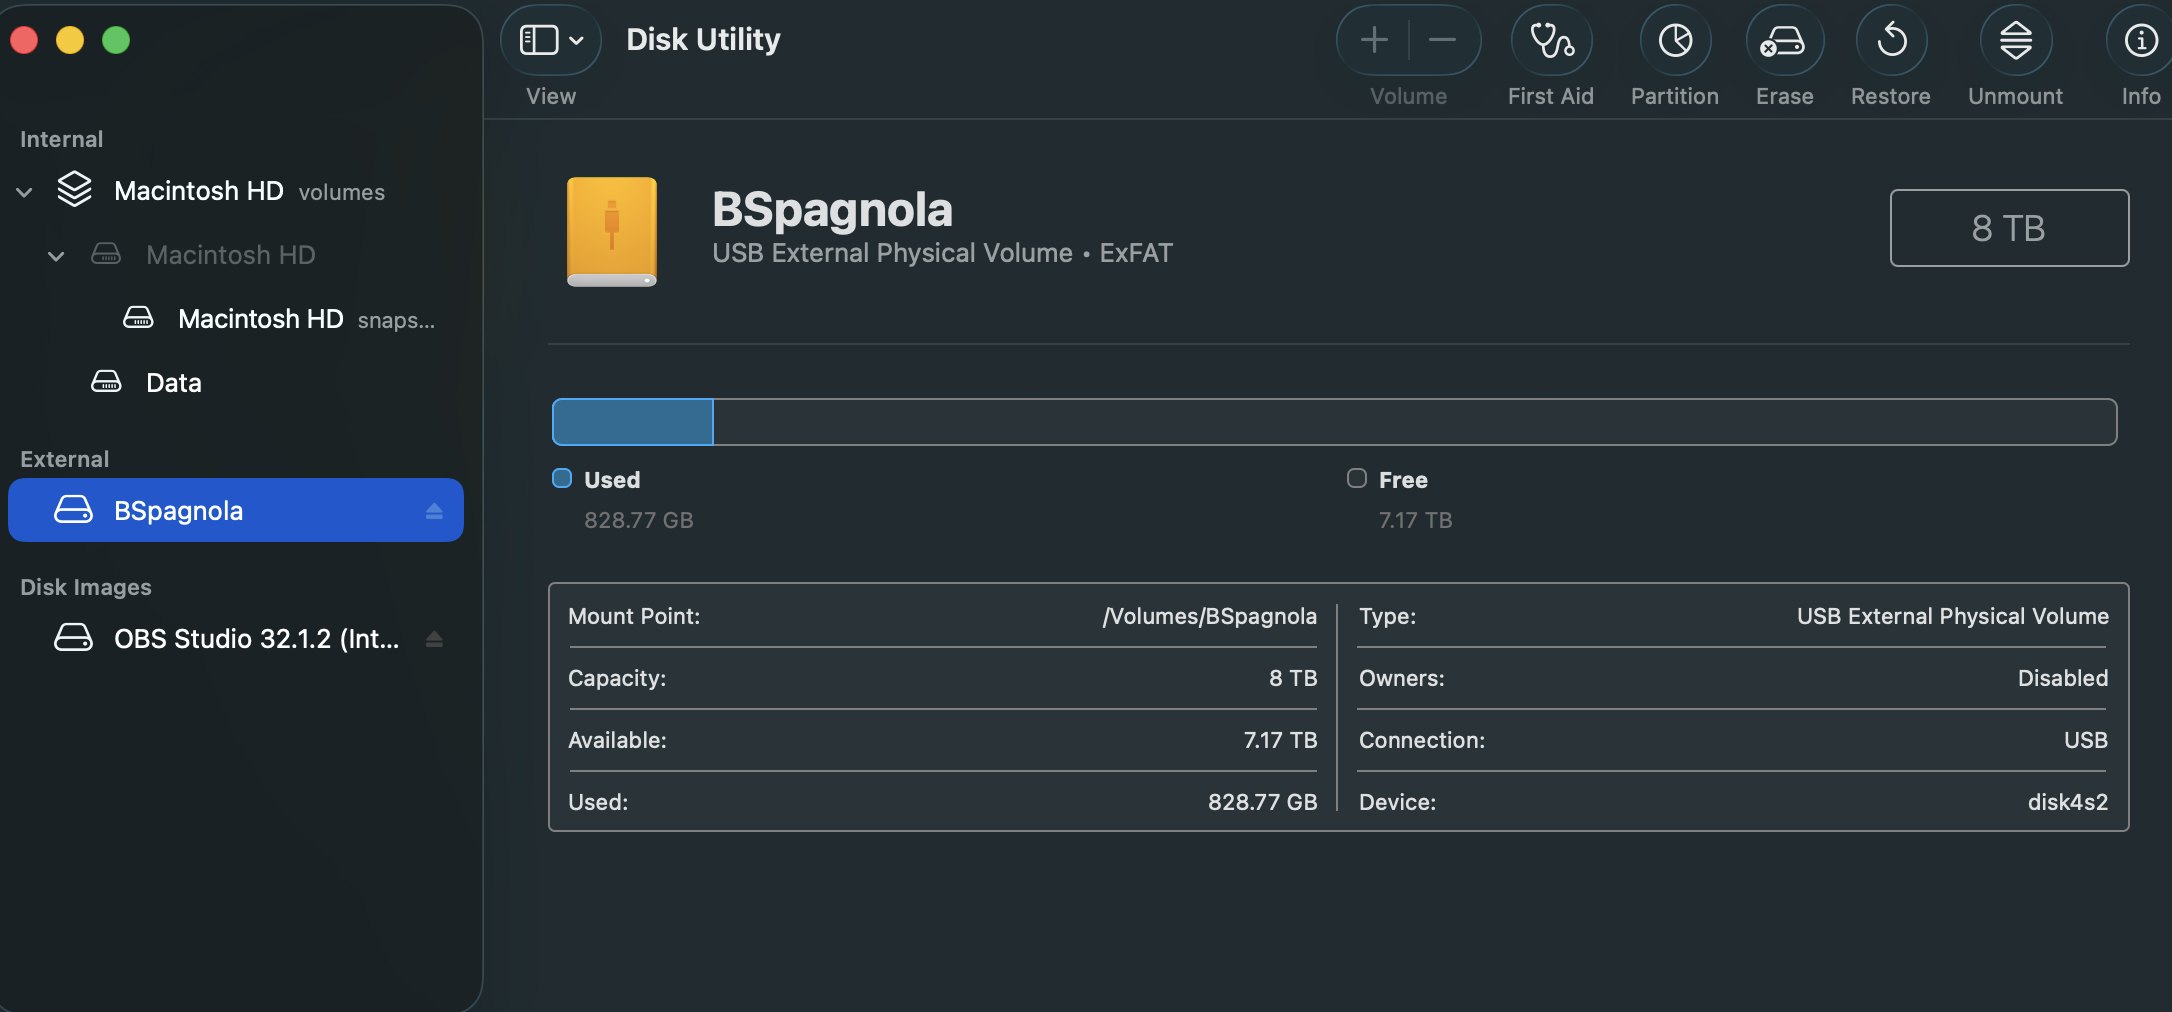
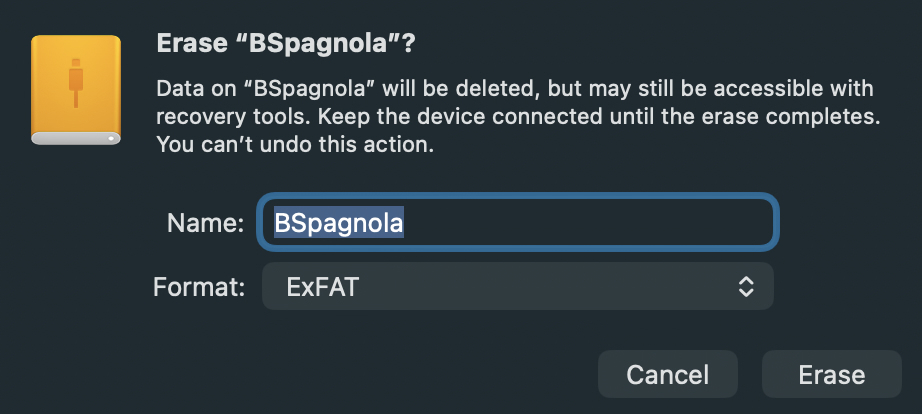
2. At the top right, select ‘Erase’ and in the window pop up:
-
- Create a name for the external drive (ie. LastName)
-
- Set the format to ExFat to make your external hard drive compatible with both PC and Mac. Other options will create encryptions and make compatible for only Mac or only PC. This is a problem when you work in groups and others have a different type of computer system.
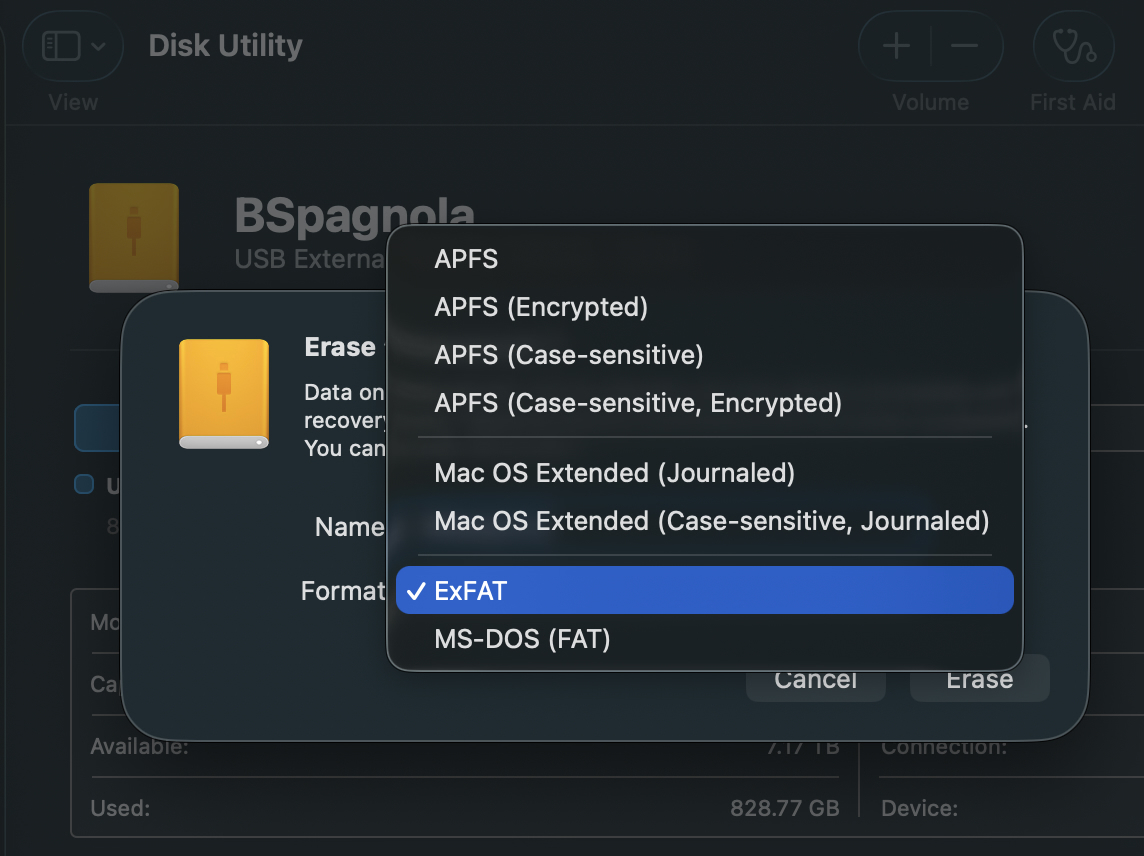
You only need to follow these steps once and then you will be able to drop media onto the external hard drive and create folders, etc.
**It’s important to ALWAYS safely EJECT your external hard drive before physically unplugging from your computer each time. To do this, drag the external hard drive icon from your desktop to the trash bin at the bottom, or right-click drive and select Eject.
Pro Tip: Back-up your media in more than one spot. Utilize a cloud service, or buy a second external hard drive to keep at home and not with you.
Formatting an External Hard drive on a PC
- Connect the new external hard drive.
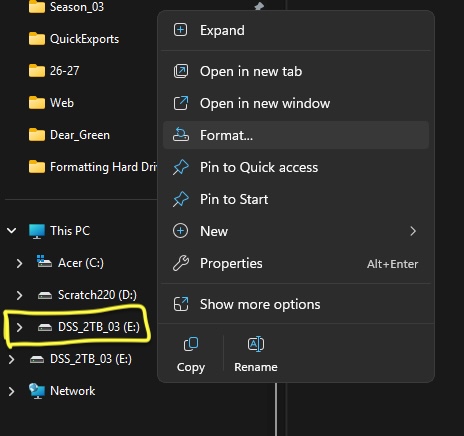
- Open file browser and in the lower left, right-click on external hard drive and select ‘Format’
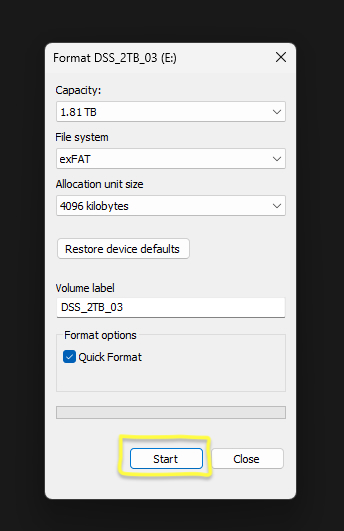
- File System: ExFat to be able to use with both Windows PCs and macOS
- Name your hard drive (ie. lastname)
- Select quick format + now the drive will be ready to use