Learn How to Use Sony Ci Media Cloud
Sony Ci is a media collaboration and cloud workflow platform, supporting media review, storage, file sharing, and production collaboration. Transitioning from using Frame.io, Sony Ci is another way for professors, staff and students to interact with media. For more, visit Cimediacloud.com.
Access
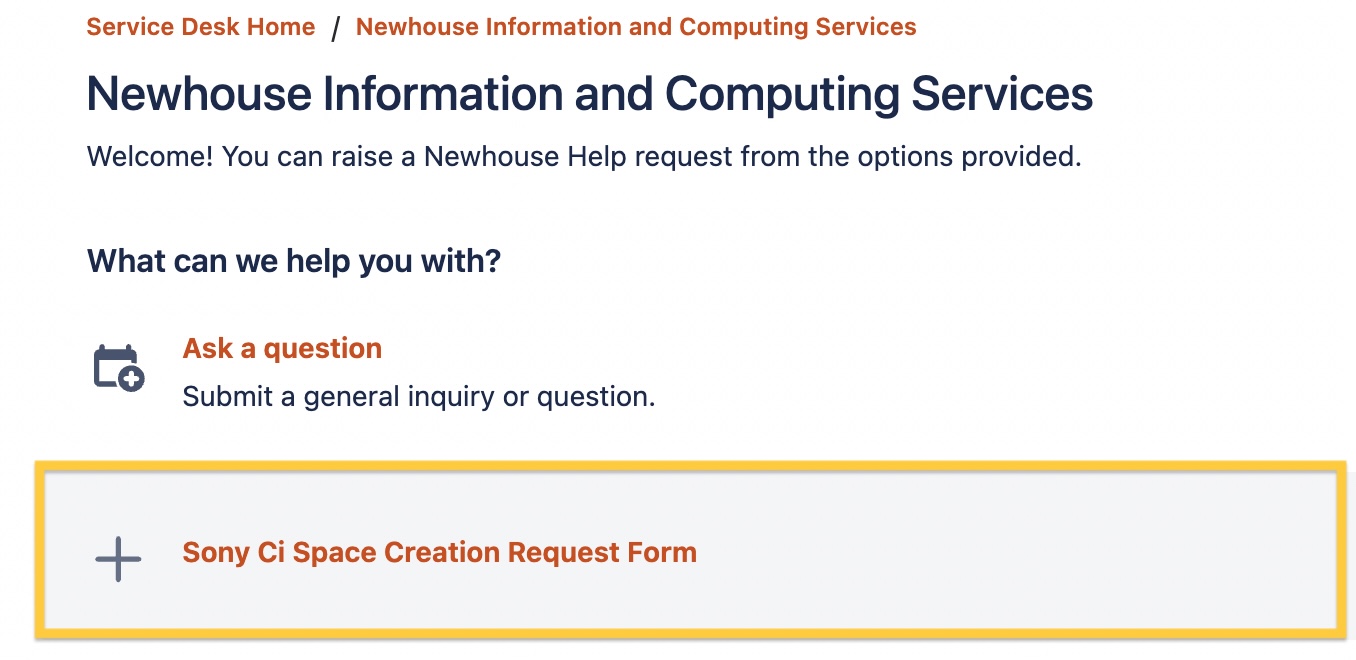
Faculty and staff must request access through Newhouse Information & Computing Services including enough detail for NICS to identify the correct workspace, permissions, and needs. To request access: visit https://support.atlassian.syr.edu/servicedesk/customer/portal/193, and select ‘ + Sony Ci Space Creation Request Form.’
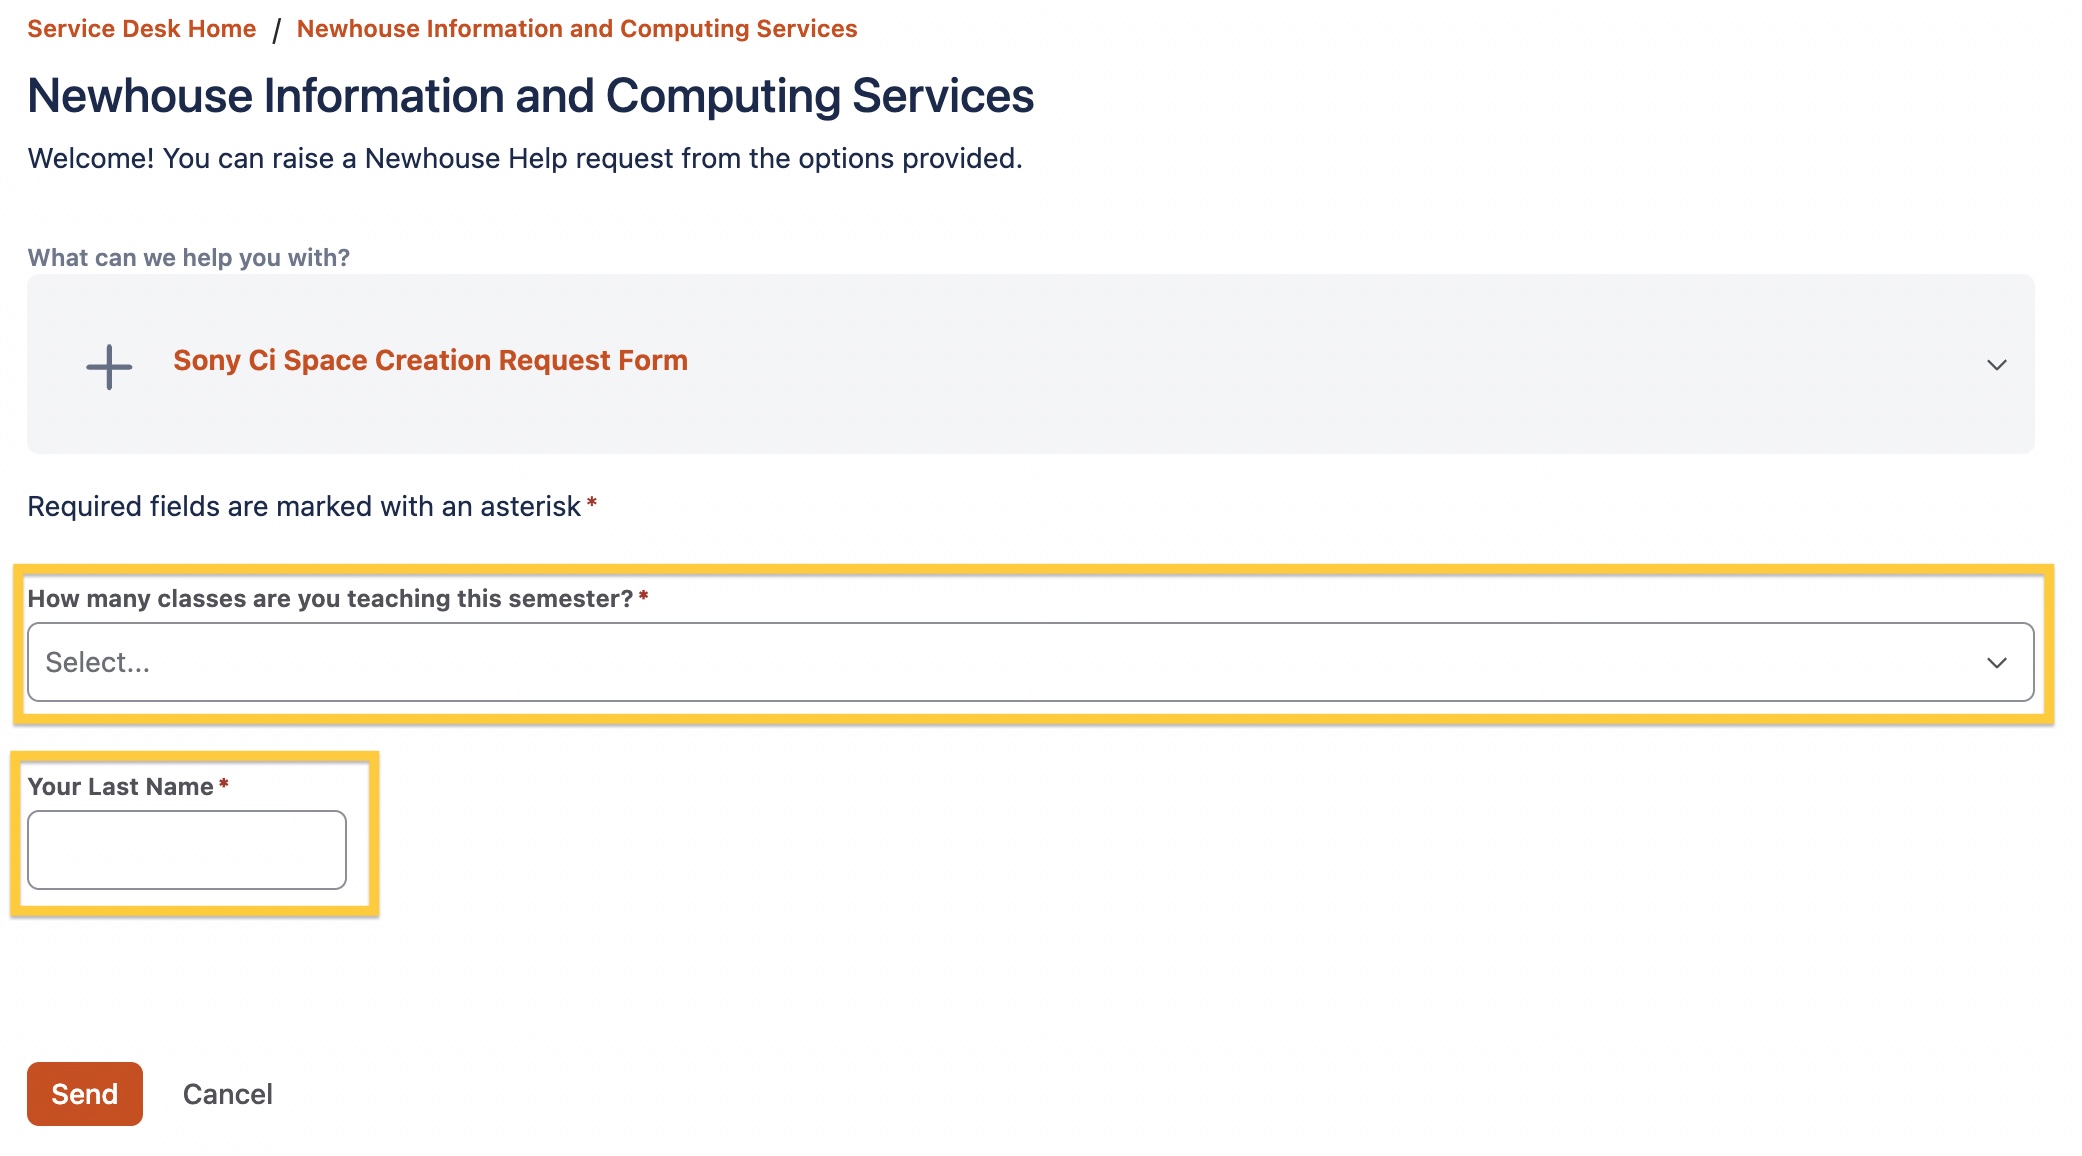
Fill out the form with the number of classes you are teaching this semester and last name.
Next Steps: After Submitting Request
The NICS team will review your request, confirm the appropriate workspace, and either add you to an existing environment or help coordinate the creation of a new one. You may receive follow-up questions or setup instructions, and an invitation once access has been granted.
Signing into Sony Ci
Visit newhouse.cimediacloud.com to sign in using your personalized Newhouse workspace.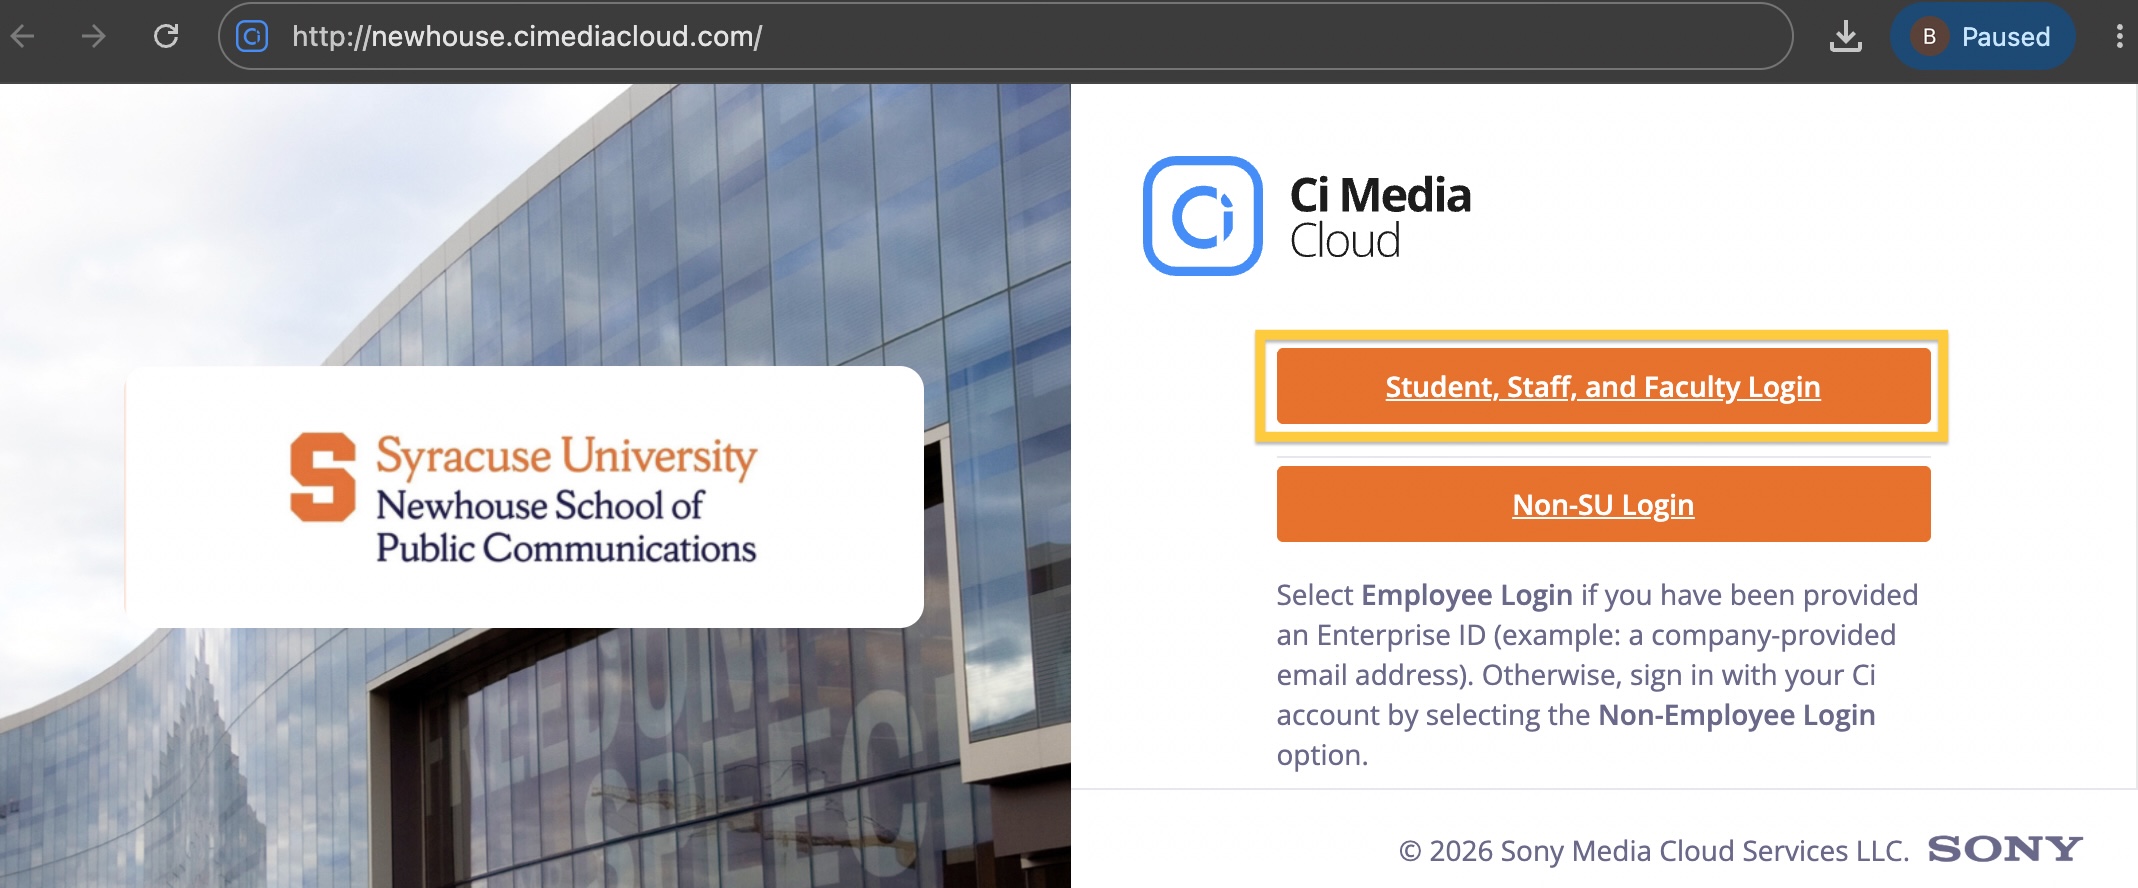
Touring Sony Ci
The Dashboard – “Home Base”
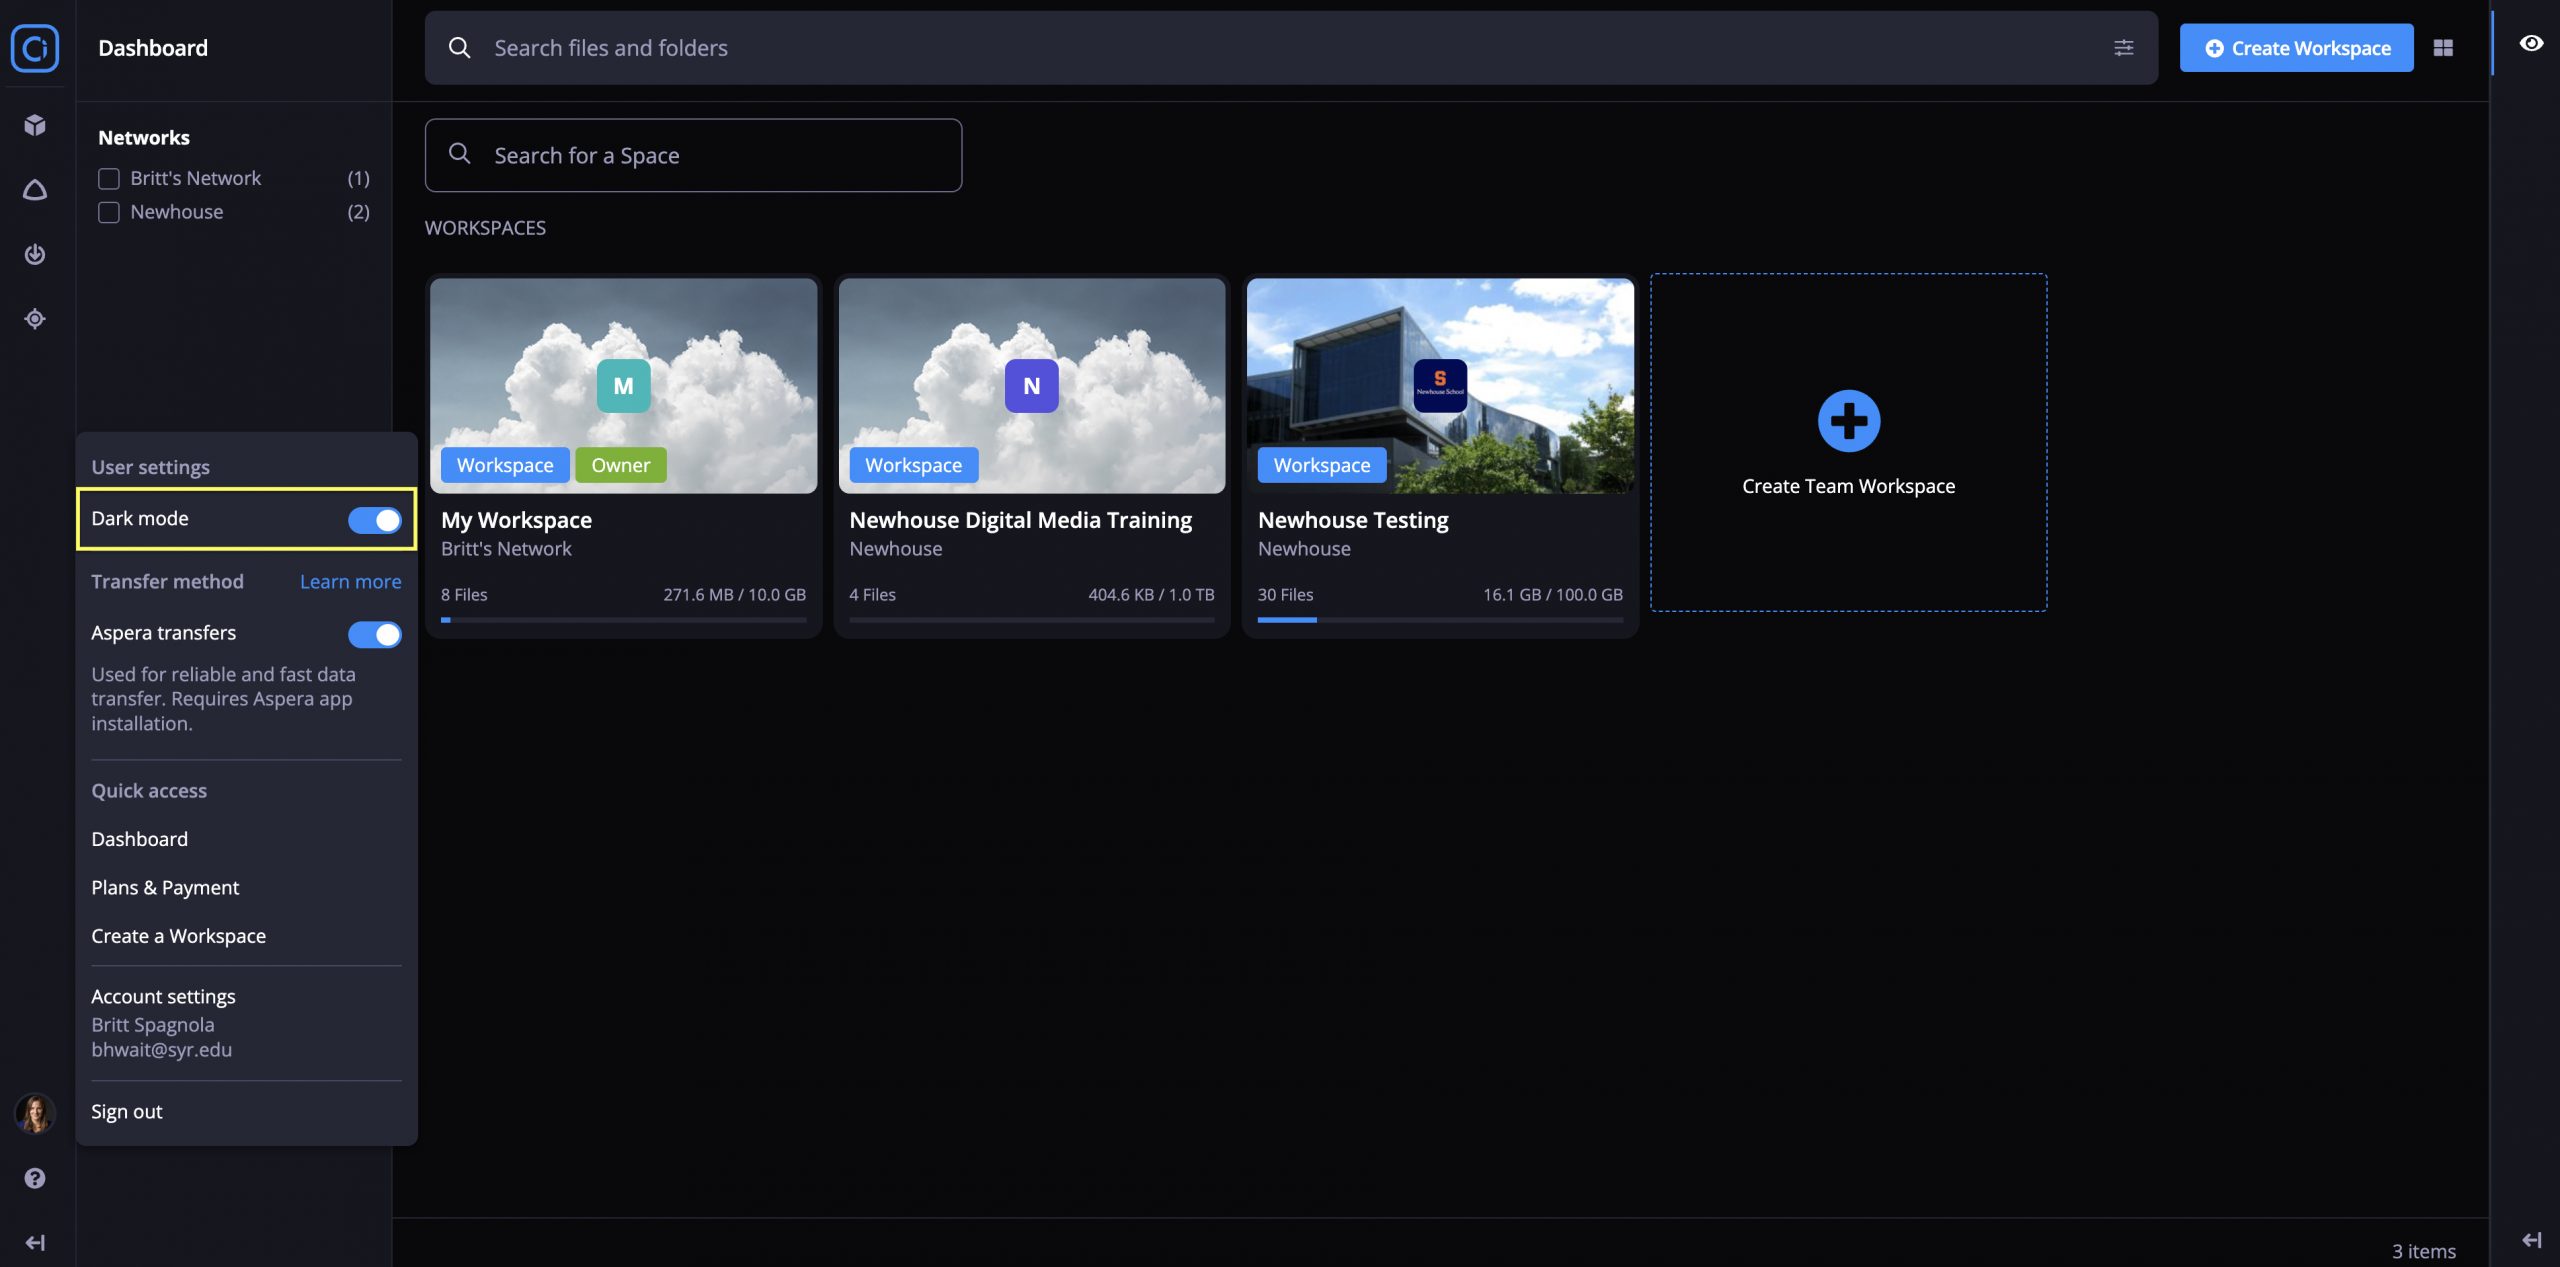
After logging into Ci, you will be brought to your Dashboard, containing workspaces (center), Activity Stream (right), navigation area (left) & search bar (top).
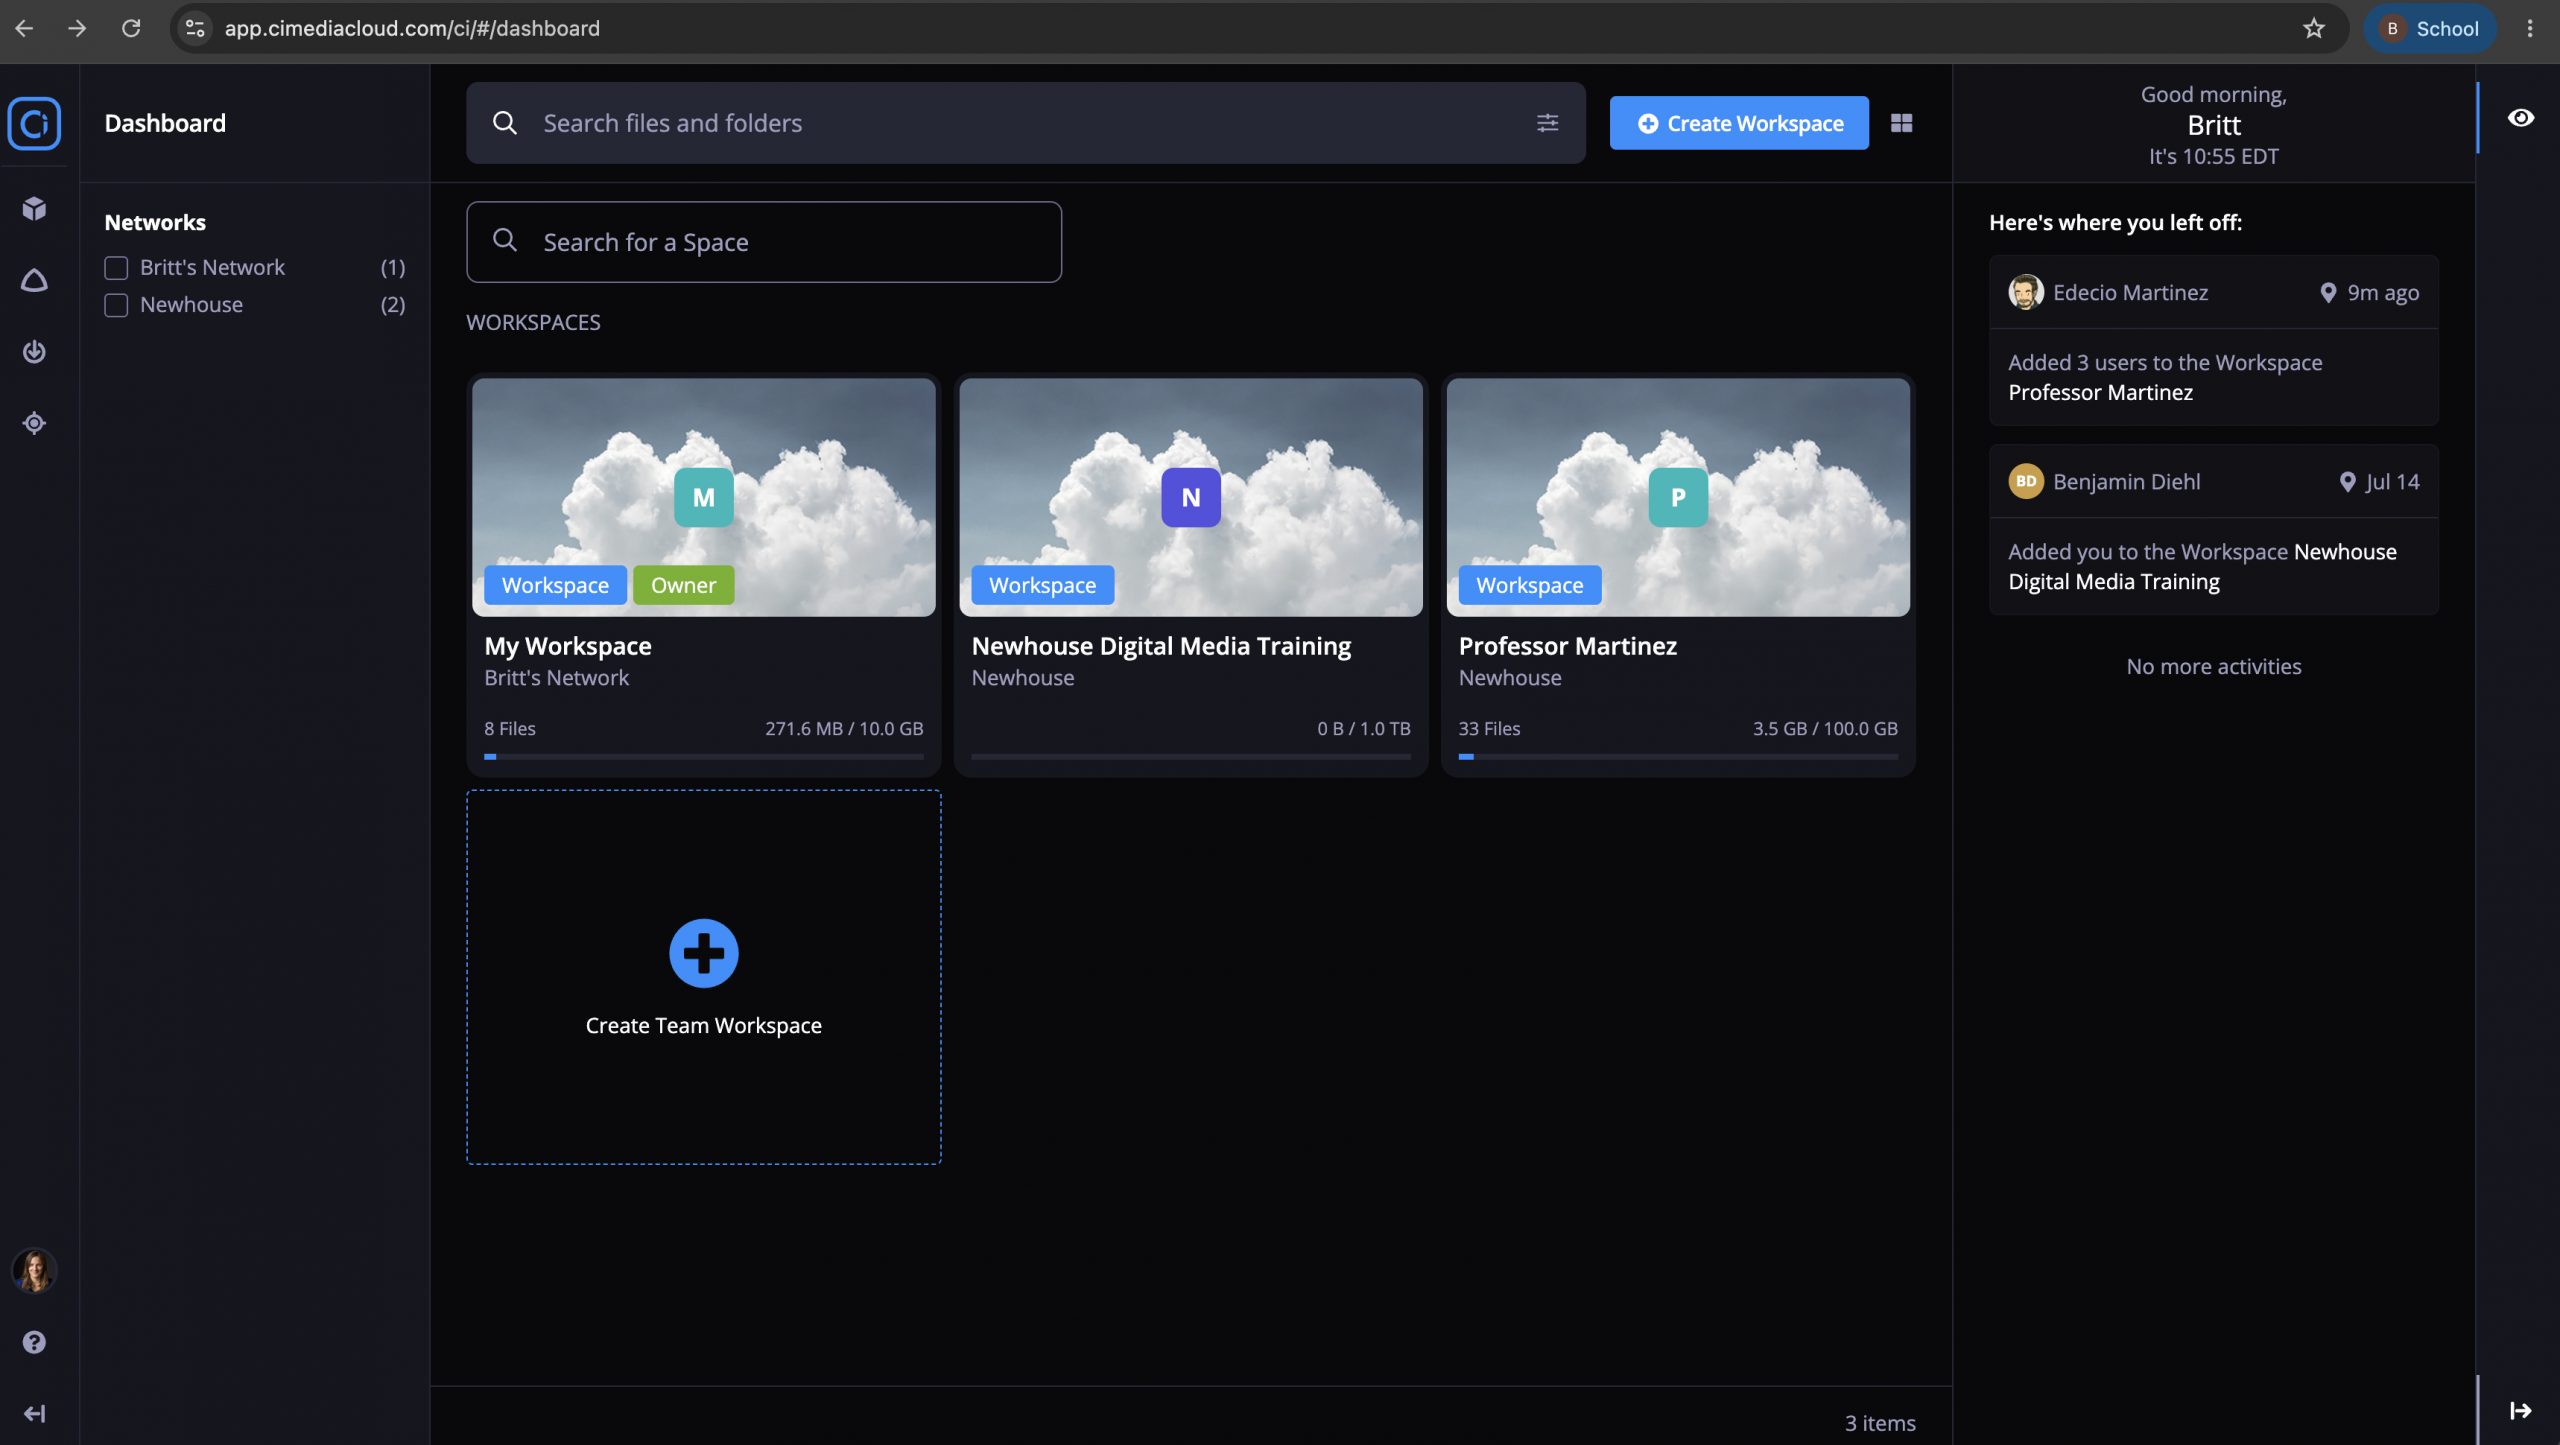
Workspaces are Ci’s core container (equivalent to Frame.io’s Projects) = folders shared through MediaBoxes to allow reviewing of media / assignments, etc.
- Once you gain access to your workspace, organize it by course, section, semester, etc.
- You will see workspaces you own vs. shared (added as a collaborator)
- Set your workspace settings: who has access, sharing defaults (showing comments set as default)
- Set the workspace view: list, thumbnail icons, grid style. And you can sort and filter as needed.
- Uploading media right to your workspace, but I woud recomend first creating a folder structure to stay organized.
Activity Stream / Notifications (right)
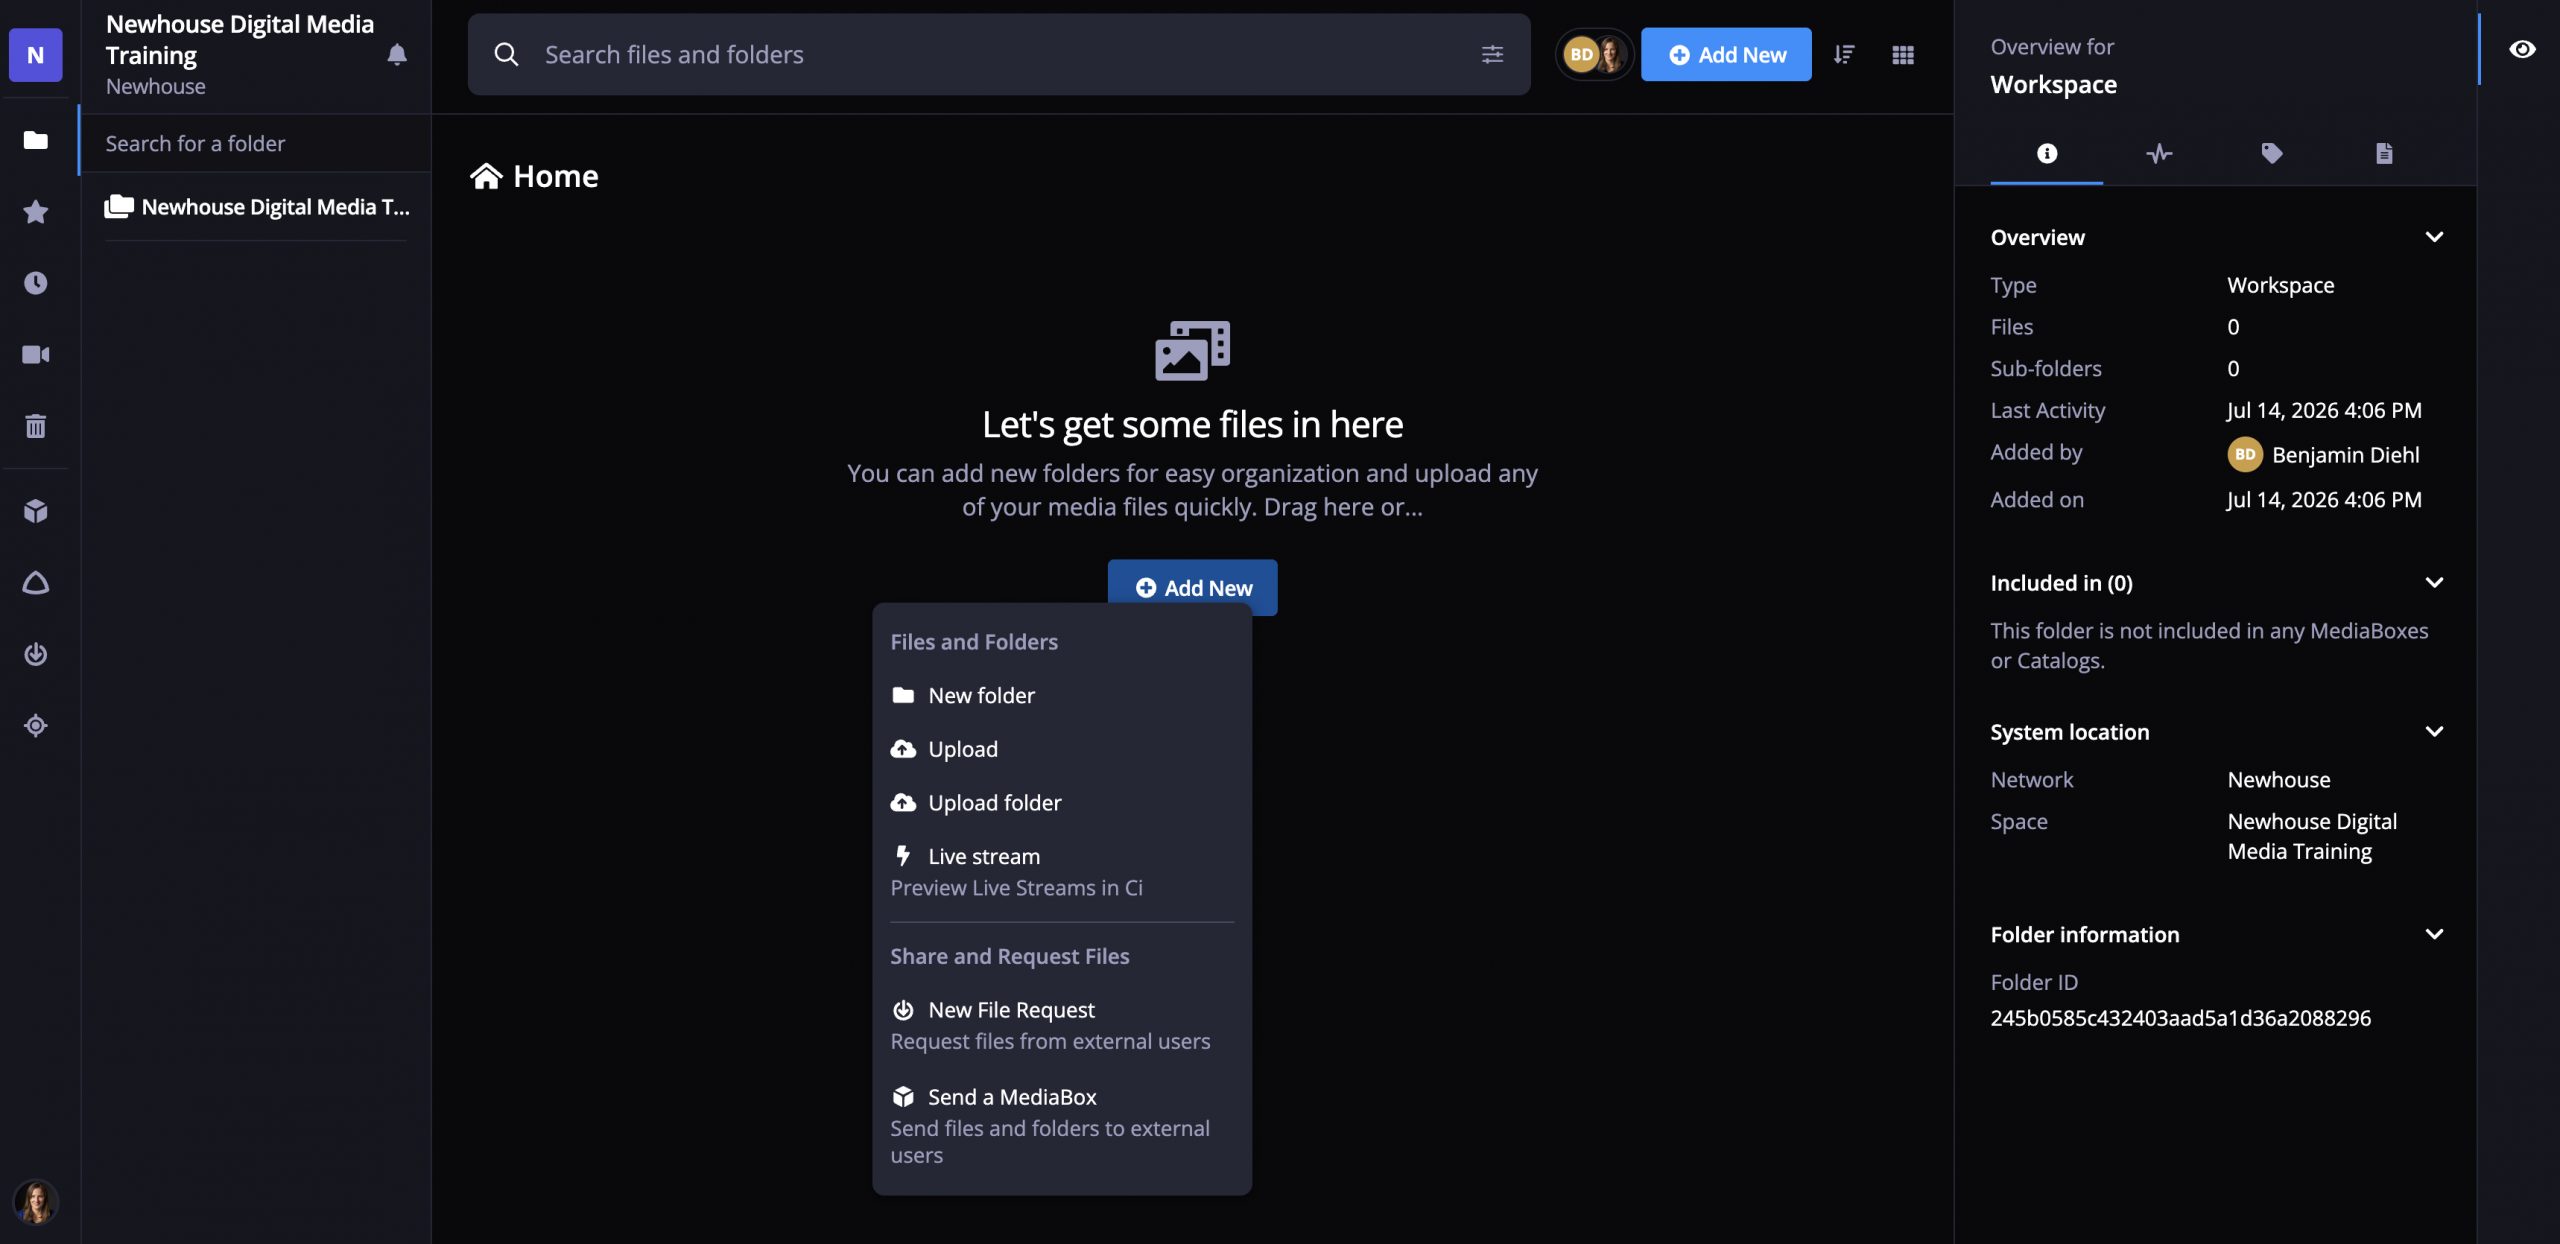
- Contains details across spaces that you have access to MediaBoxes, File Request creation, user invites. *Expand/Collapse via ‘Open Panel’ button.
Navigation Bar (left)
- Navigate Spaces – Get to your different workspaces fast
- MediaBoxes – “Virtual showroom” – shareable collections of files / folders sent or received, filtered by type, space and status.
- WorkSessions – Collaborative digital review space created when meda assets are opened in tools like VideoReview or ImageReview, to insppect, discuss and annotate files.
- File Requests – allows you to securely collect media from contributors using this customized link to upload files directly into your designated workspace or specified folder.
- External Transfers – Track larger transfers moving in and out of your workspace
Account Icon / Avatar (bottom left)
At the bottom, when clicking on your profile icon, you can adjust account settings like switching from classic to dark modes to make viewing easier on your eyes and adjusting transfer settings.
Below, there is also a Help icon to search Ci and submit a help ticket.
Organization in Sony Ci
Organize your personal workspace per class or department. An example of folder structure could be CLASS FOLDER > 1. Class Materials, 2. Group Projects, 3. Independent Student Projects.
The Workflow
- Create folder structure first then link folders to MediaBoxes for students to be able to see inside folder to later review and receive comments on assignments.
- Create a Submission / Upload Folder called “Upload Folder”
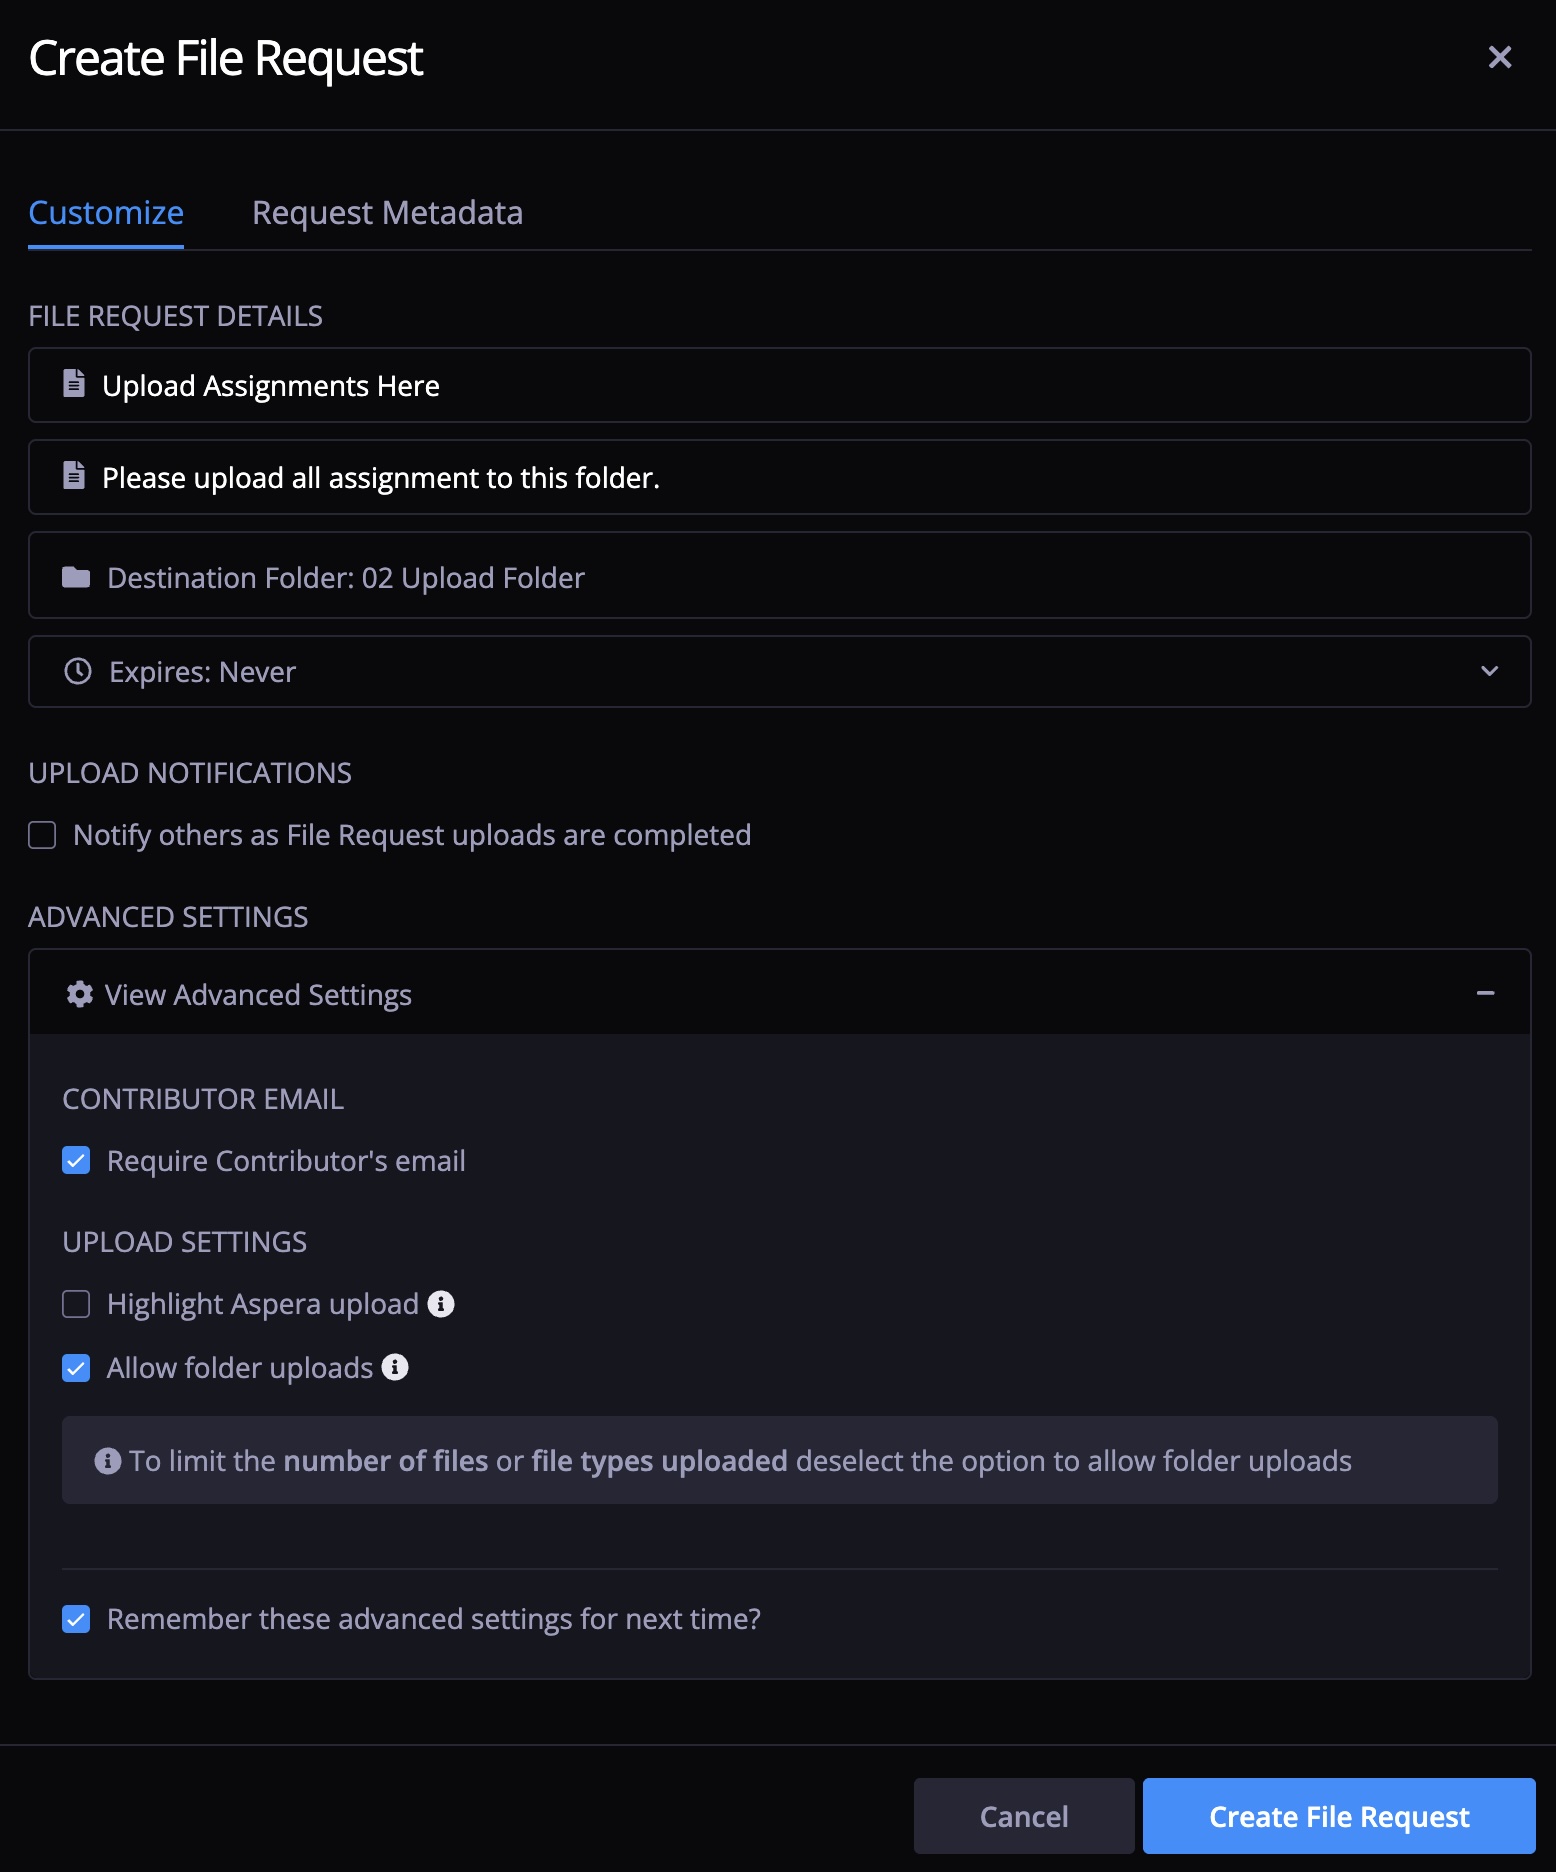
- Convert folder to ‘Create File Request’ link. So, there’s ONE link for students to keep track of for submitting assignments.
- Share that File Request link on Blackboard or email link to students.
- Once students submit projects, instructor or CF can move projects to specific student or group folders to later grade and review together.
How Students Submit Work
Instructors can create a File Request (link) that students will use to upload files to a folder. The student will be able to upload to that folder, but not see inside.
File Request
File Request links give students the ability to contribute files but give zero visibility into looking at folders and what is inside. Create File Request link for group folders or for individual folders.
Ie. Create File Request link called GROUP A ASSIGNMENT SUBMISSION.
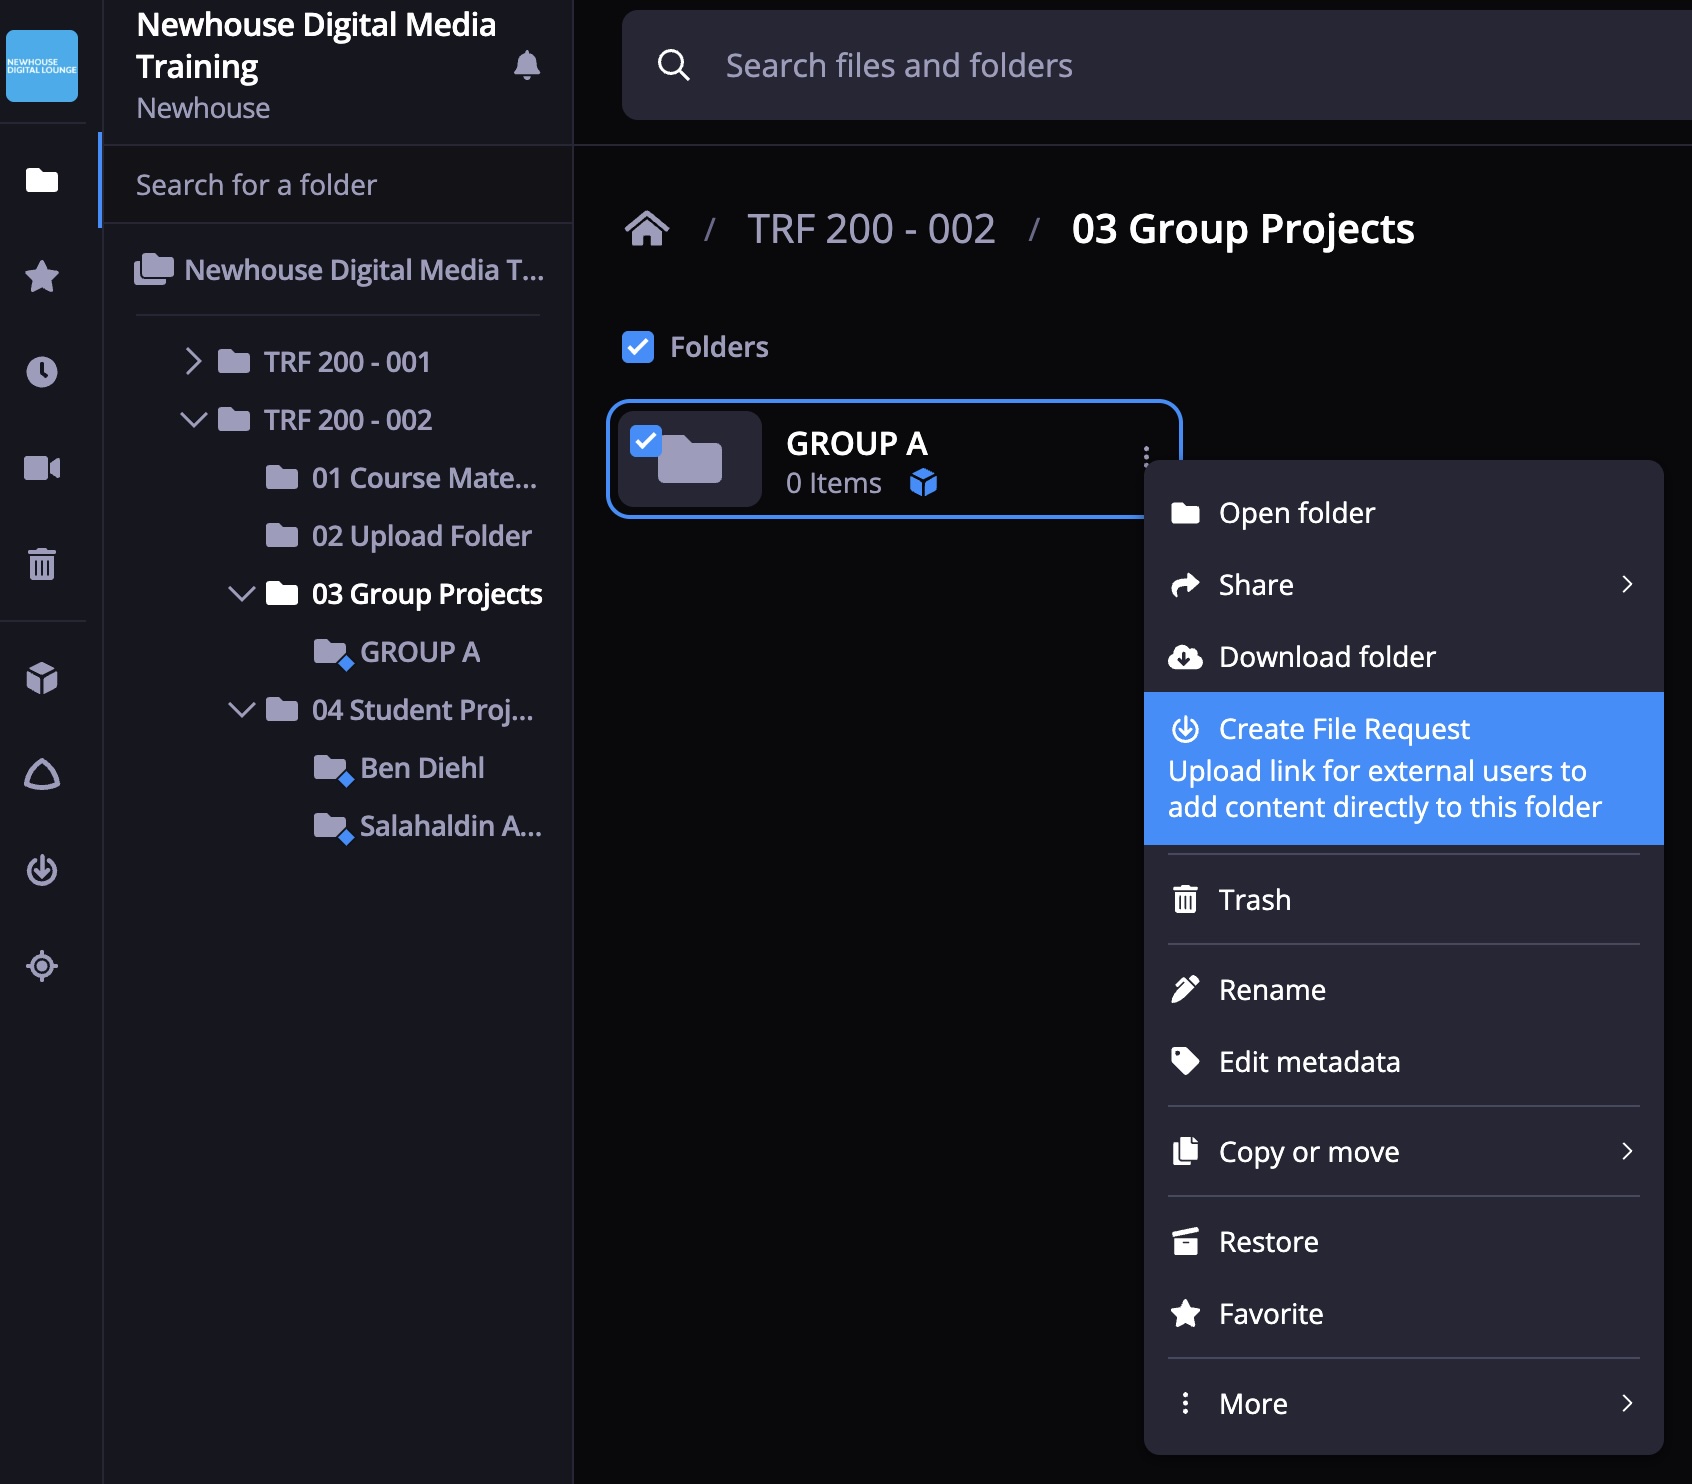
- Only students within this group can upload their Assignment 1 file.
In each folder you are going to create TWO THINGS:
- File request to be able to upload files
- Media box so they can see everything inside and be able to review and comment.
How Professors Provide Feedback
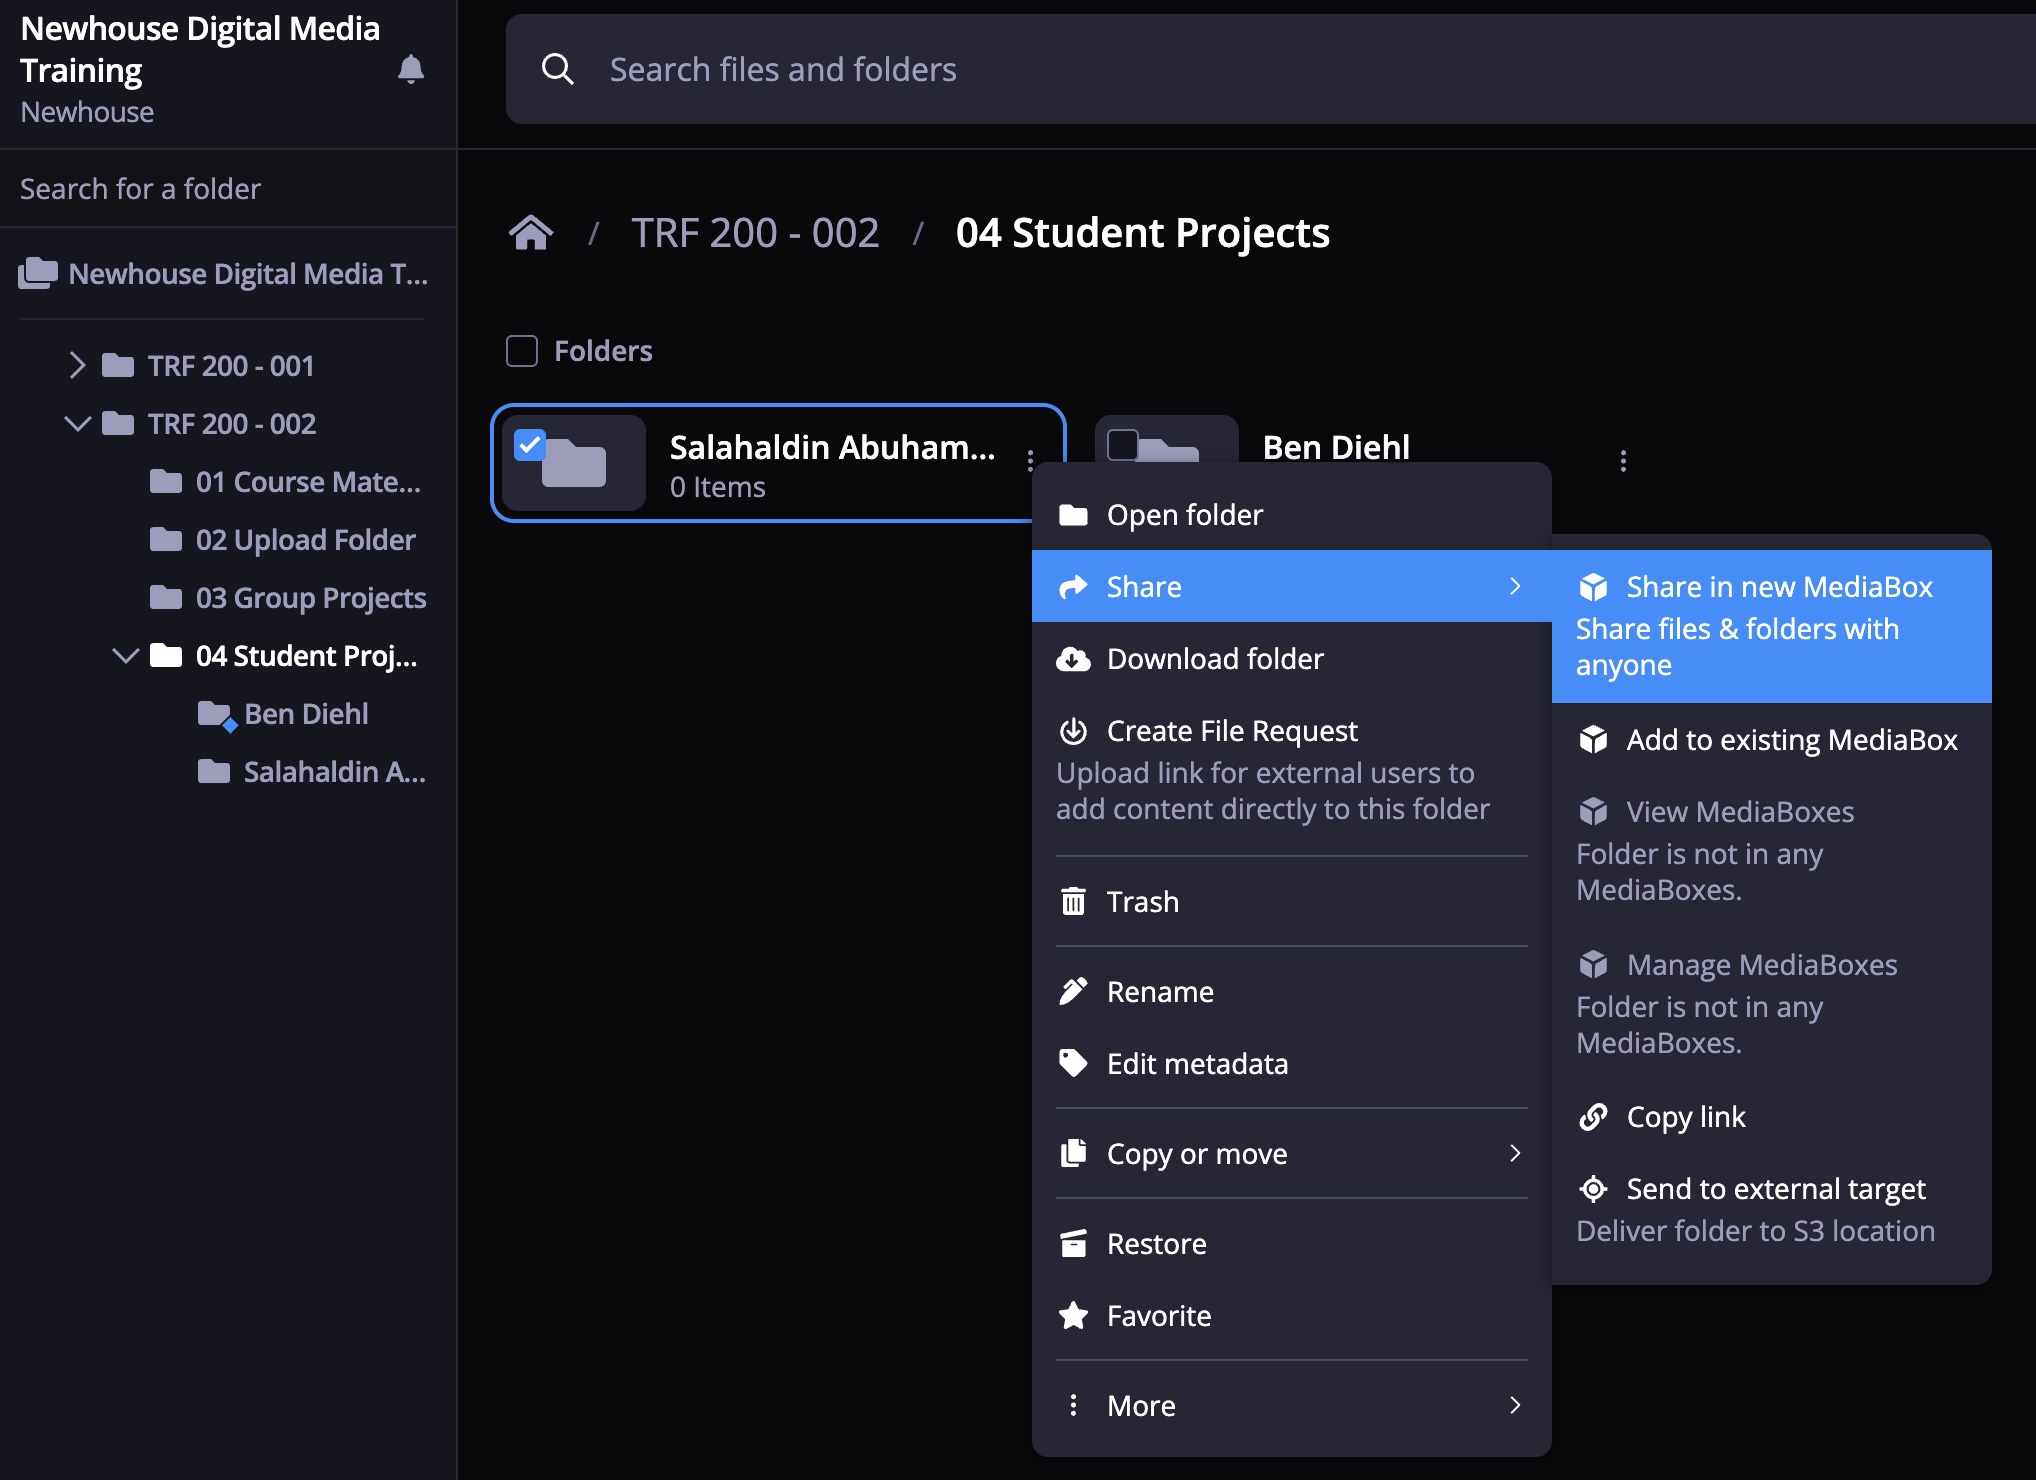
After a student uploads their project, the instructor can select ‘share in new media box’ and invite that student to a live session remotely – watching the video at the same time with live feedback. When the instructor stops the video; the clip stops playing for both the instructor and student.
Creating MediaBoxes
MediaBoxes contain files/folders that can be shared via a customizable link.
To create a new MediaBox, you can do this one of two ways:
- Select a file, click share icon and choose ‘Share in new MediaBox.’
- Or navigate to ‘+ Add New’ blue button at the top, select ‘Share a new MediaBox’
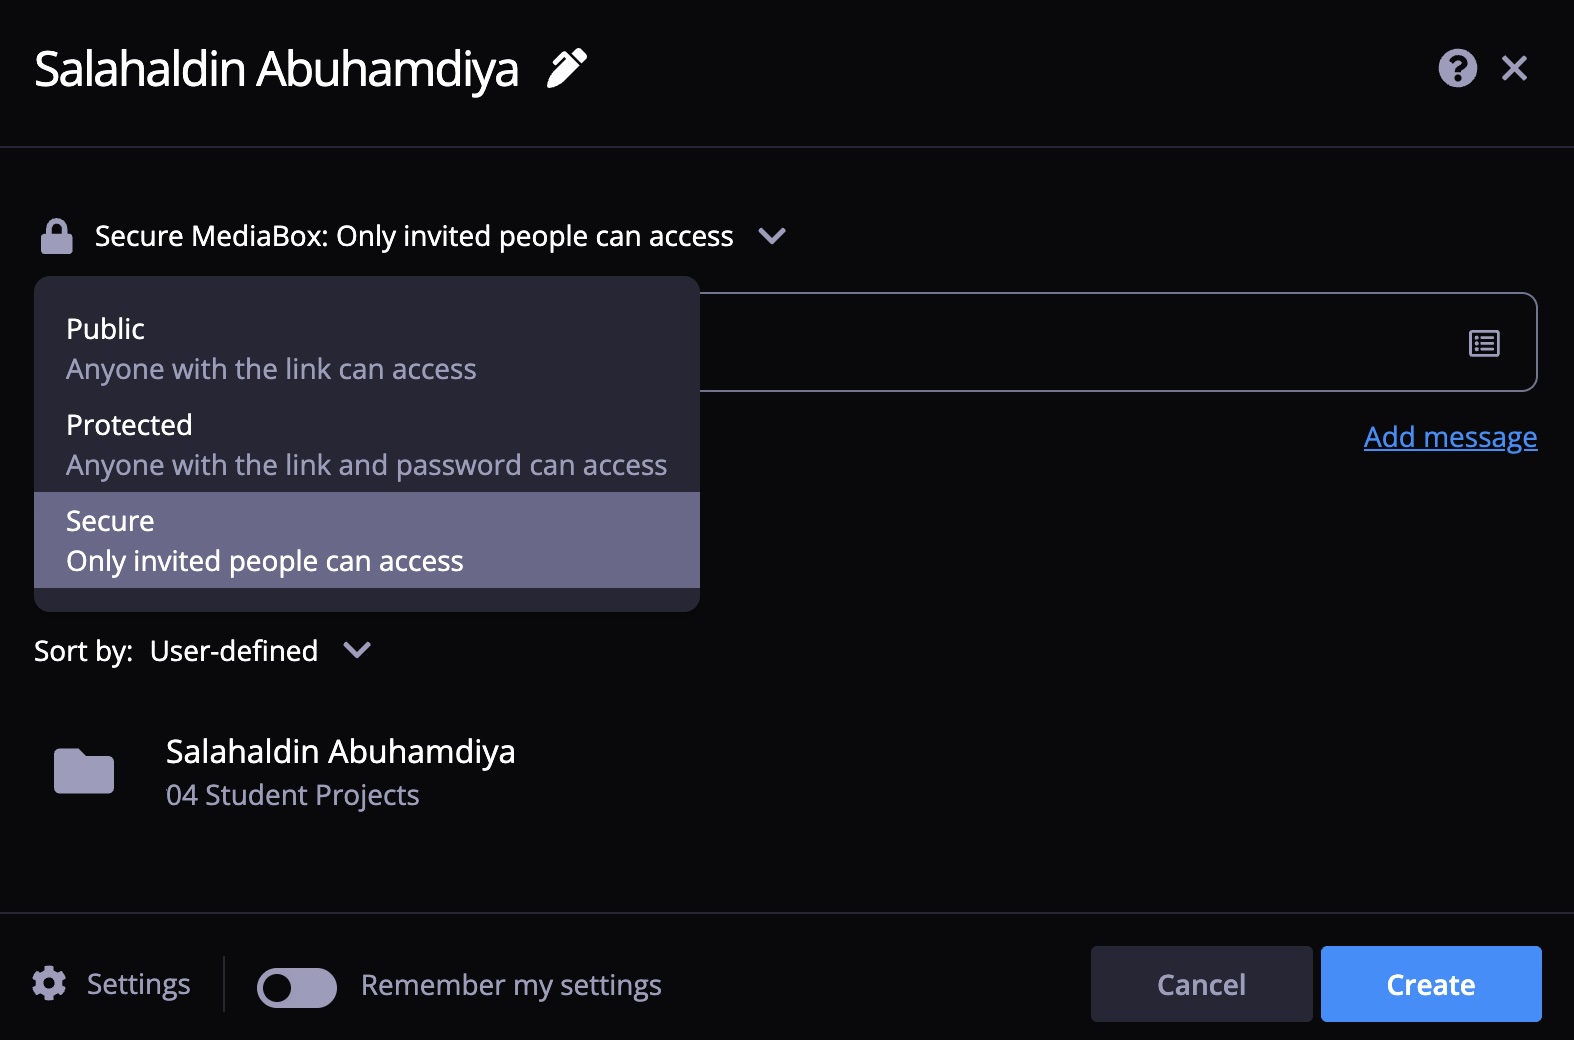
A window will pop up, for you to change the title and level of security:
- Secure: Only recipients who have a Ci account can access
- Protected: Login is optional, anyone with a MediaBox link + password can view contents
- Public: Anyone who has the link can open the MediaBox.
Input a list of recipients’ emails. *Check ‘Notify new recipients via email’ box.
Pro Tip: When creating a MediaBox, there is an option to ‘REMEMBER MY SETTING’ to apply certain settings to every media box you create in the future. You can override this later.
MediaBox vs. Folder
Folder – storage container for organizing files in the workspace. Upload, delete, and move files inside folders as much as you want.
MediaBox – customizable, shareable link (like a virtual showroom) that lets you securely share specific files or folders with external clients for viewing, reviewing, or downloading without giving them access to your entire workspace. Control what recipients can do (e.g., download source files previews, or just view and leave comments). Set security levels and apply expiration dates.
Sony Ci Transfer Desktop App + Aspera Plugin
Reliably transfer large quantities of media using the Sony Ci Transfer desktop app (cimediacloud.com > Ci Transfer). The Aspera plugin also allows folder uploads and speeds things up. (cimediacloud.com > Aspera Transfer.)
Live Review Sessions
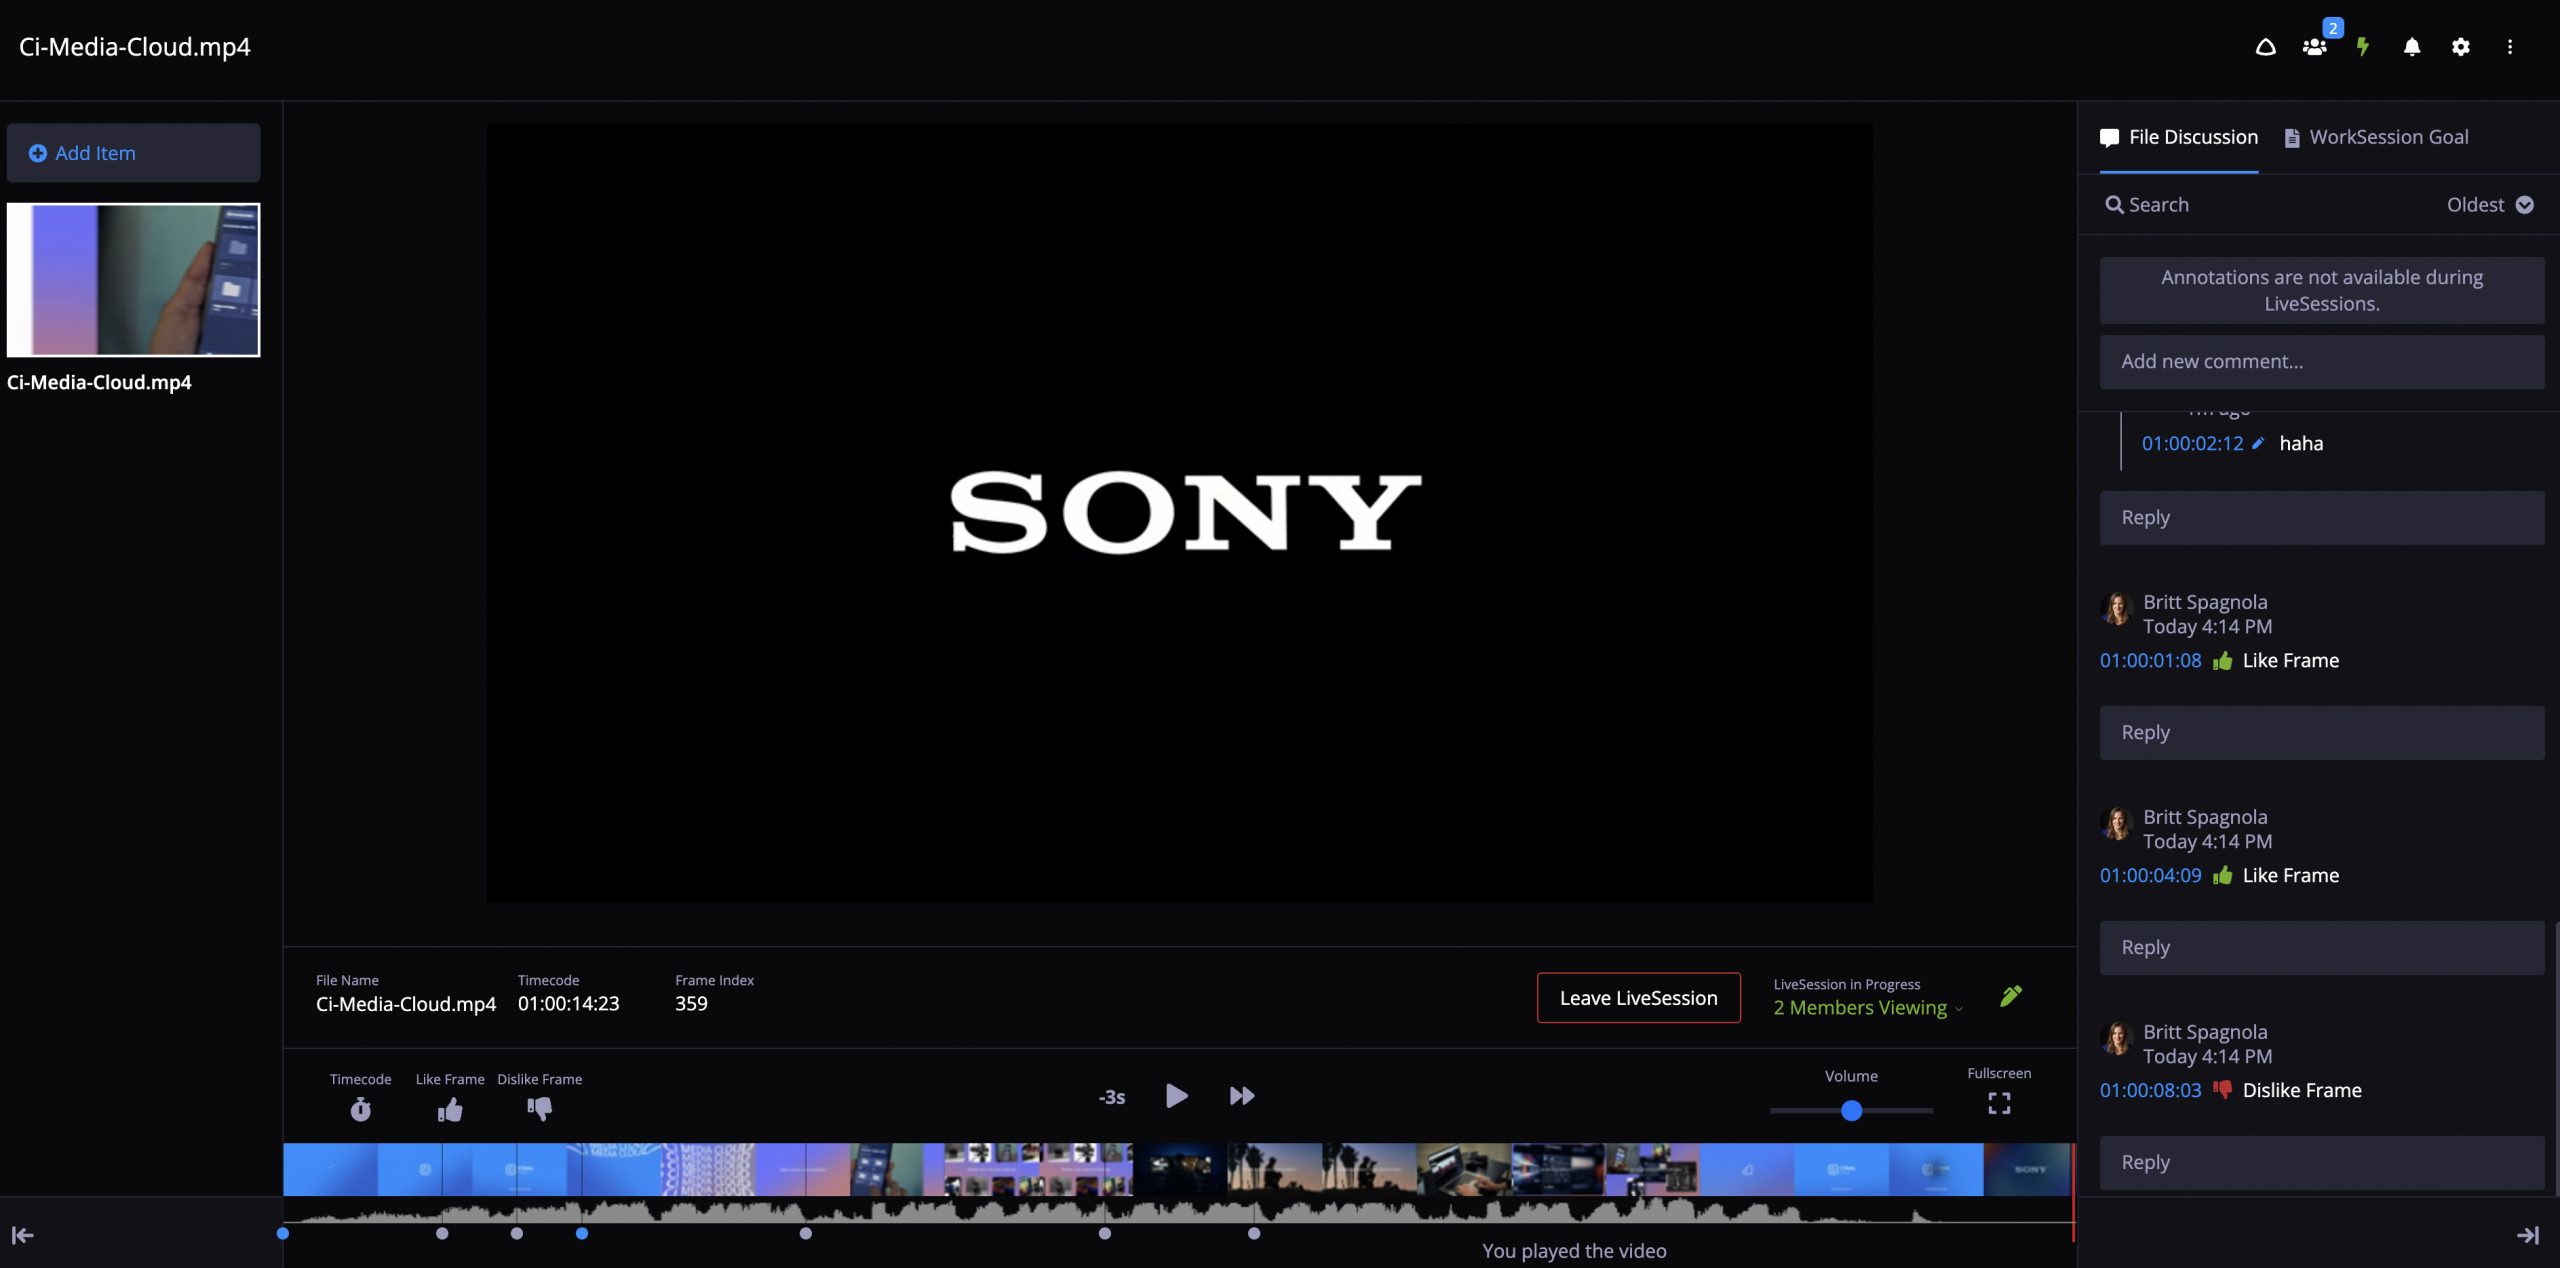
This feature allows for a live, shared-viewing experience with students, in groups or 1:1.
For example; you send a meeting invite for 3:00pm to a student to view a video assignment together. You provided them with a link to the media box, and once both of you are signed in, you select the ‘live session’ button. When hitting play, the video will now play for both people.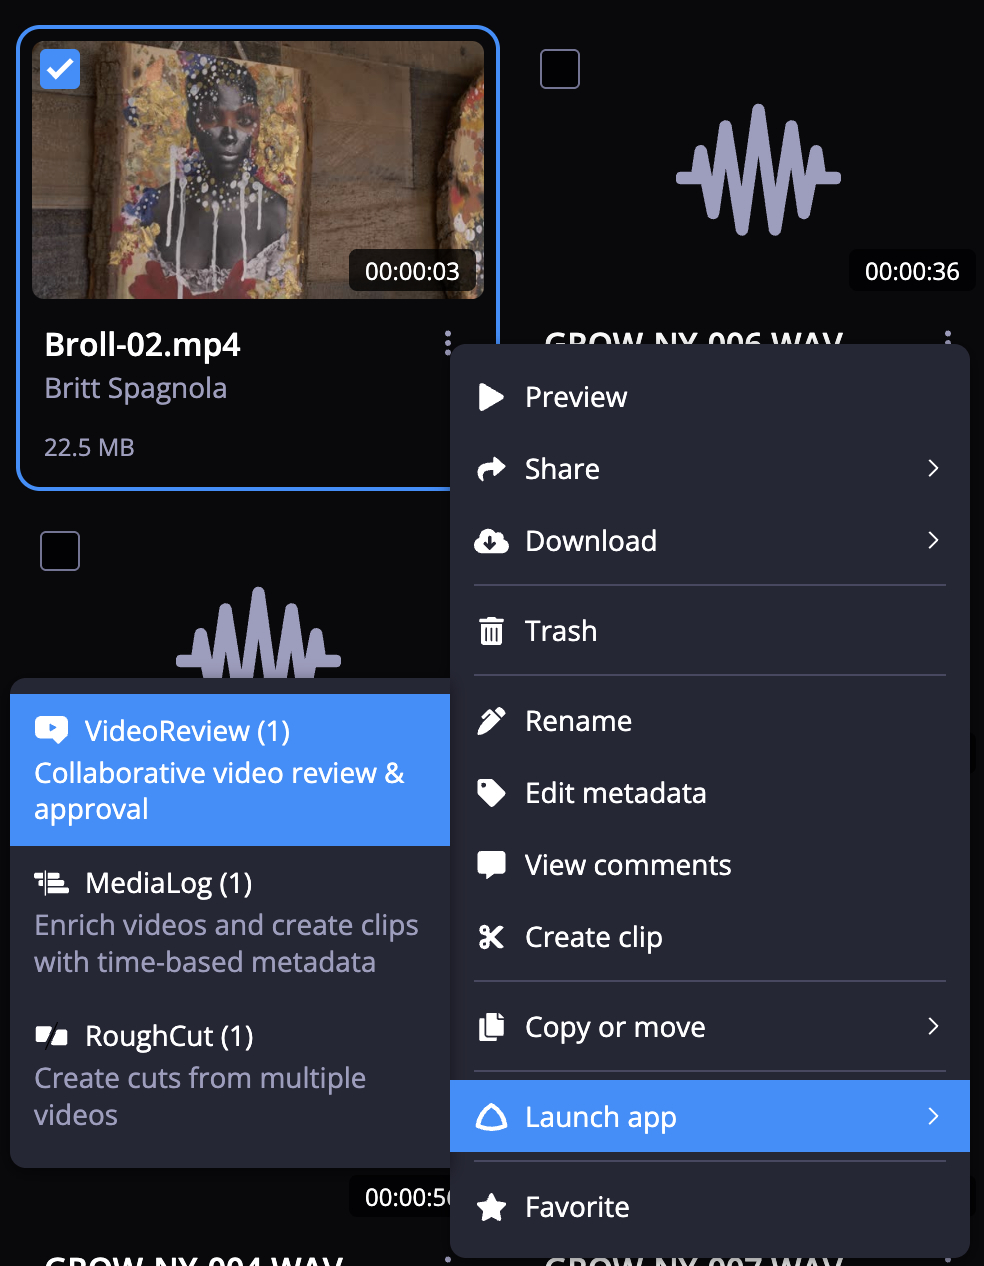
The Switch / Ci’s Adobe Premiere Pro panel integration
Sony Ci, marketing itself as a Frame.io alternative, is working on closing the gap with frame-by-frame annotation, private review sessions, and a rebuilt Premiere Pro panel that turns comments into timeline markers and relinks proxies to source files. Download this at the Adobe Exchange – https://exchange.adobe.com/apps/cc/0fbae07b/ci-media-cloud-for-premiere-pro
As always, reach out if you are staff or faculty wanting to set up some 1:1 time to go through Sony Ci to meet your specific needs: bhwait@syr.edu