This guide will help Newhouse broadcast & digital journalism students export video from Adobe Premiere using certain presets.
First, open the Export Window by selecting the Export tab located in the top left of Adobe Premiere to the right of the “Edit” tab.
- First, import provided PRESET: Navigate to the (…) and select “Import Presets.”
- Locate the Presets folder of the BDJ Sample Project Folder that you renamed to that specific assignment.
- Click the preset you want to use and import
- If Exporting for a LIVE LAB or NEWSROOM SERVER, Select the “BDJ NEWSROOM EXPORT PRESET SERVER” preset. FORMAT: This will alter the format to be MXF OP1a.
- If Exporting for YOUTUBE or Personal Use: Select the “BDJ Class YouTube Preset” preset. FORMAT: This will alter format to be H.264.
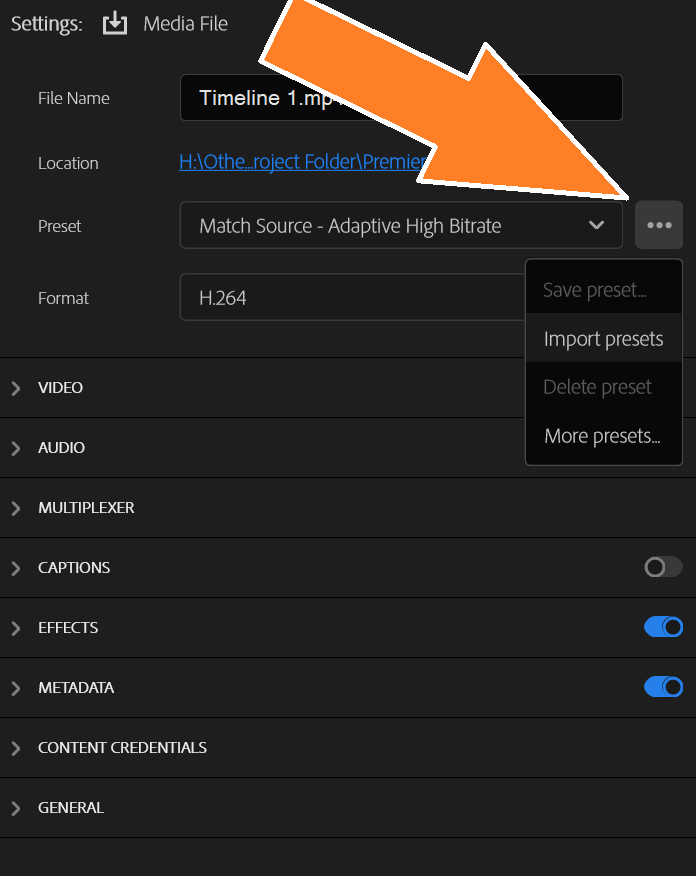
2. LOCATION: Set export location for your video. Select the blue folder path and locate the export folder on your external hard drive.
-
- Find the folder you want to save your video to and click “Save” in the pop-up window
- Set the location to the “- Exported Files” folder in the BDJ Sample Project Folder that you made for the day.
3. FILE NAME: Name your file following the naming file convention given to you by your instructor.
-
- Don’t use punctuation, though underscores are allowed, or extra spaces. The name should be less than 32 characters long.
4. Export your video by clicking the blue export button at the bottom right of the Window.
5. Navigate to the “– Exported Files” folder in the BDJ Sample Project Folder you relabeled for this assignment and make sure your video was exported there.
If you need further help, reach out to Christian De Guzman, ctdeguzm@syr.edu, Newhouse’s Broadcast Digital Media Training Specialist.