Adobe Premiere for Newhouse Broadcast, Digital Journalism (BDJ) students
For a broadcast-style folder structure to use when organizing media on your external hard drive, locate the “BDJ Sample Project Folder” on the G Drive. This folder template will be duplicated for each assignment over the course of the semester.
Important: Before launching Premiere, follow these steps and launch from the Premiere Project already created within this BDJ Sample Project folder.
First, make sure your brand new, out of the package, external hard drive is formatted for compatibility to using with BOTH PC and Mac computers. Here are instructions on how to format your external hard drive. *If you have footage already saved, DO NOT format. This process will erase everything!
Note: the first four steps are for students who don’t have the latest version of the BDJ Sample Project Folder. Students who DO have this copy, can skip to Step 5.
- After logging into a computer at Newhouse using your SU email + password, open the File Explorer application at the bottom dock.
- In the File Explorer window that pops up, locate the G Drive. (G:) under the Network Locations section.
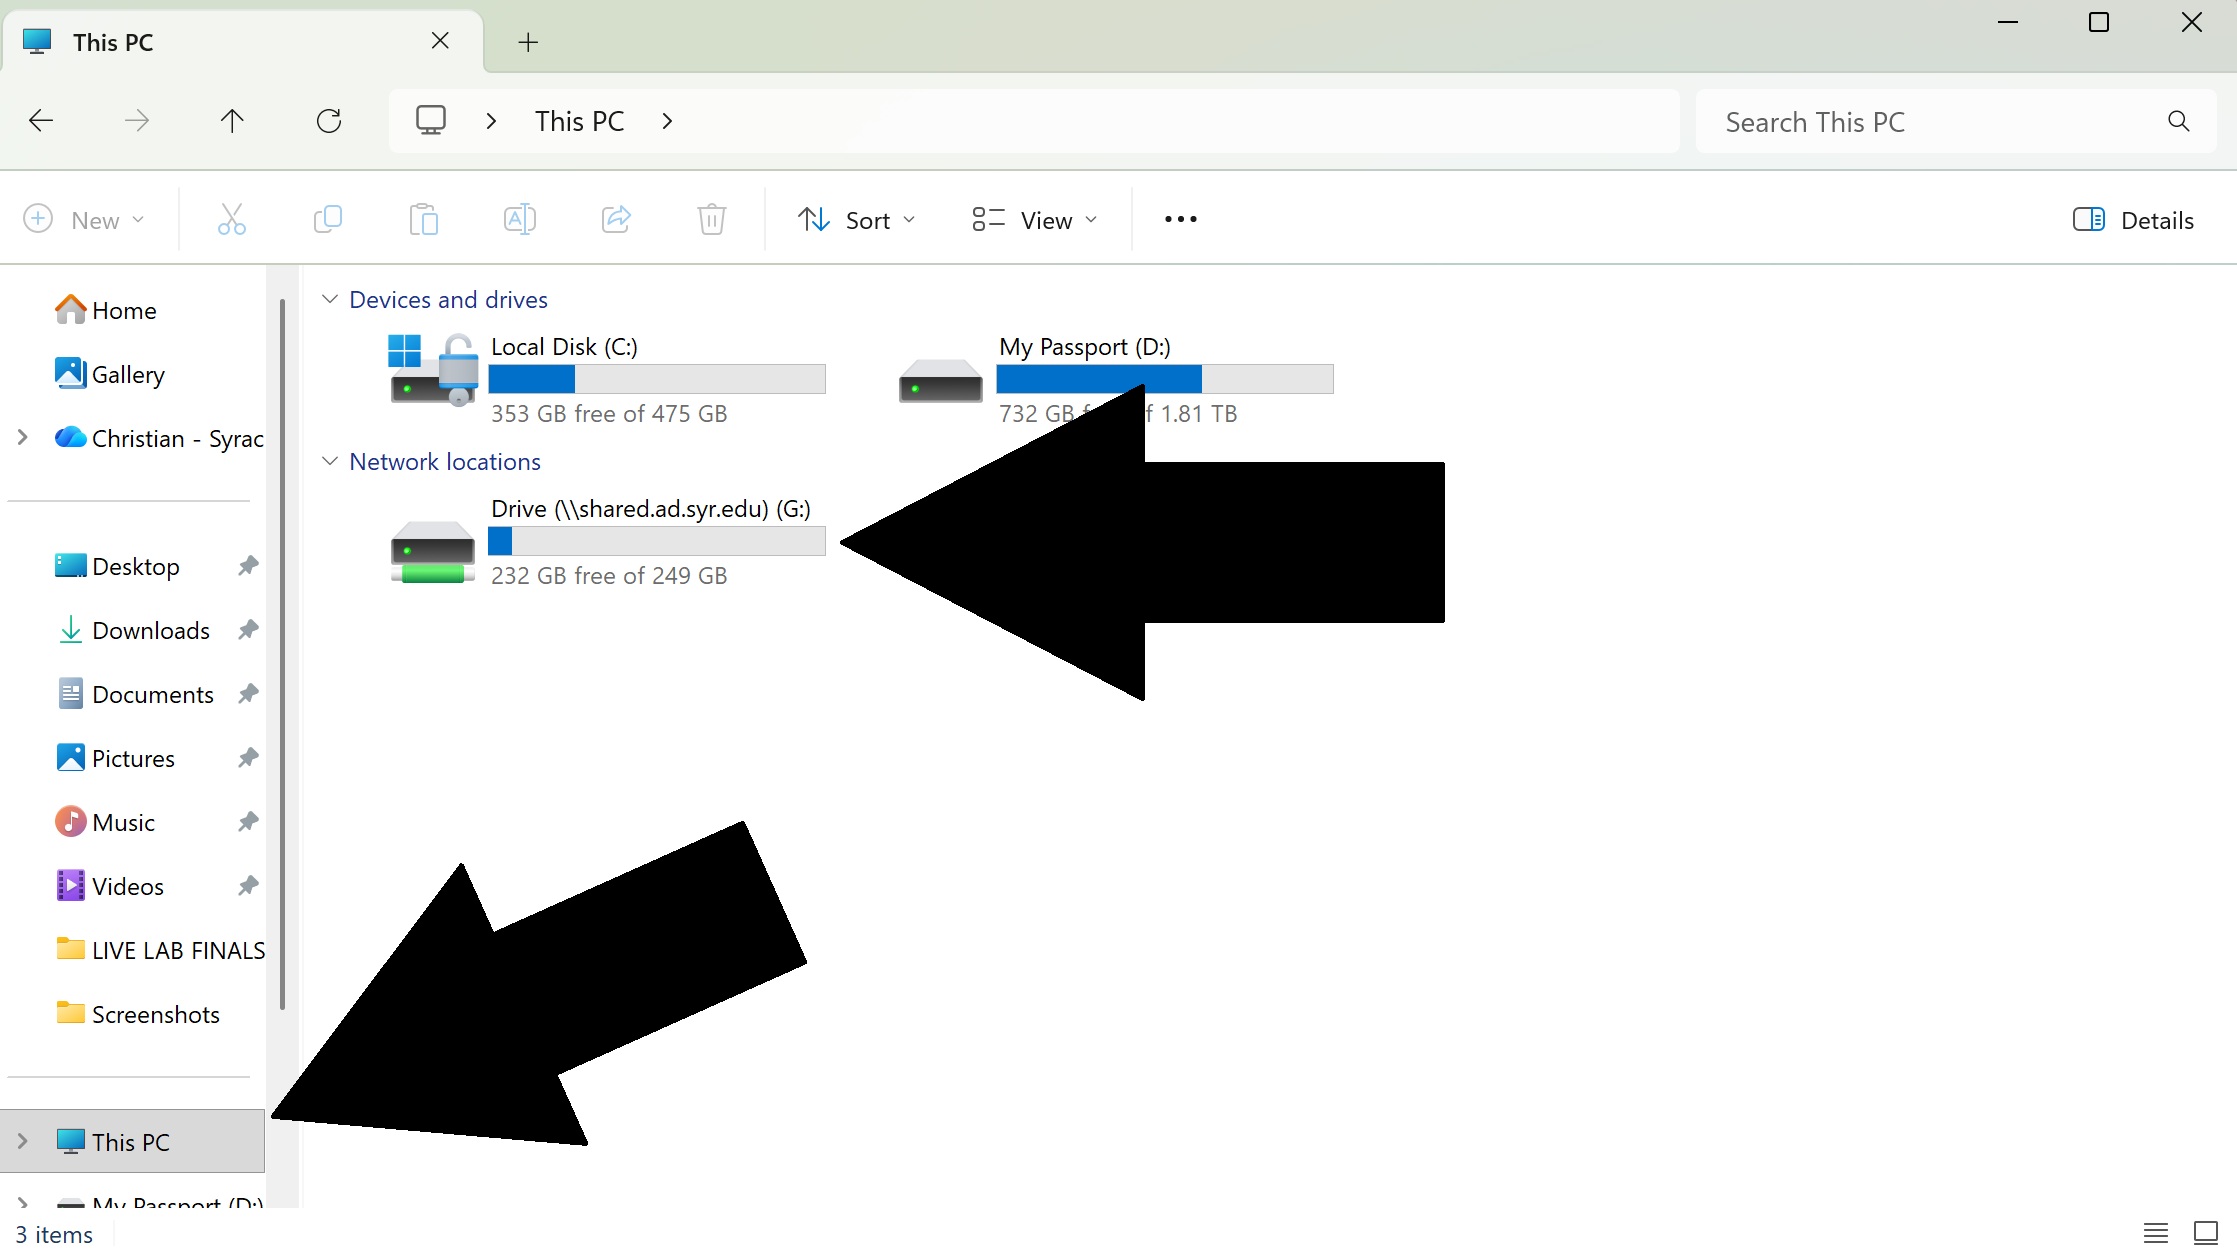
3. Navigate to the BDJ Sample Project Folder.
-
- G Drive > NEWH-Filer > Course Folders > BDJ -> Universal Templates > ‘BDJ Sample Project Folder’
4. Copy the ‘BDJ Sample Project Folder’ and paste it to your personal external hard drive to use as a folder structure template for future projects.
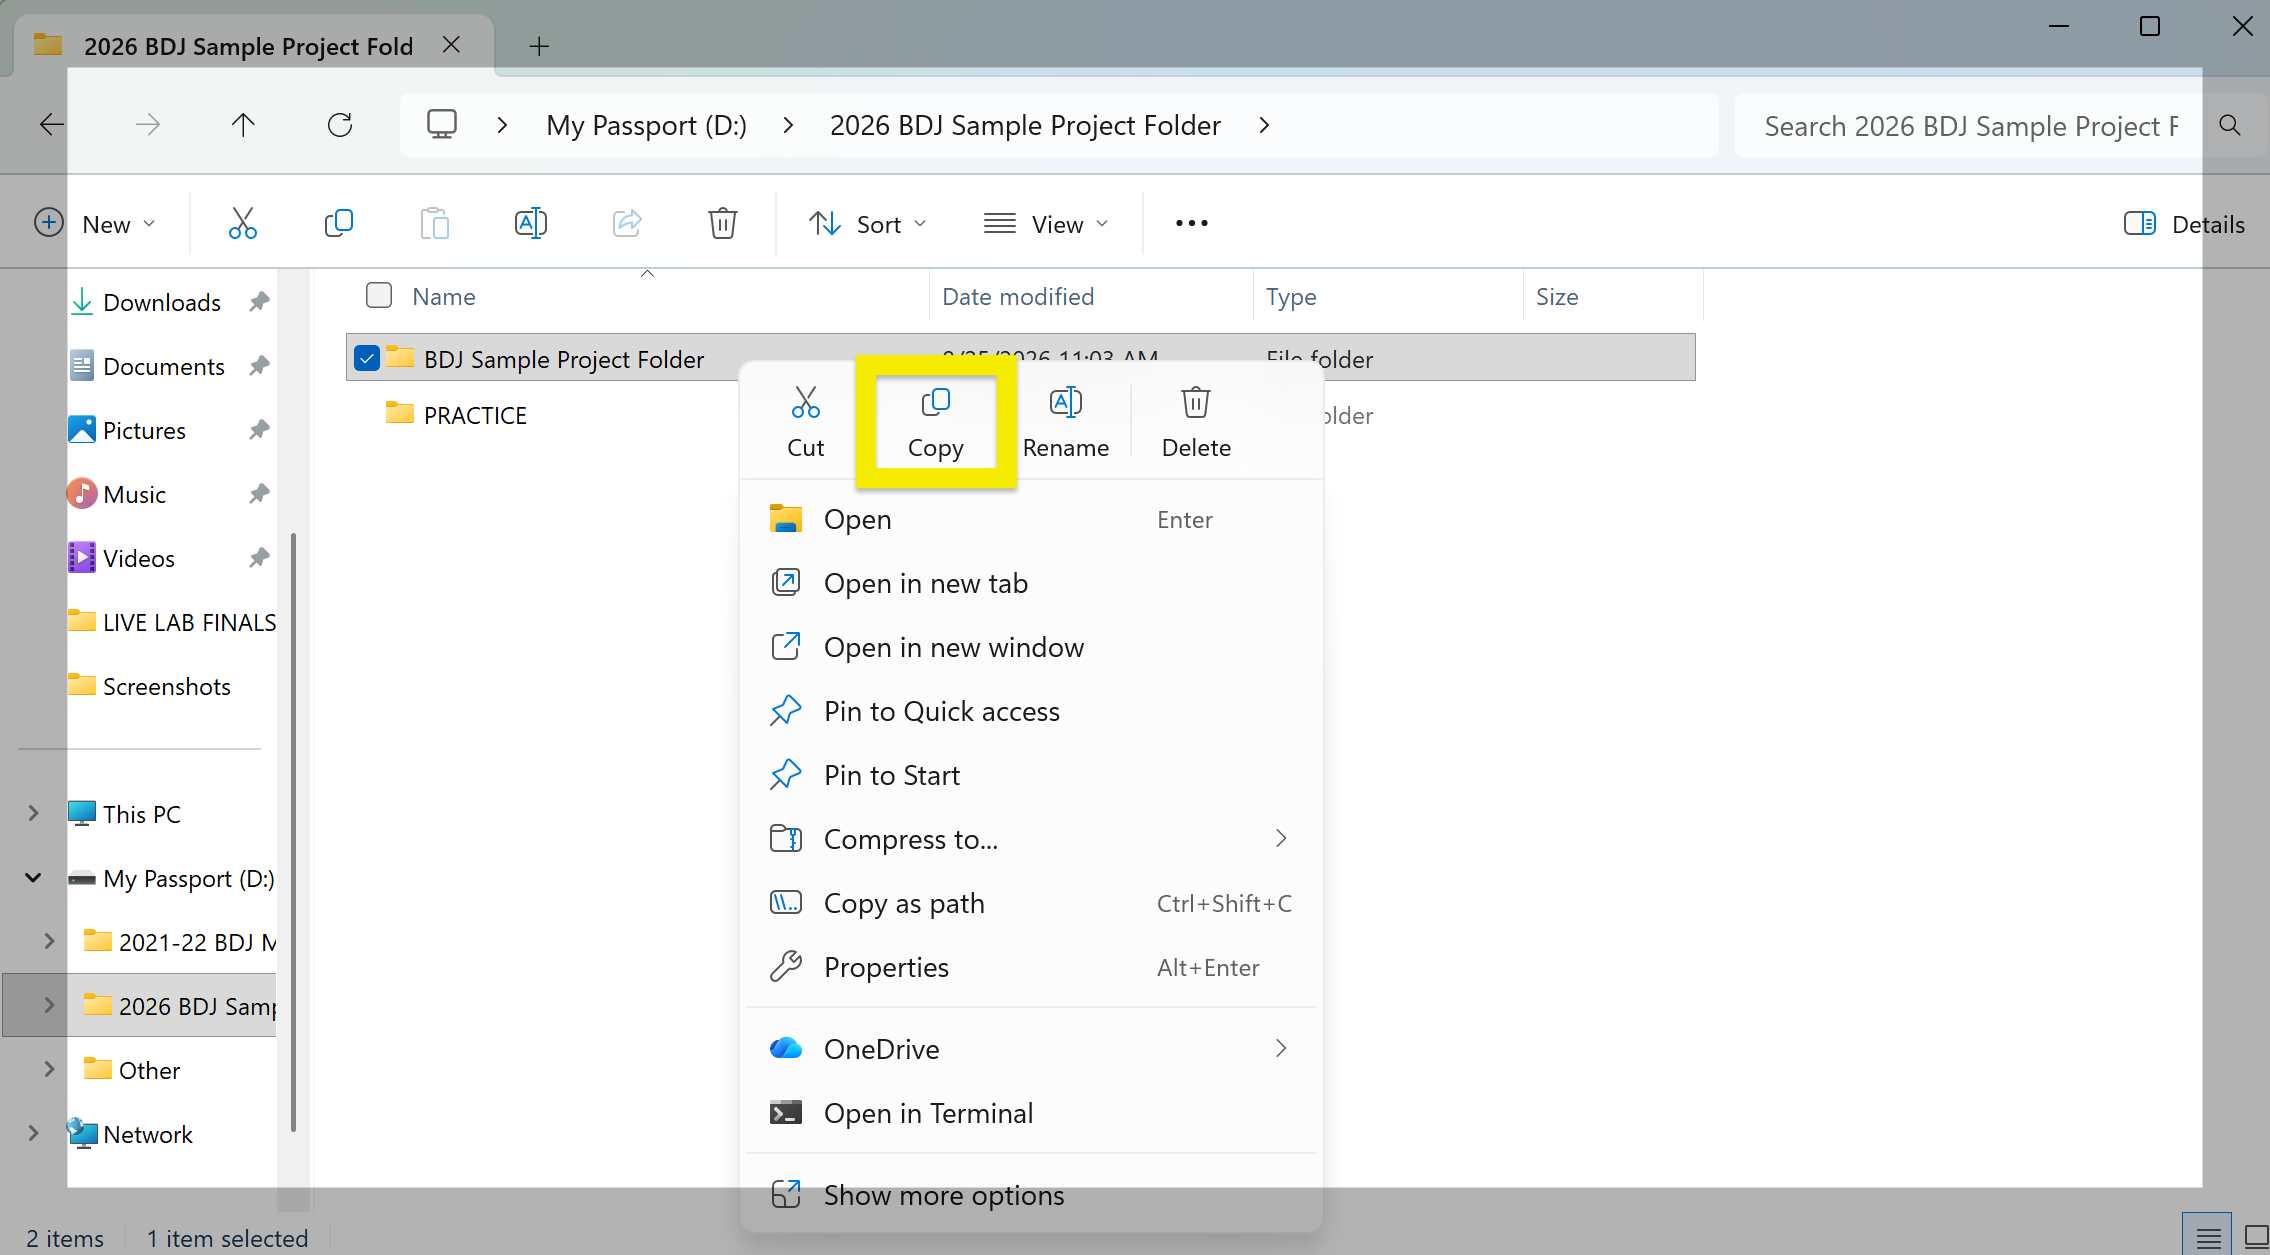 5. After pasting this folder to your external drive, duplicate / copy that ‘BDJ Sample Project Folder’ so that you now see BOTH ‘BDJ Sample Project Folder’ AND ‘BDJ Sample Project Folder — Copy.’
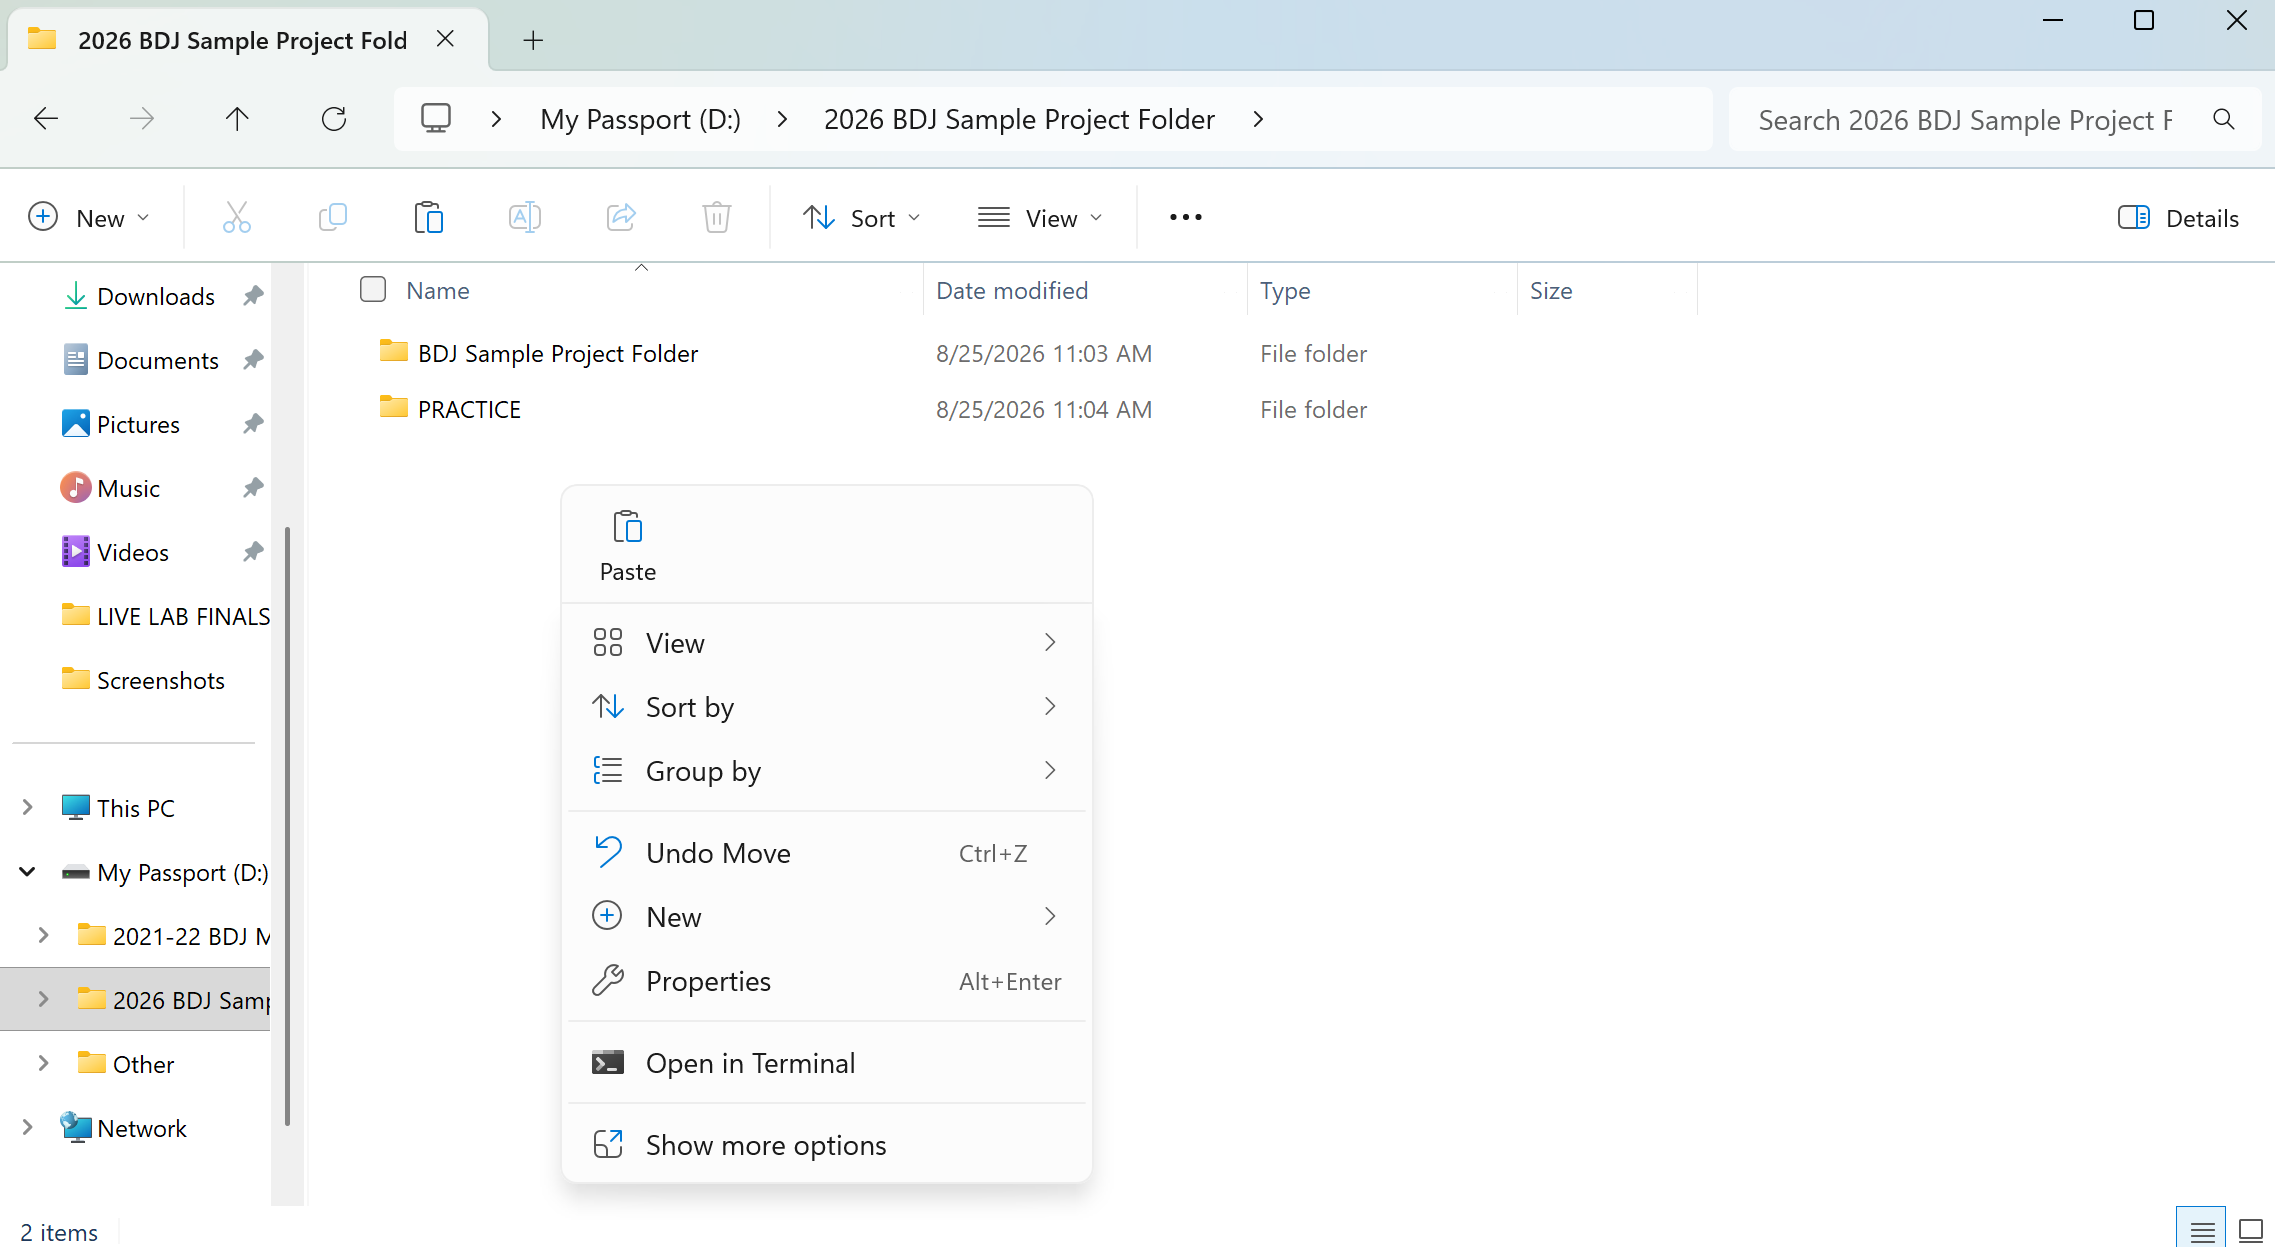
6. Rename “BDJ Sample Project Folder – Copy” to Project Name or Assignment/ Project # by right-clicking the copy folder and clicking ‘Rename.’
7. Open the now renamed folder. Navigate to the “Premiere” folder inside and find the Premiere Project already created for you.
8. Before opening the Premiere project, relabel to your assignment title. Then double-click that project to launch Adobe Premiere.
SCRATCH DISKS
9. Once inside Premiere, before you start editing, it’s important to save your scratch disks to the Scratch Disk folder within this BDJ Sample Project Folder structure. Saving scratch disks to the specific, Scratch Disk dedicated folder of your drive, keeps your project files organized, prevents clutter and boosts editing performance.
Set the Scratch Disk Locations by navigating to Premiere’s top menu and in the dropdown File menu > Project Settings > Scratch Disks. 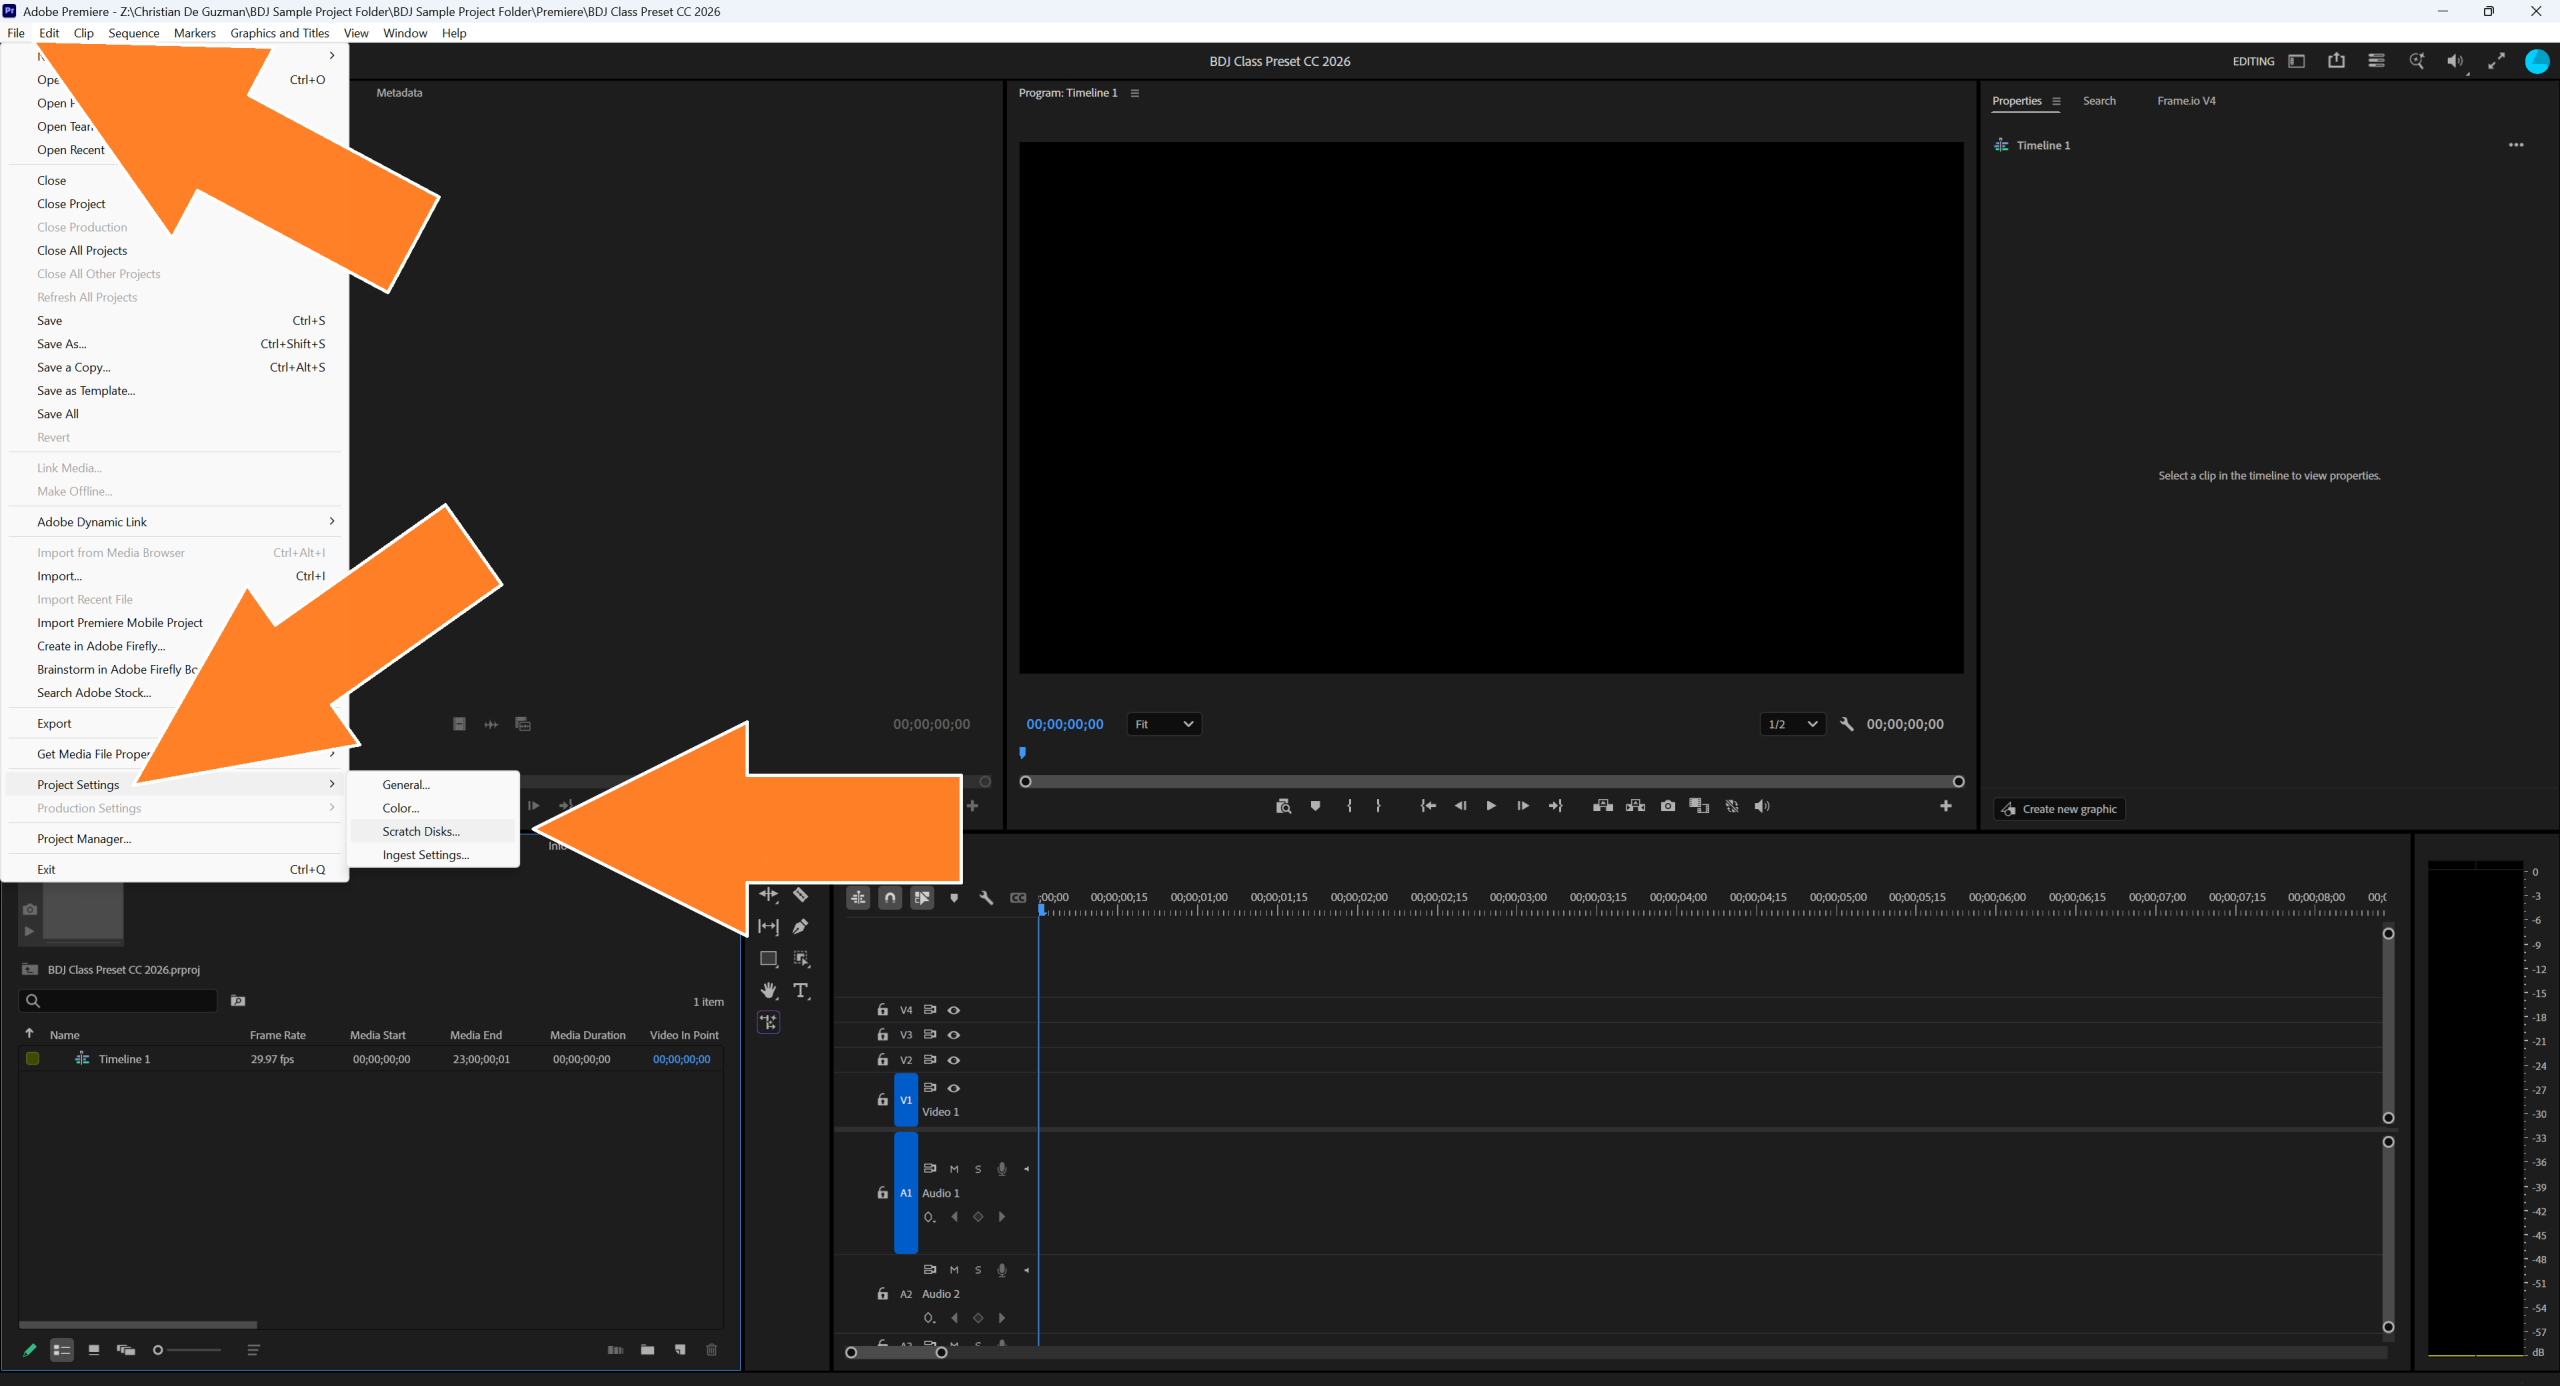
Under ‘Captured and Generated’, select ‘Browse…’ on the right and set this location to the Scratch Disks folder within the folder structure you have.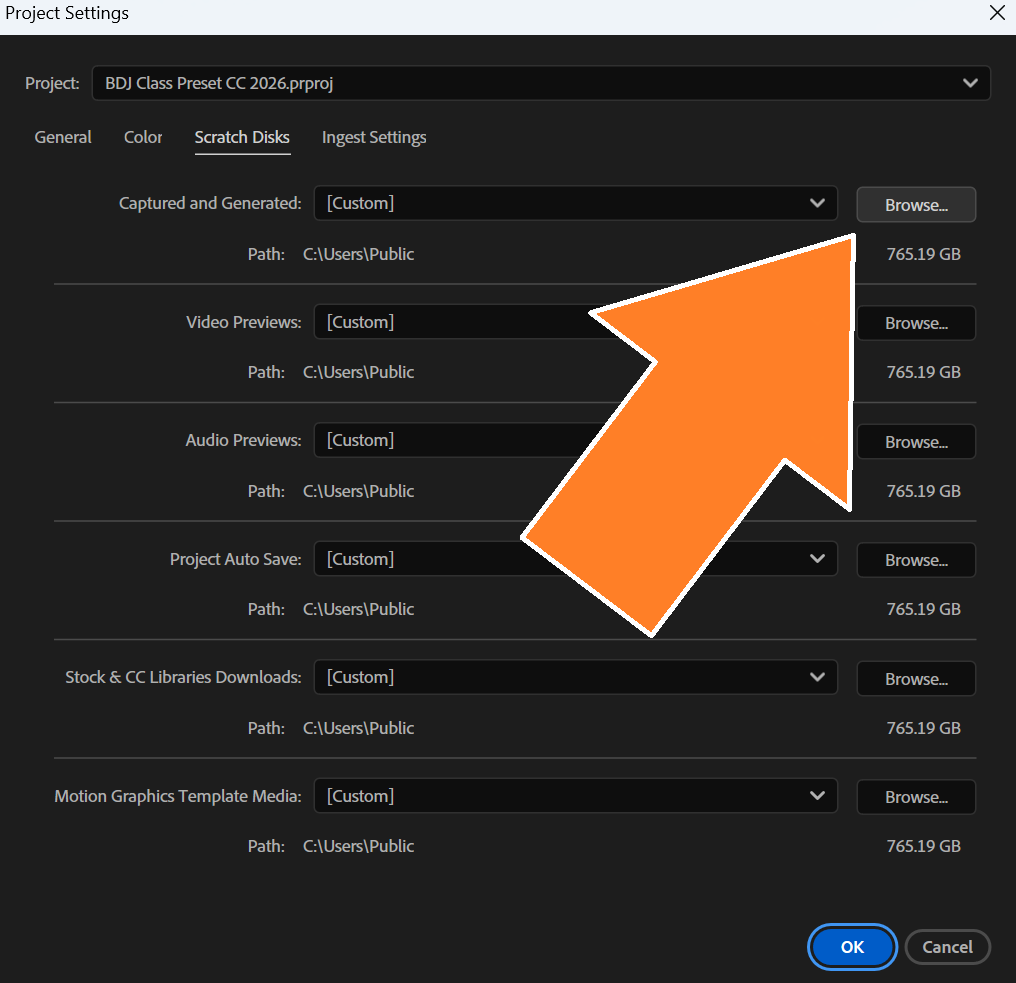
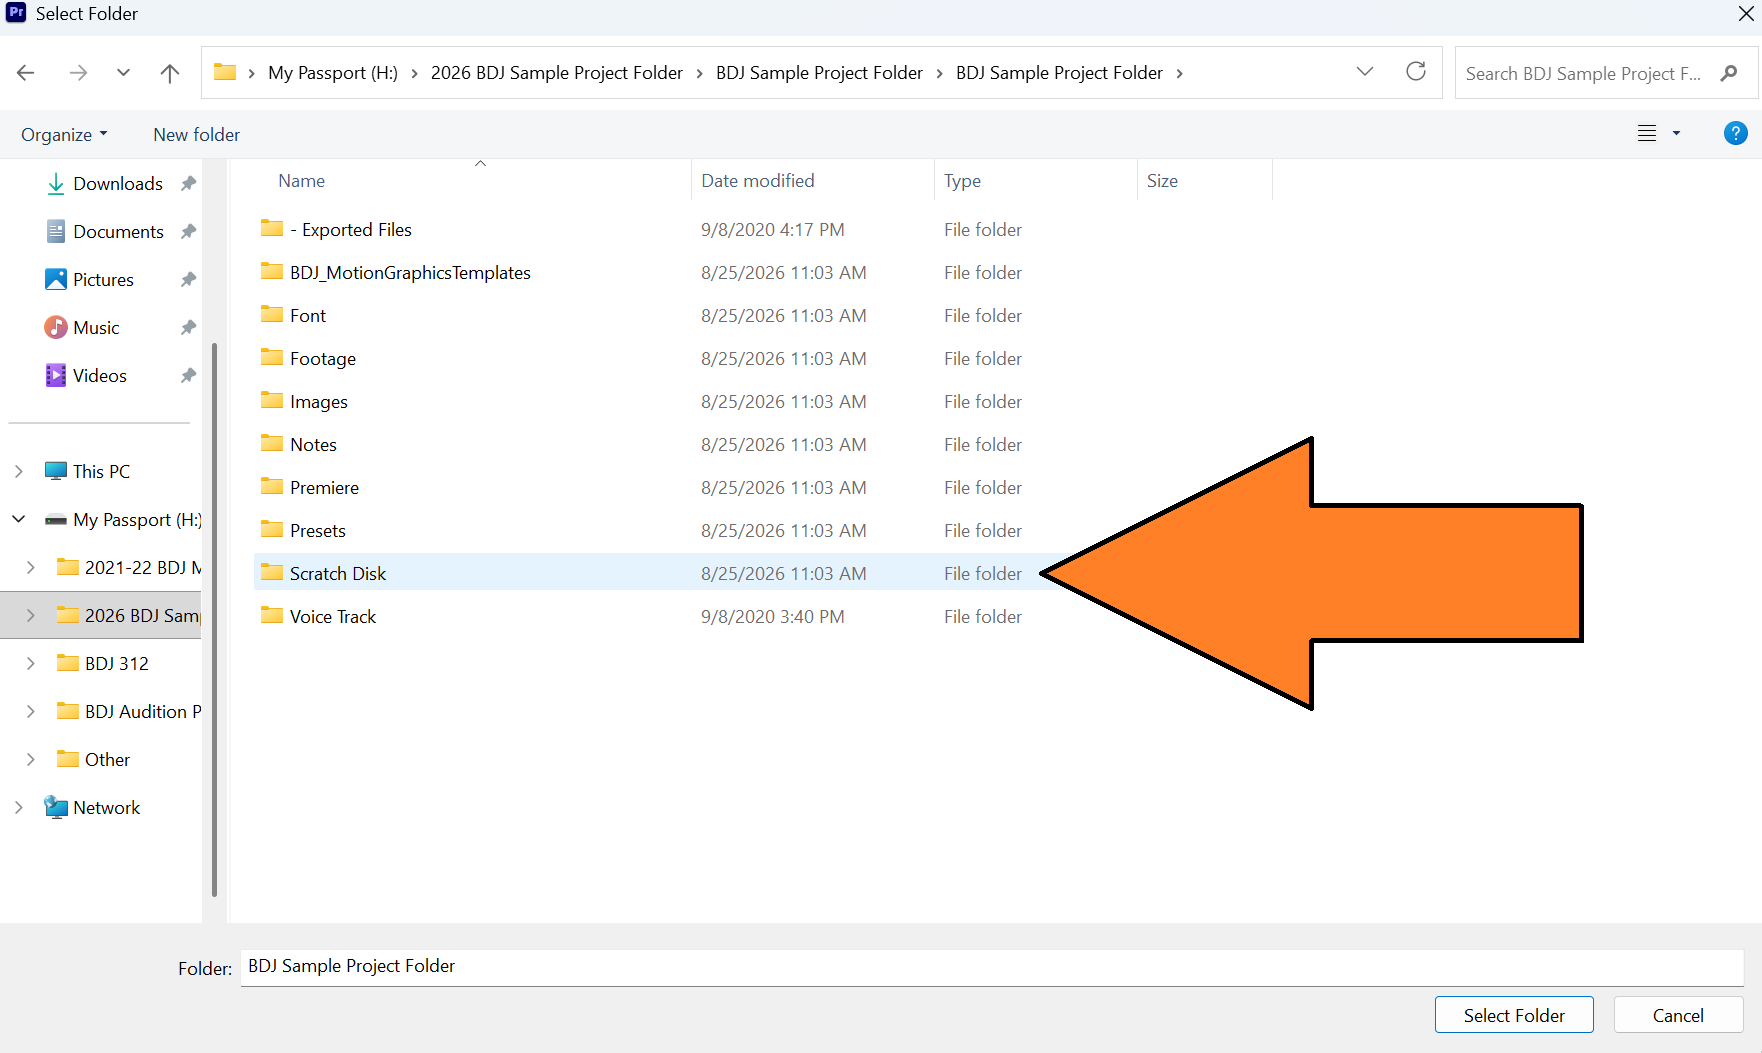
Repeat this step for Video Previews, Audio Previews, Project Auto Save, Stock & CC Libraries Downloads and Motion Graphics Template Media.
Then once finished, click ‘OK’ at the bottom right of the window.
AUTO SAVES
10. In Premiere’s SETTINGS, set the Auto Save timing to 2 minutes. In between autosaves, you should still manually save as often as possible using Ctrl + S.
- To set the timing of auto saving, navigate to Premiere’s top menu and dropdown to Edit > Preferences > Auto Save. Set to 2 minutes and click ‘OK.’
Now, you’re all set to start editing your project.
—-
If you need further help, reach out to Christian De Guzman, ctdeguzm@syr.edu, Newhouse’s Broadcast Digital Media Training Specialist.